Ohara Quickstart VM
Prerequisites
OS: Windows / Linux / MacOS
VirtualBox 5.2+: Oracle VM VirtualBox, is a free and open-source virtual machine.
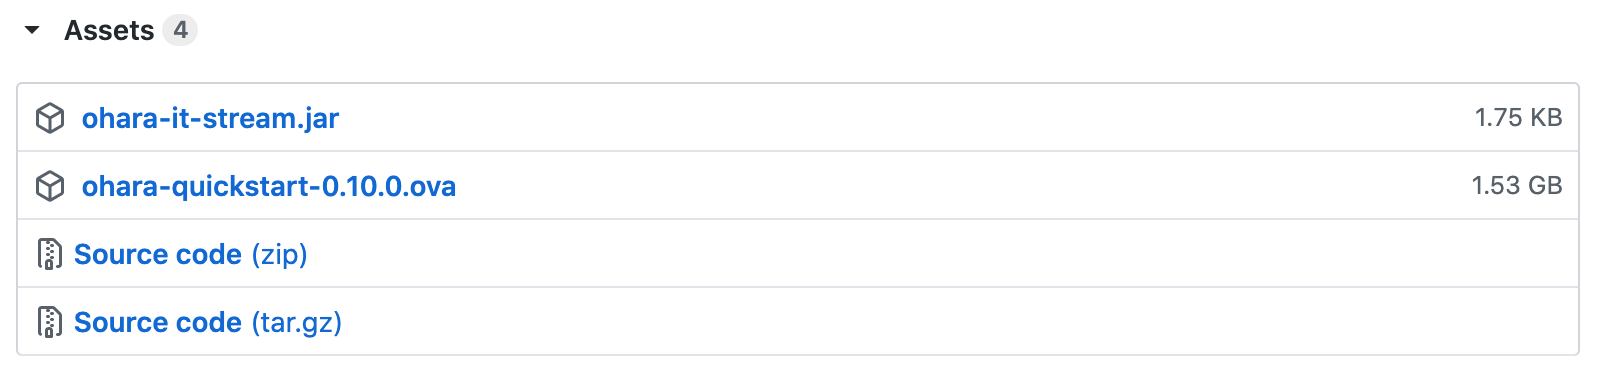
Ohara Quickstart VM image: An OVA (Open Virtual Appliance) file, a pre-prepared virtual machine image for Ohara quickstart. You can download the image file (.ova) from the release page
Note
You might have noticed there’s another jar file listed in the screenshot: “ohara-it-stream.jar”. It’s a stream jar that could be used later in our tutorial where we walks you through how to use our UI. And download it if you would like to follow along with our tutorial later on.
Installation
VirtualBox
Please download the VirtualBox from here, and reference this article on how to install it on your machine.
Import Quickstart VM
You can use VirtualBox user interface to import the Ohara Quickstart VM (ova file):
Main menu -> File -> Import Appliance
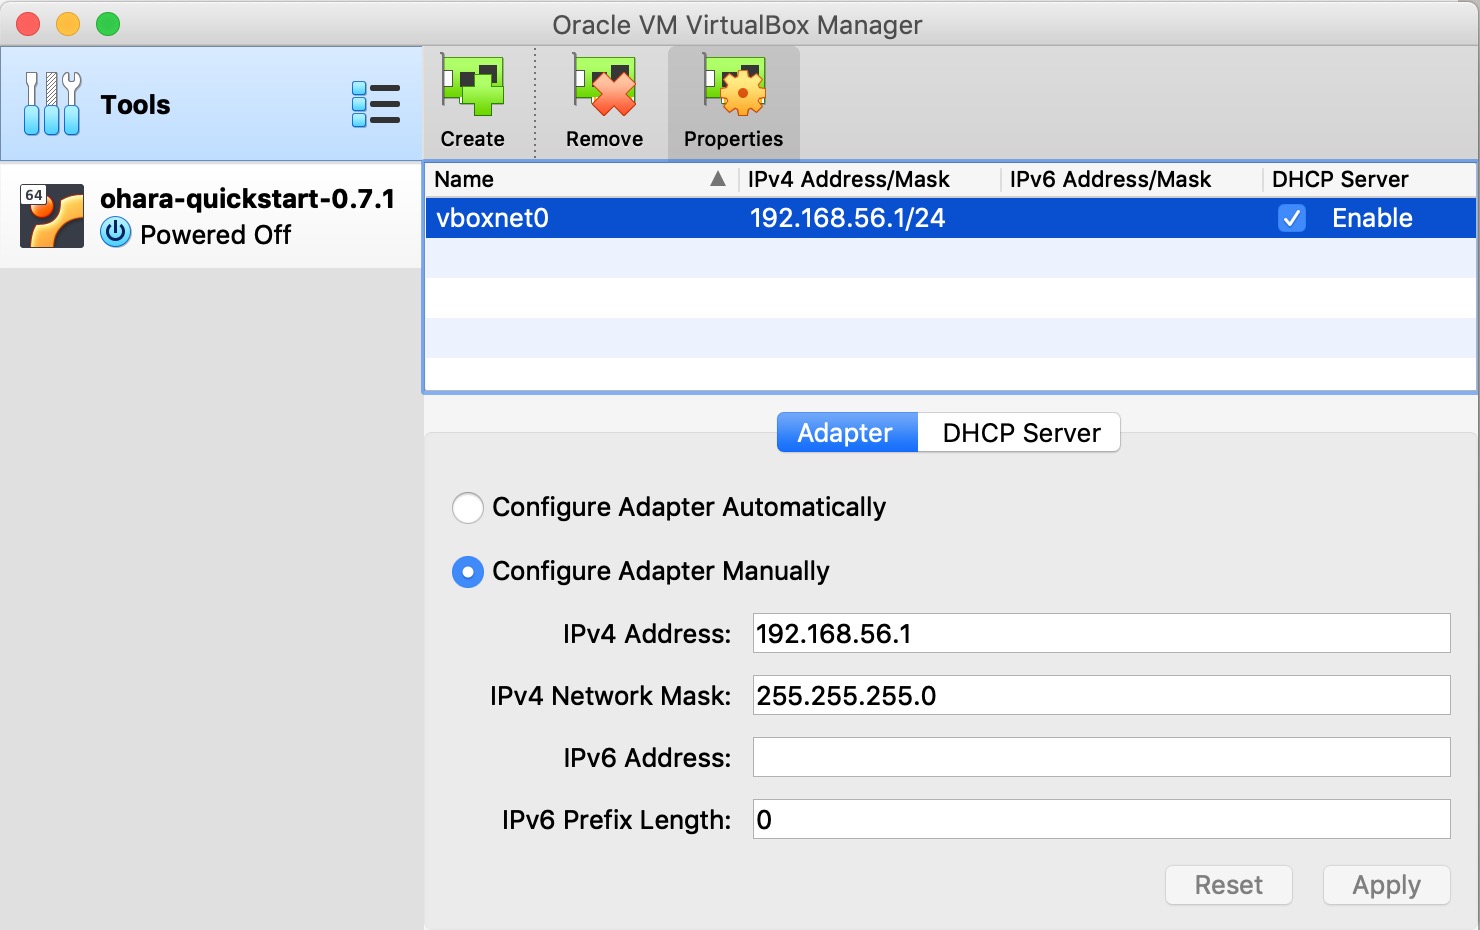
Setup VirtualBox network adapter
Quickstart VM requires a Host-only network adapter to be configured so that you can connect from the host machine to guest machine (Quickstart VM).
Note
Quickstart VM uses network adapter
vboxnet0with DHCP Server enabled as default Host-only adapter, if there is already avboxnet0adapter in your VirtualBox, you can just skip this step.
Create new network adapter
Click Tools and then click Create, ensure that the DHCP Enable option is checked.
MacOS - Create network adapter
Setting network adapter
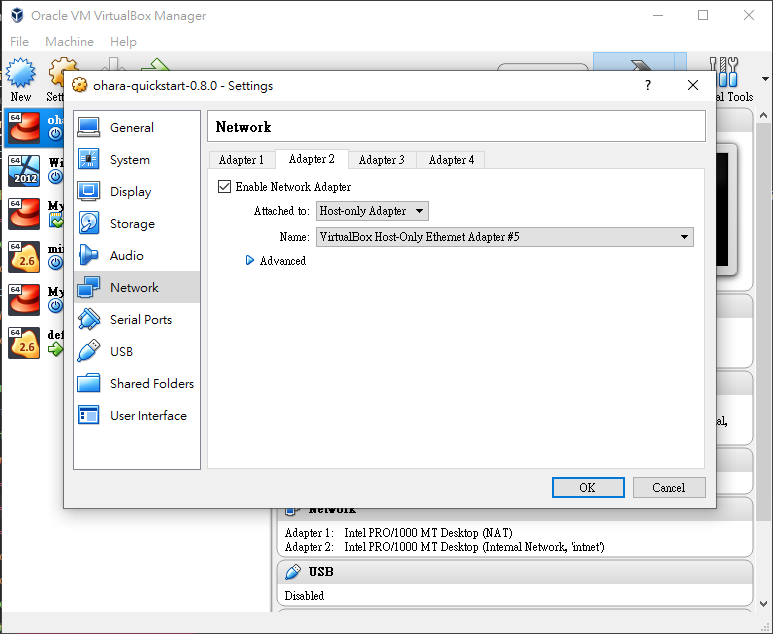
Select the imported ohara-quickstart VM, click Setting, then click Network, and click Adapter2, select Host-only Adapter, and select the newly added network card.
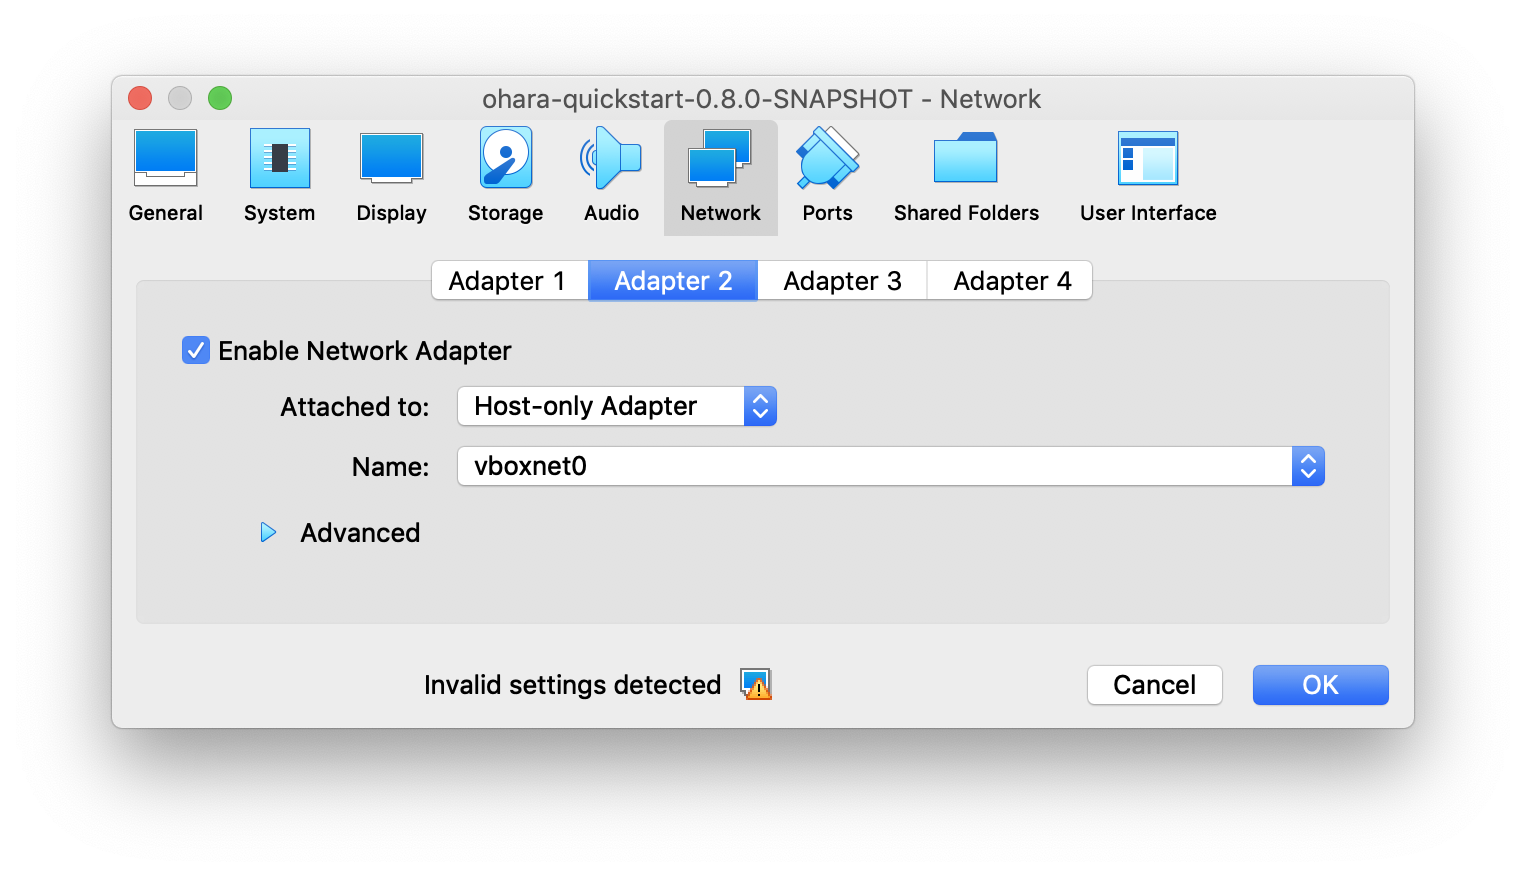
MacOS - Setting VM’s network adapter
Create network adapter
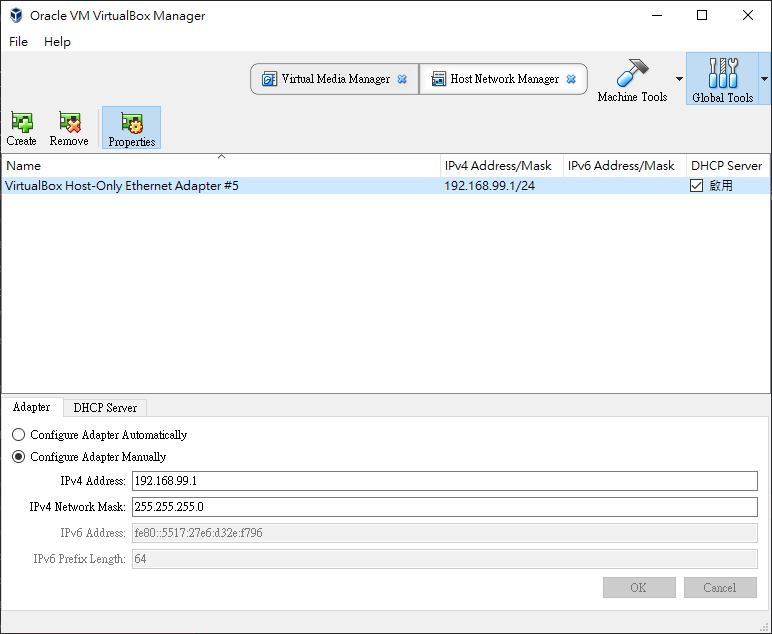
Click Global Tools and then click Create, ensure that the DHCP Enable option is checked.
Windows - Create network adapter
Setting network adapter
Select the imported ohara-quickstart VM, click Setting, click Network, click Adapter2, select Host-only Adapter, and select the newly added network card.
Windows - Setting VM’s network adapter
Install Ohara
Once the Quickstart VM is imported and the network adapter is configured, you can press the “Start” button to start Quickstart VM and then use the following username and password to log into the system:
- Username: ohara
- Password: oharastream
The installation will be starting automatically if this is your first time log in to the system. This step will take some time to complete as it needs to download all Ohara docker images.
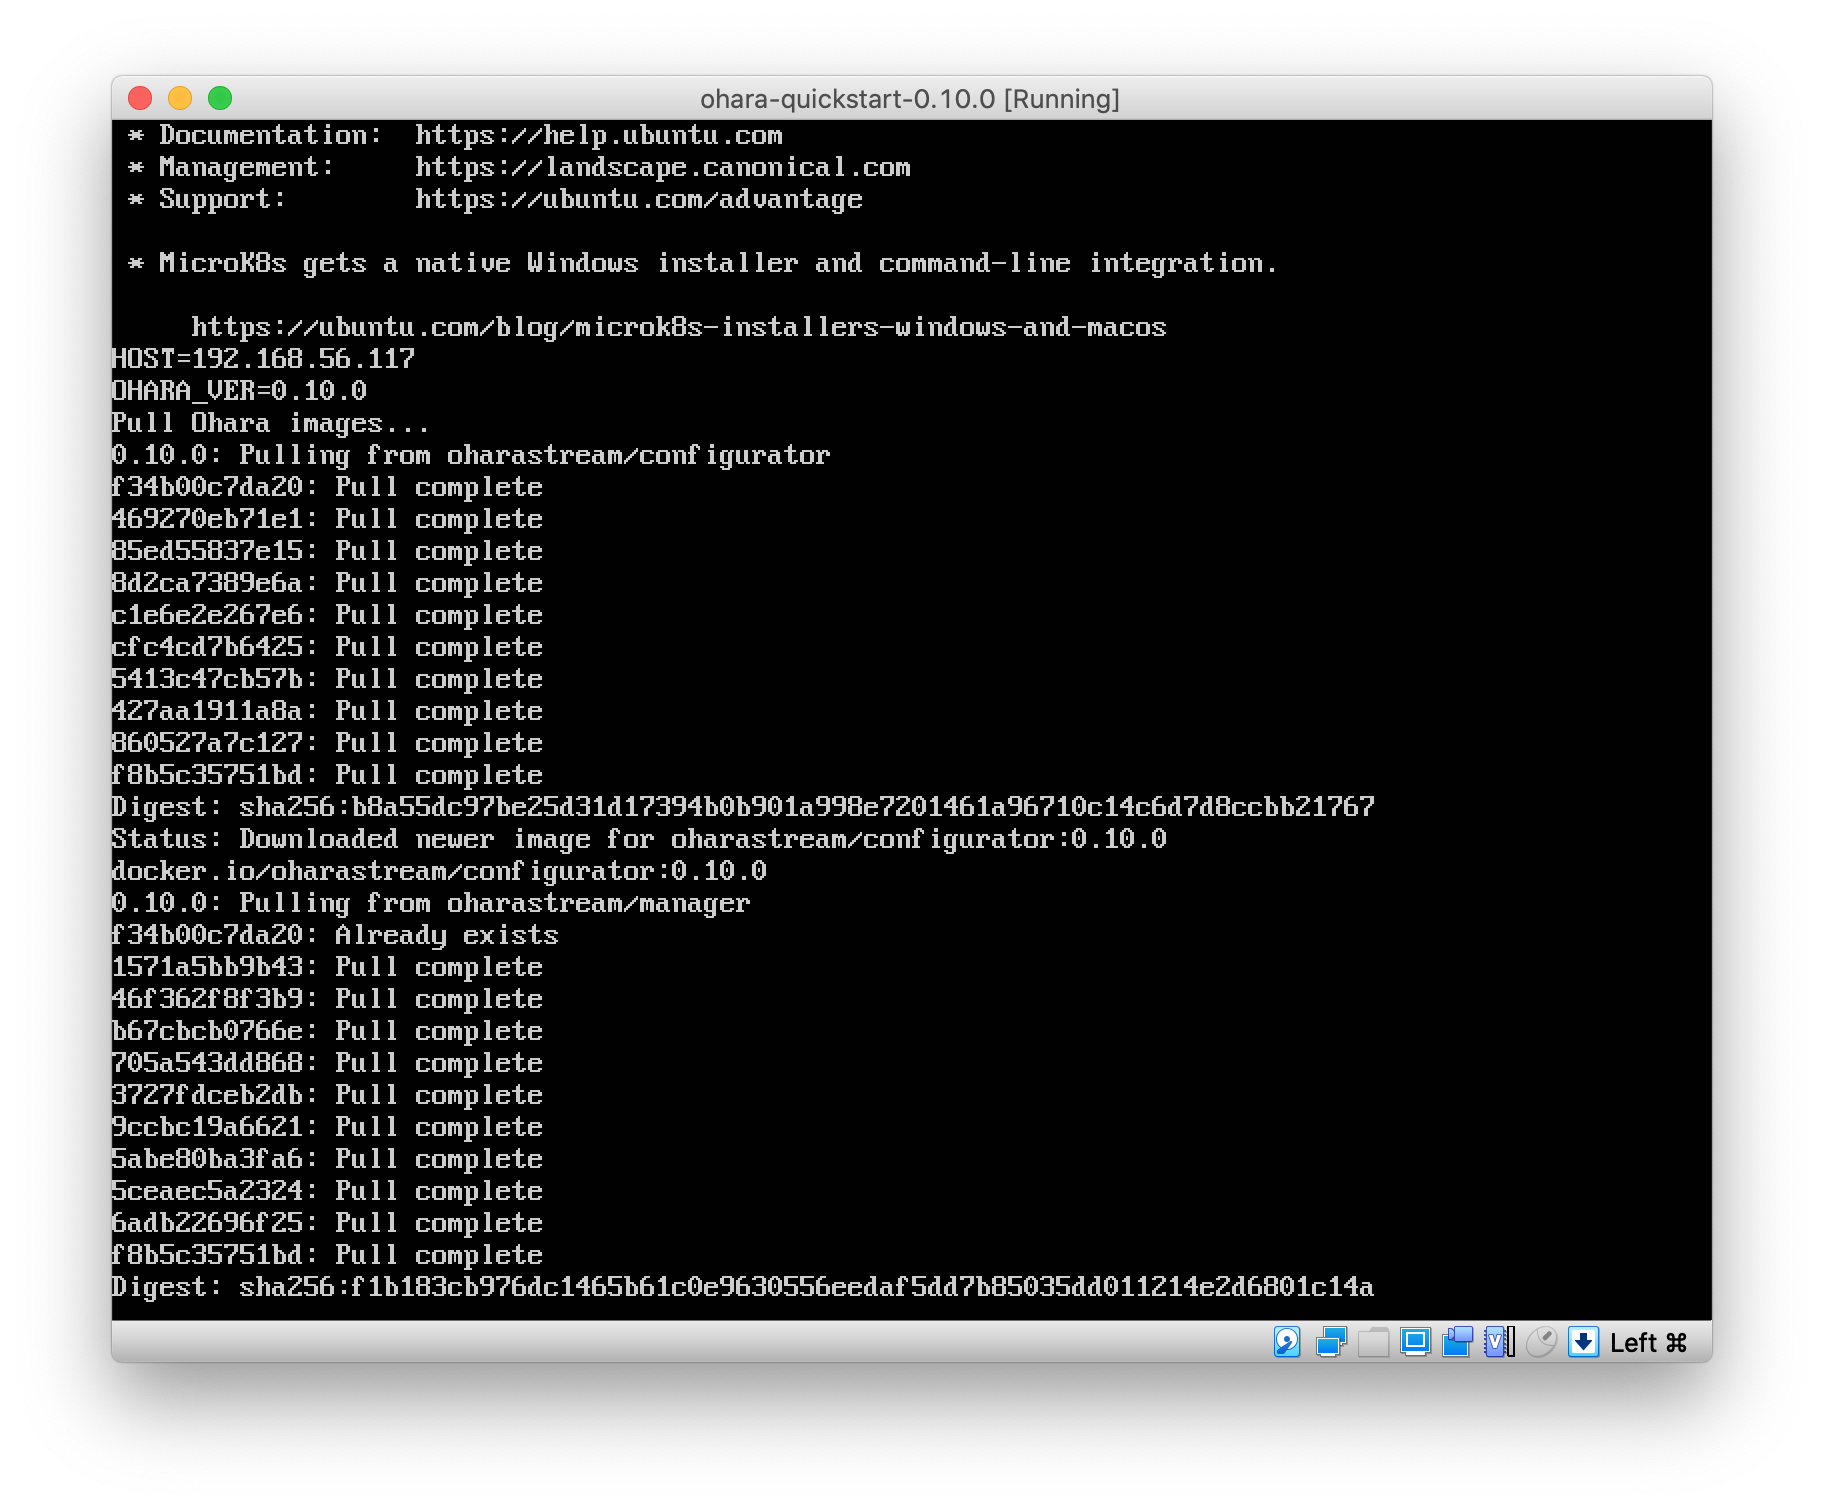
VM is pulling down images from Docker Hub
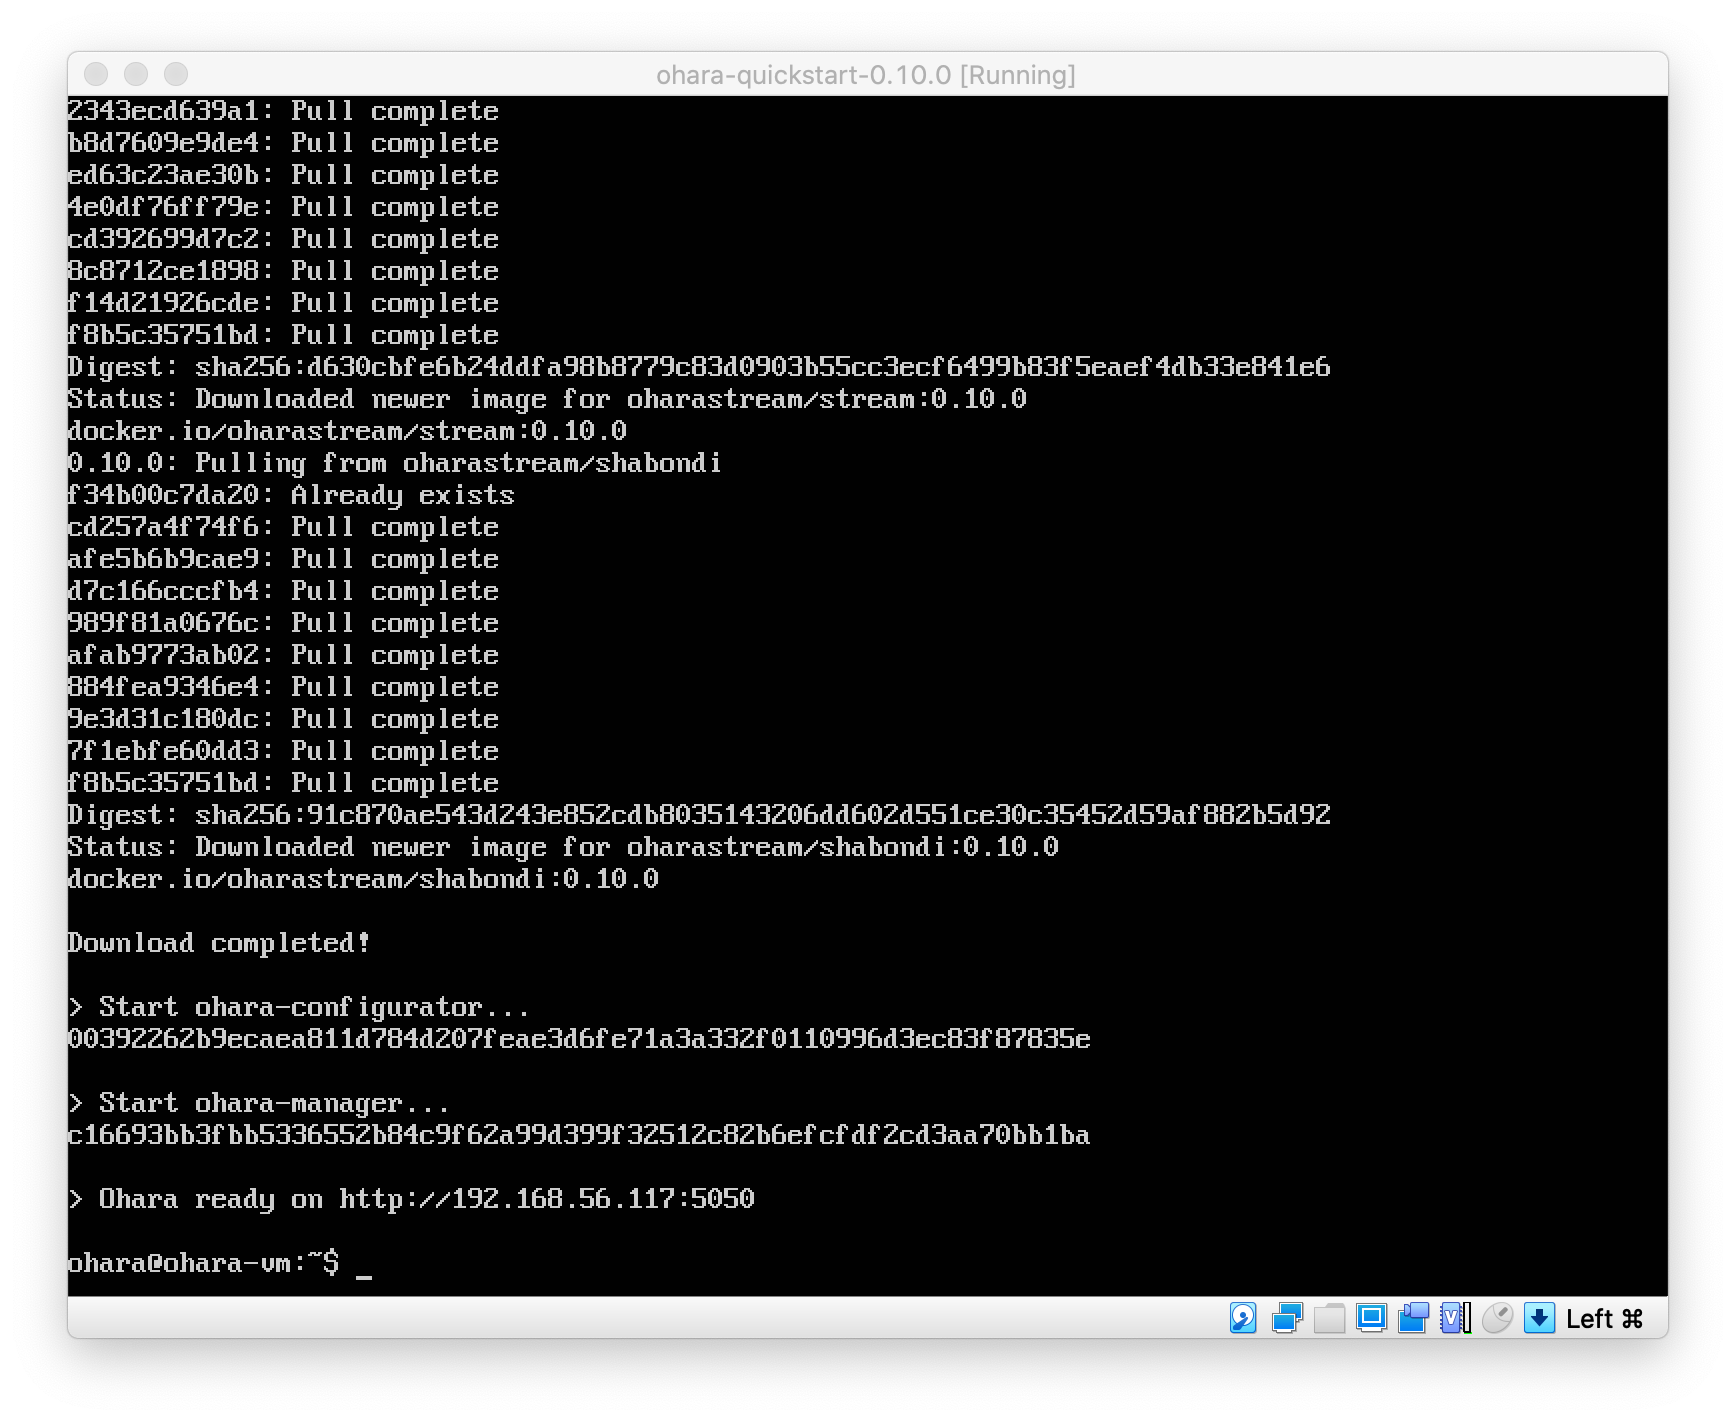
Finishing the setup
After the installation is completed, you should see something like the following:
> Ohara ready on http://192.168.56.102:5050
As we can see here, the VM’s IP address is 192.168.56.102 (this address will be varied depending on your VirtualBox network settings).
We can then open the browser and enter this URL in browser’s address bar http://192.168.56.102:5050 to open Ohara manager (Ohara’s UI, we will introduce it in the following section).
Note
After shutting down your VM, the docker containers will be deleted and restarted on your next login
Terminology
Before jumping into the UI and create our very first workspace and pipeline. Let’s get to know some of the terms that we will be using throughout this guide.
- Manager
- Manager is the user interface of Ohara (UI). it provides a friendly user interface allowing user to design their data pipeline without even touching a single line of code.
- Node
- Node is the basic unit of running service. It can be either a physical server or virtual machine.
- Workspace
- Workspace contains multiple Ohara services including: Zookeepers, Brokers and Workers. And pipelines are services that run in a workspace.
- Pipeline
- Pipeline allows you to define your data stream by utilizing Connector to connect to external storage systems, as well as a Stream to customize data transformation and stream processing.
- Connector
- Connector connects to external storage systems like Databases, HDFS or FTP. It has two types - source connector and sink connector. Source connector is able to pull data from another system and then push the data to topic. By contrast, Sink connector pulls data from topic and then push the data to another system.
- Stream
- Stream is powered by Kafka Streams which provides users a simple way to write their own stream processing application.
- Topic
- A topic is a place where all the data are written just like a database table where data is stored. It acts like a buffer, the data being pull in from the source connector is stored in the topic and so later can be pulled out again by another component (e.g., sink connectors)
UI overview
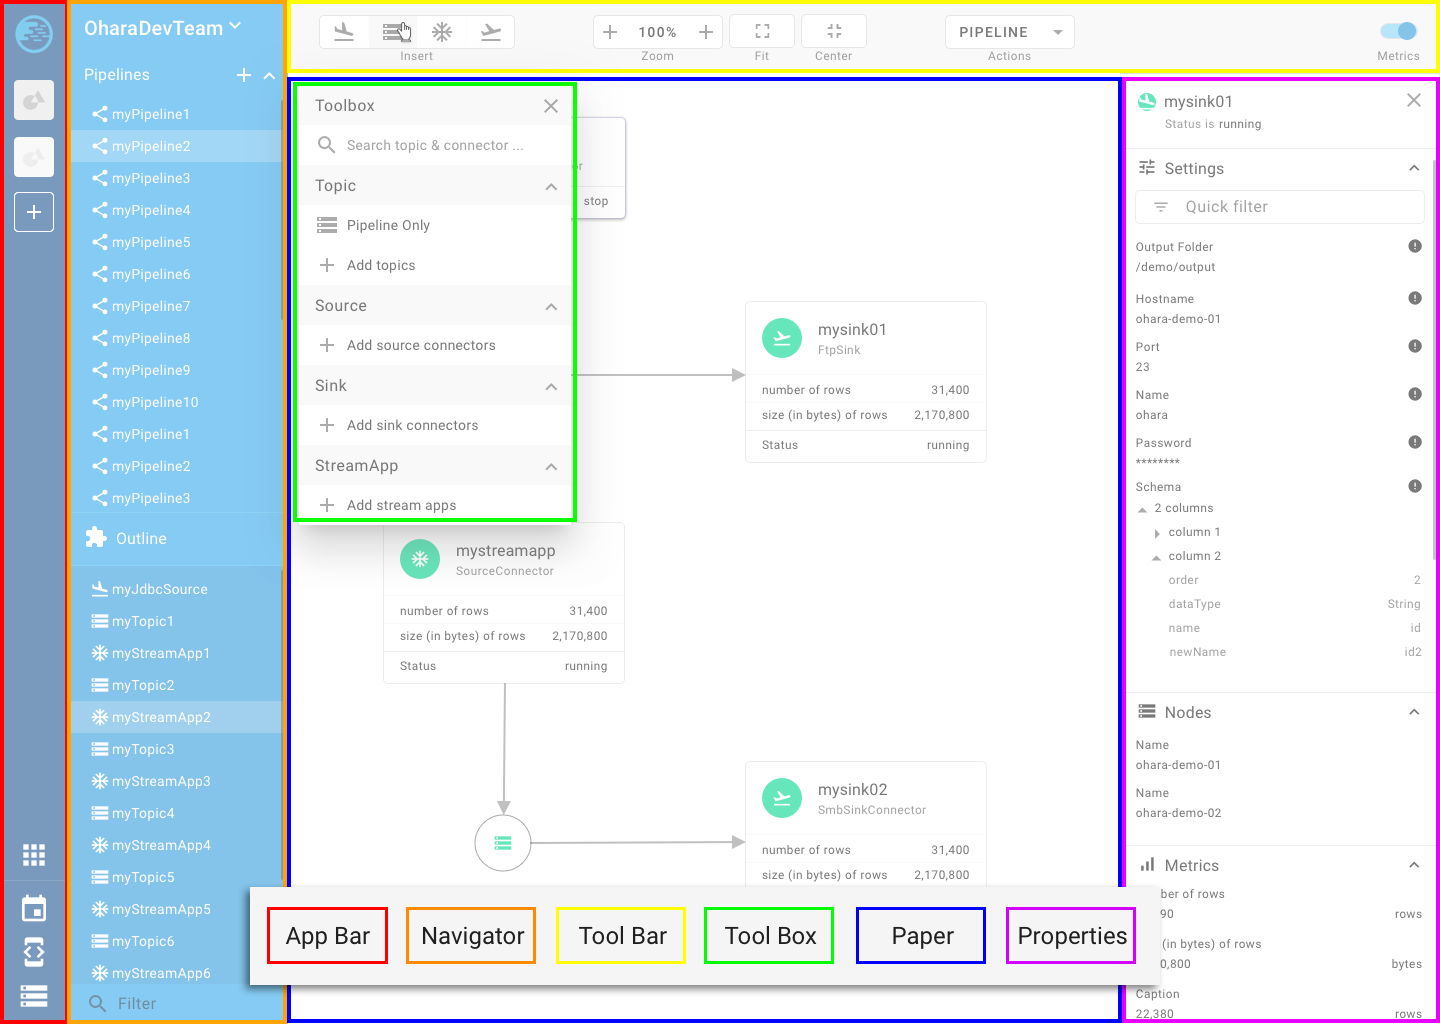
Before we proceed, here is a screenshot of Ohara Manager where we show you each component’s name so you are better prepared for the upcoming tutorial. You can always come back to this overview if you are lost or not sure what we’re talking about in the tutorial.
Note
We do our best to make our docs as clear as we could, if you think there’s still room for improvement. We would love to hear from you: https://github.com/oharastream/ohara/issues
Create your first pipeline
Now, Ohara Manager is up and running, we can use the UI to create our very first pipeline. Here are the steps that we will be going through together:
Create a workspace
Create a pipeline
Add pipeline components, this includes:
- A FTP source and a sink connector
- Two topics
- A stream
- Create connections between them
Start the pipeline
Note
During the tutorial, we will be using FTP source/sink connectors. And so you will need to prepare your own FTP in order to follow along.
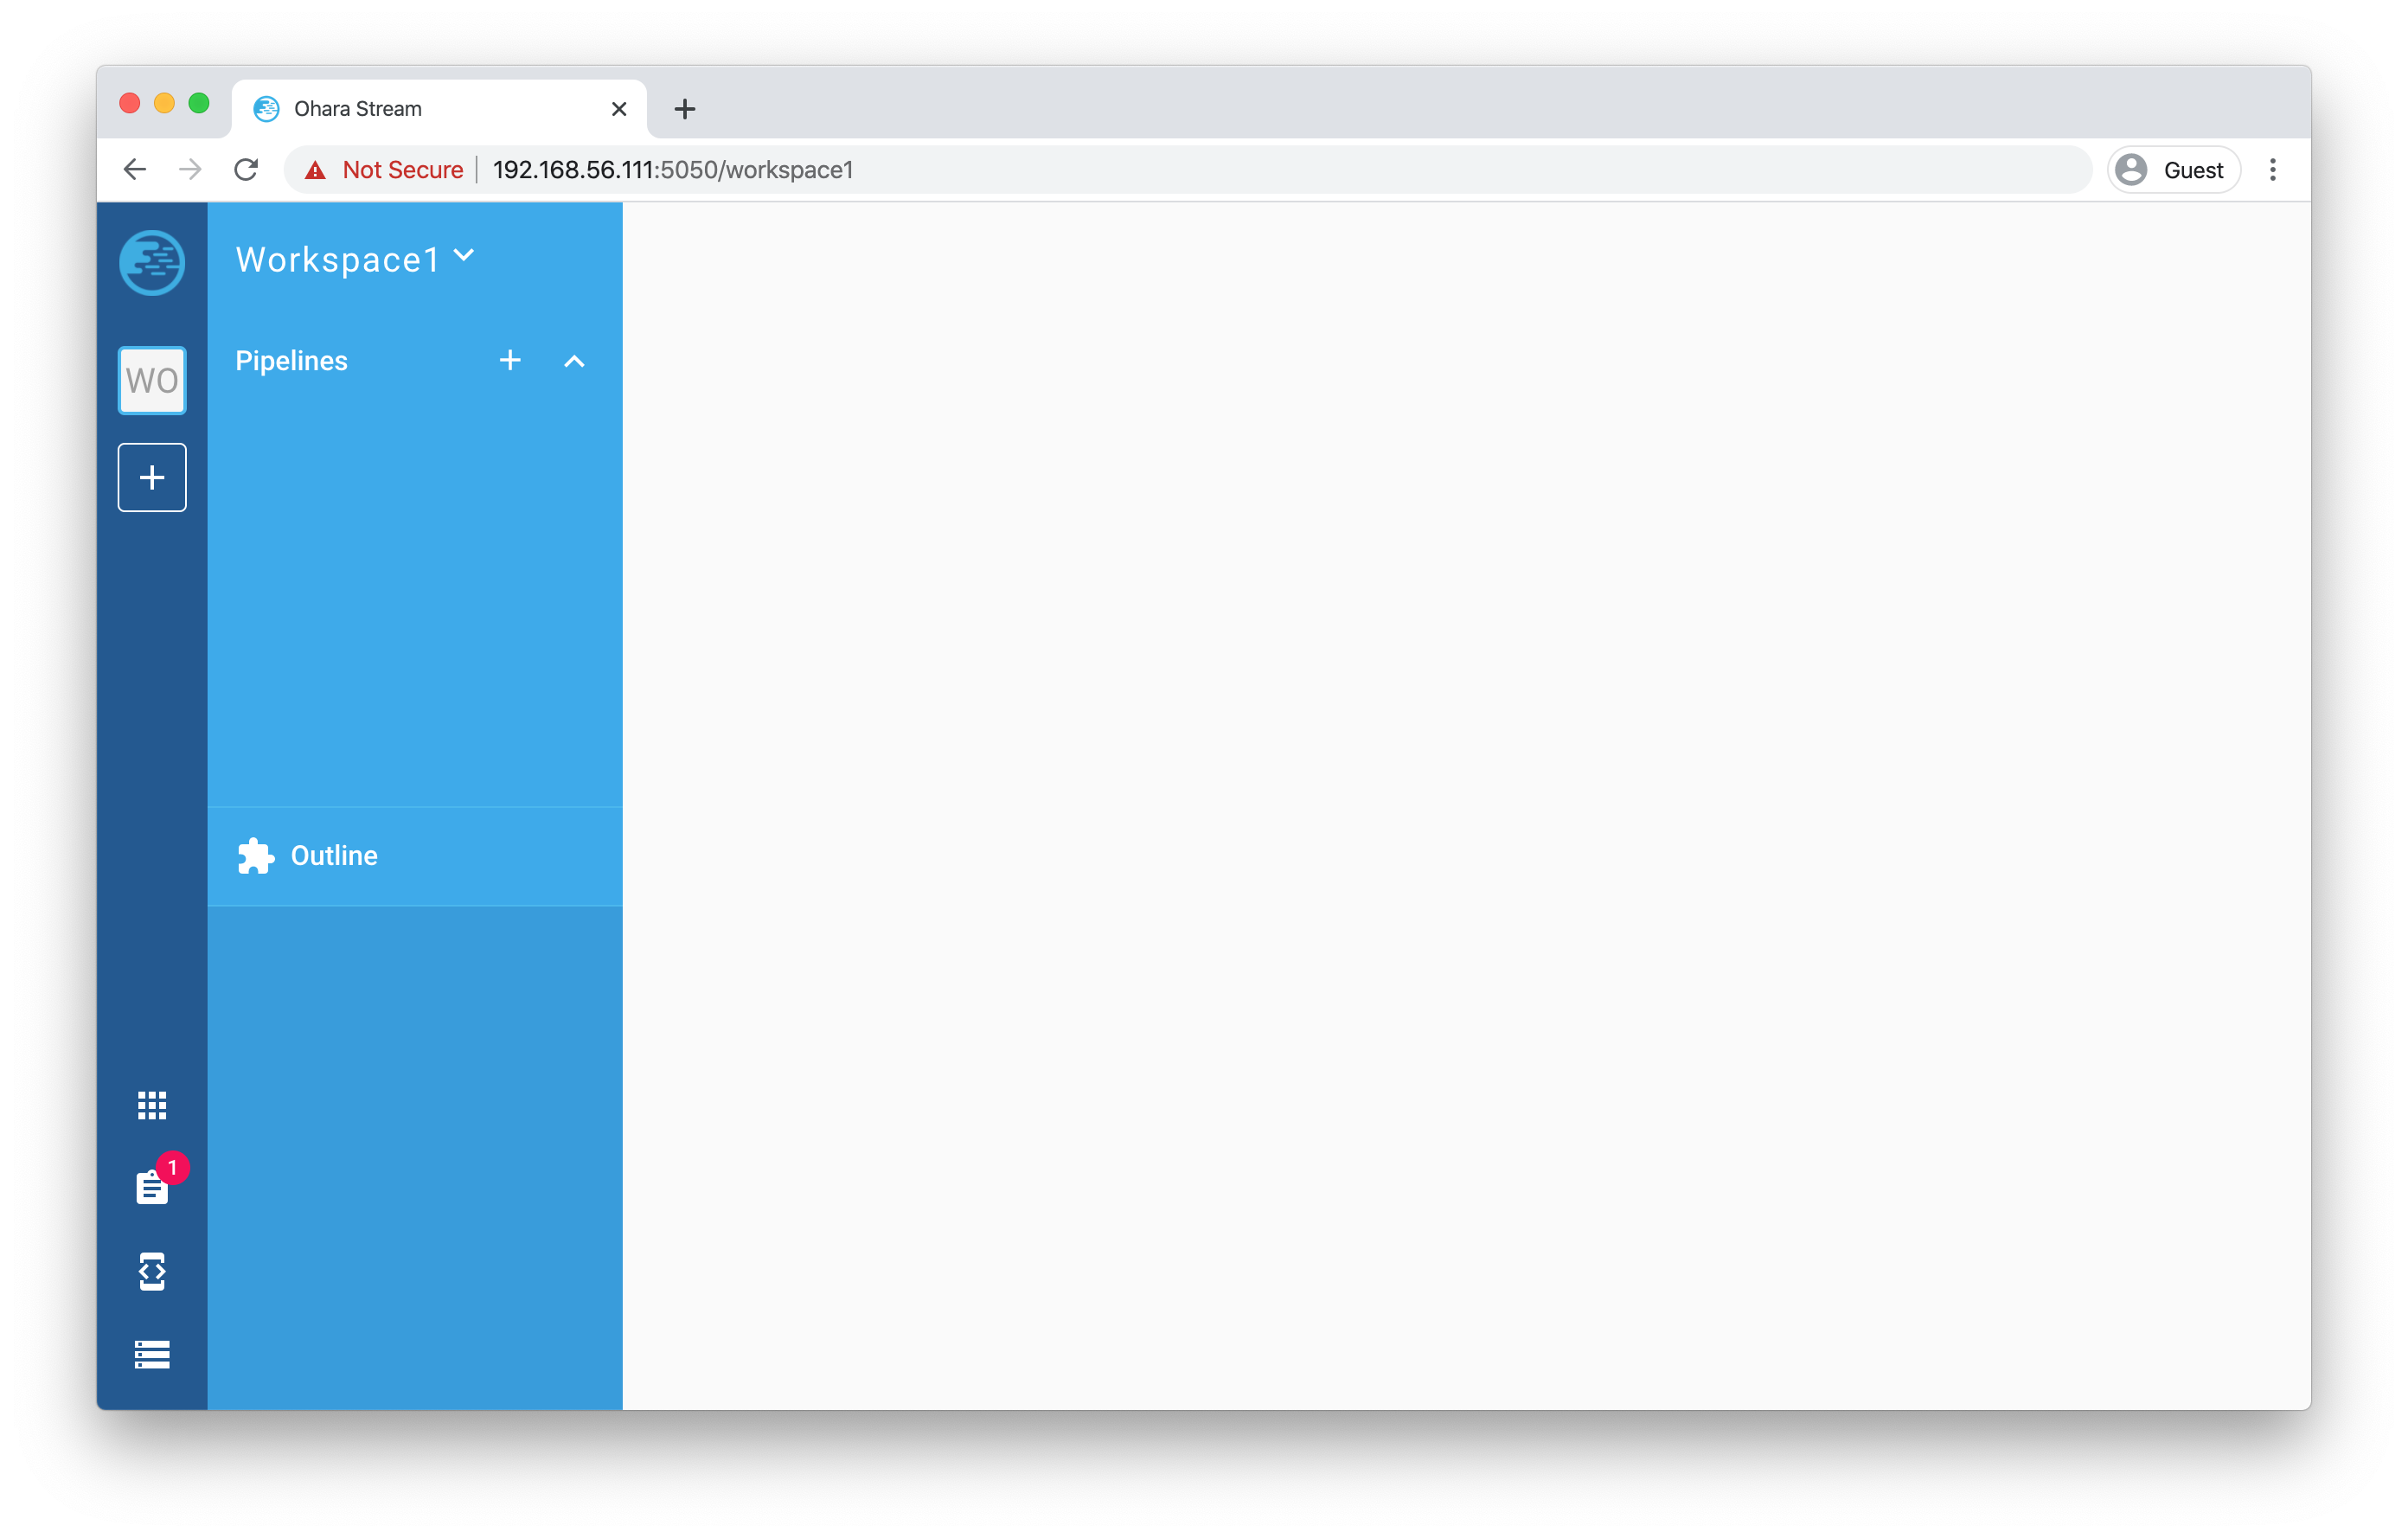
Create a workspace
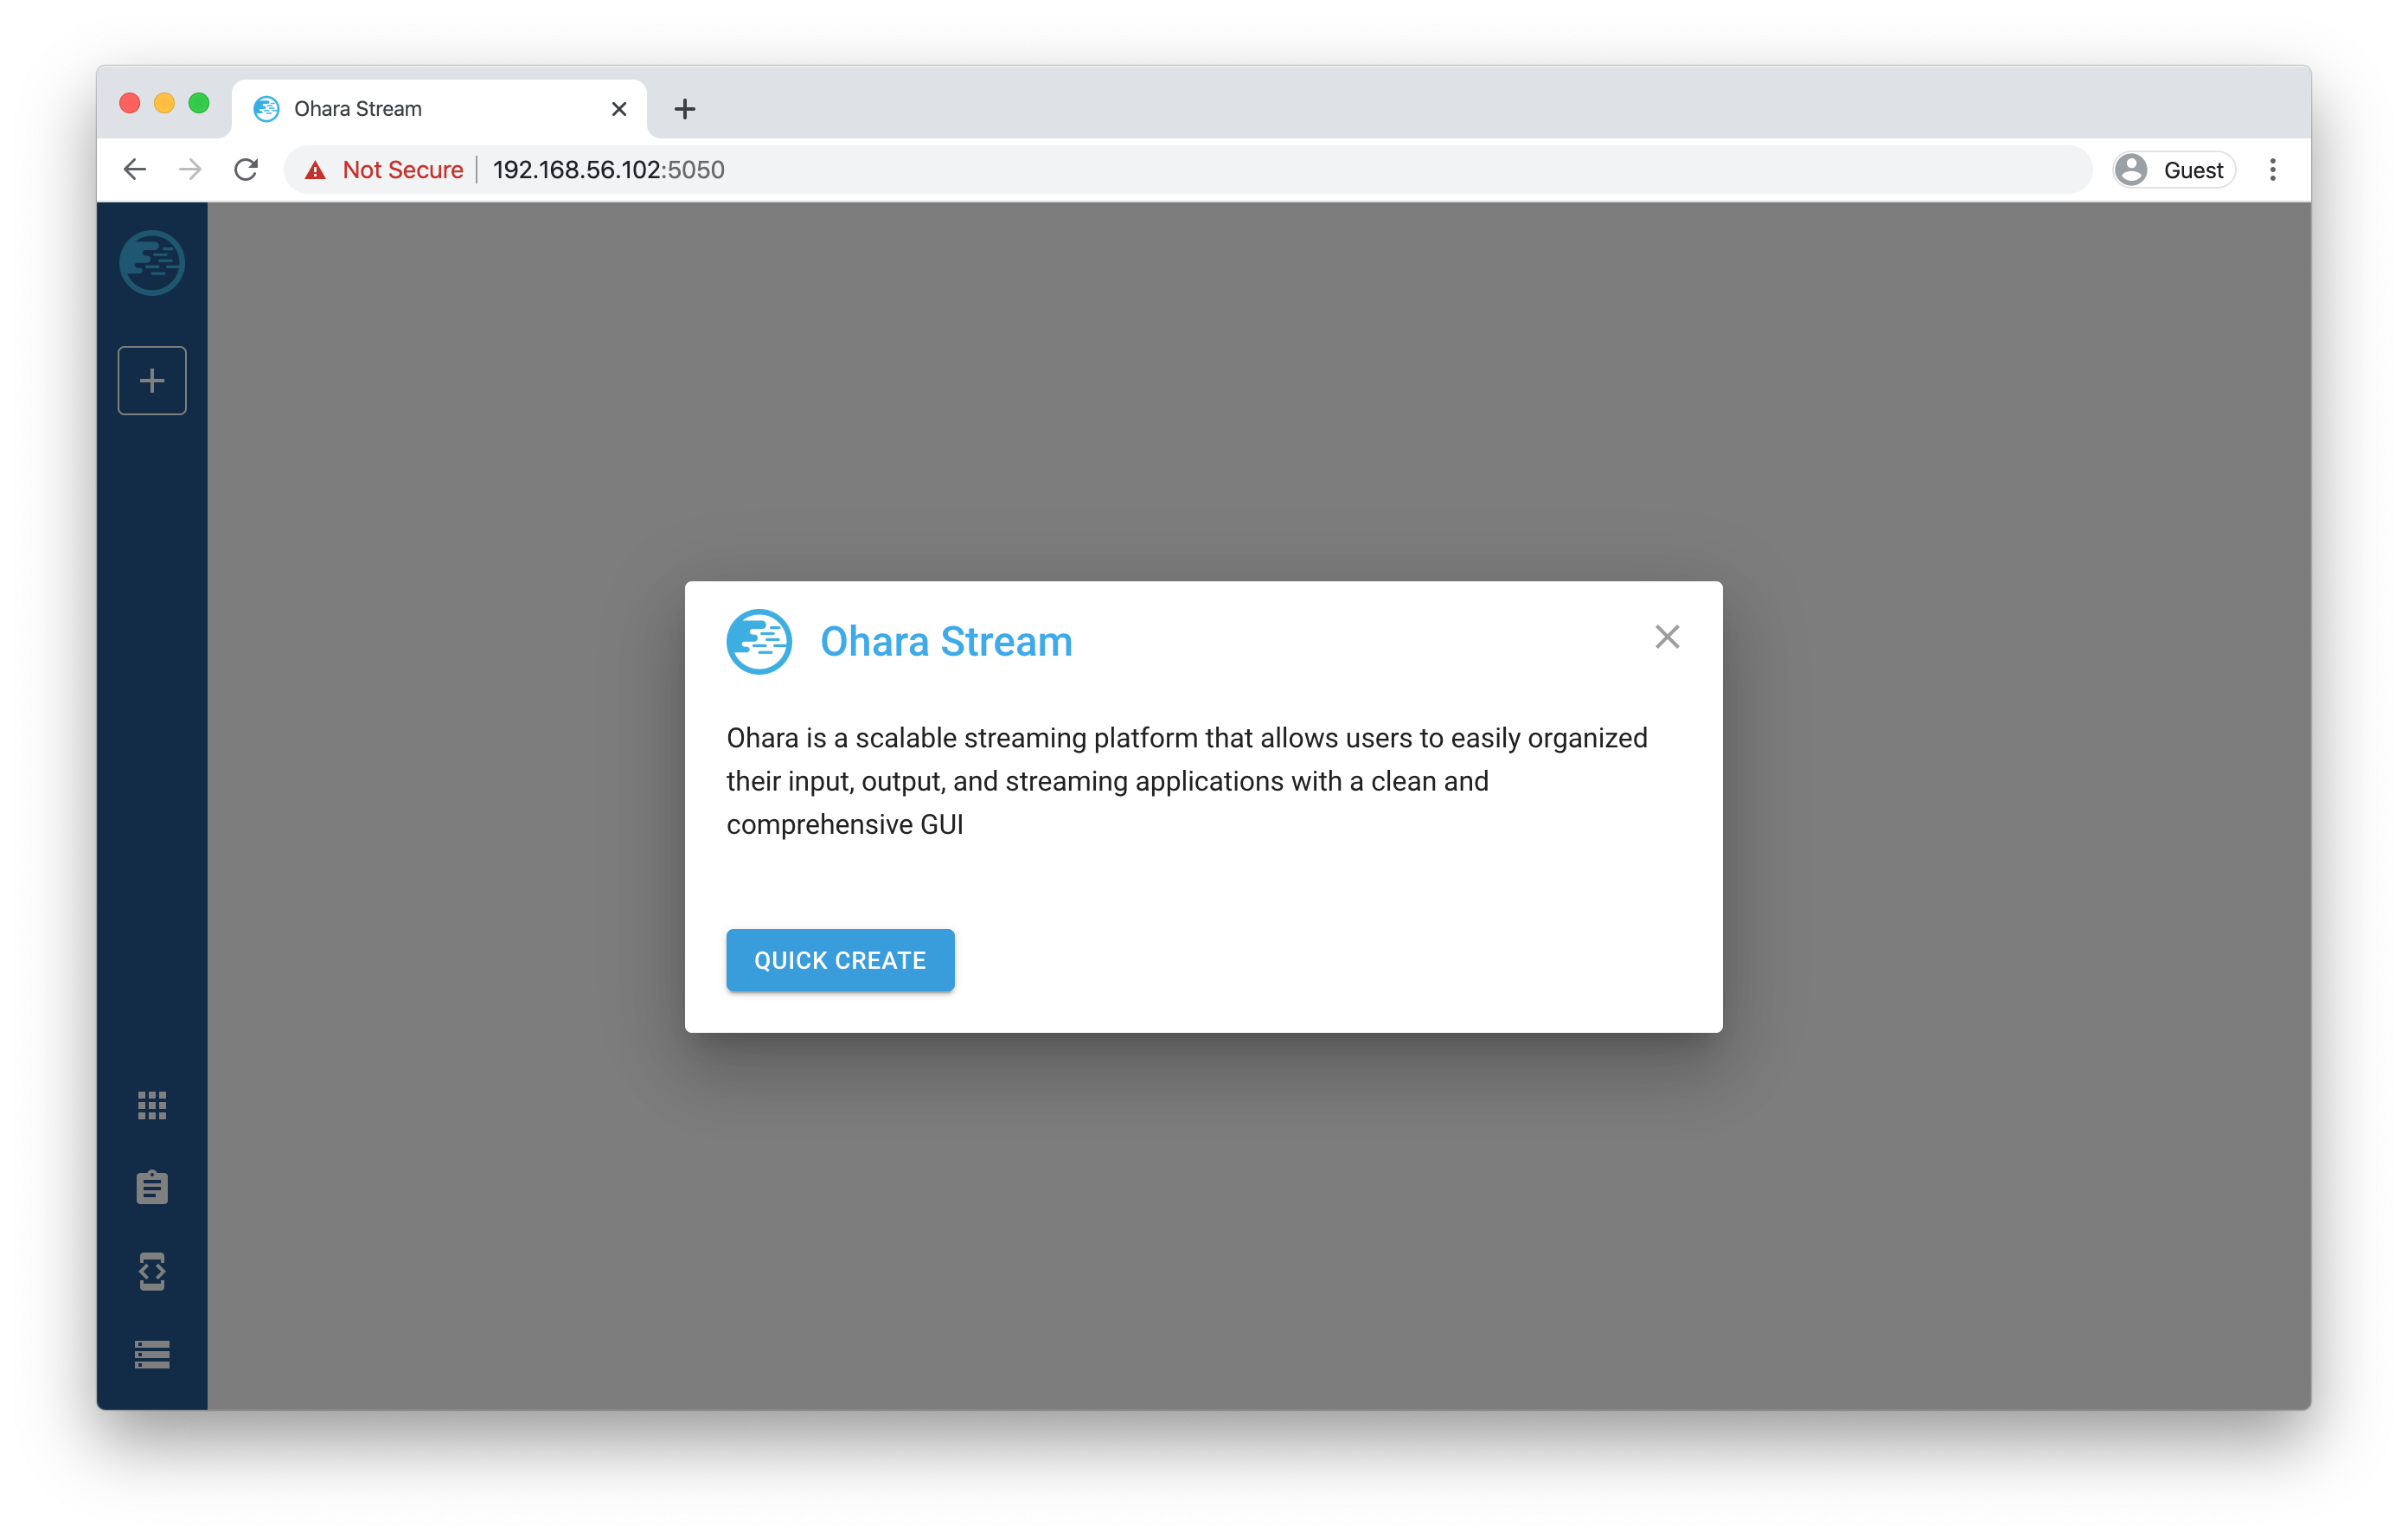
Open Ohara Manager with your browser (http://192.168.56.102:5050) and you should see a dialog showing up right in the middle of your screen:
Click on the QUICK CREATE button to open a new dialog
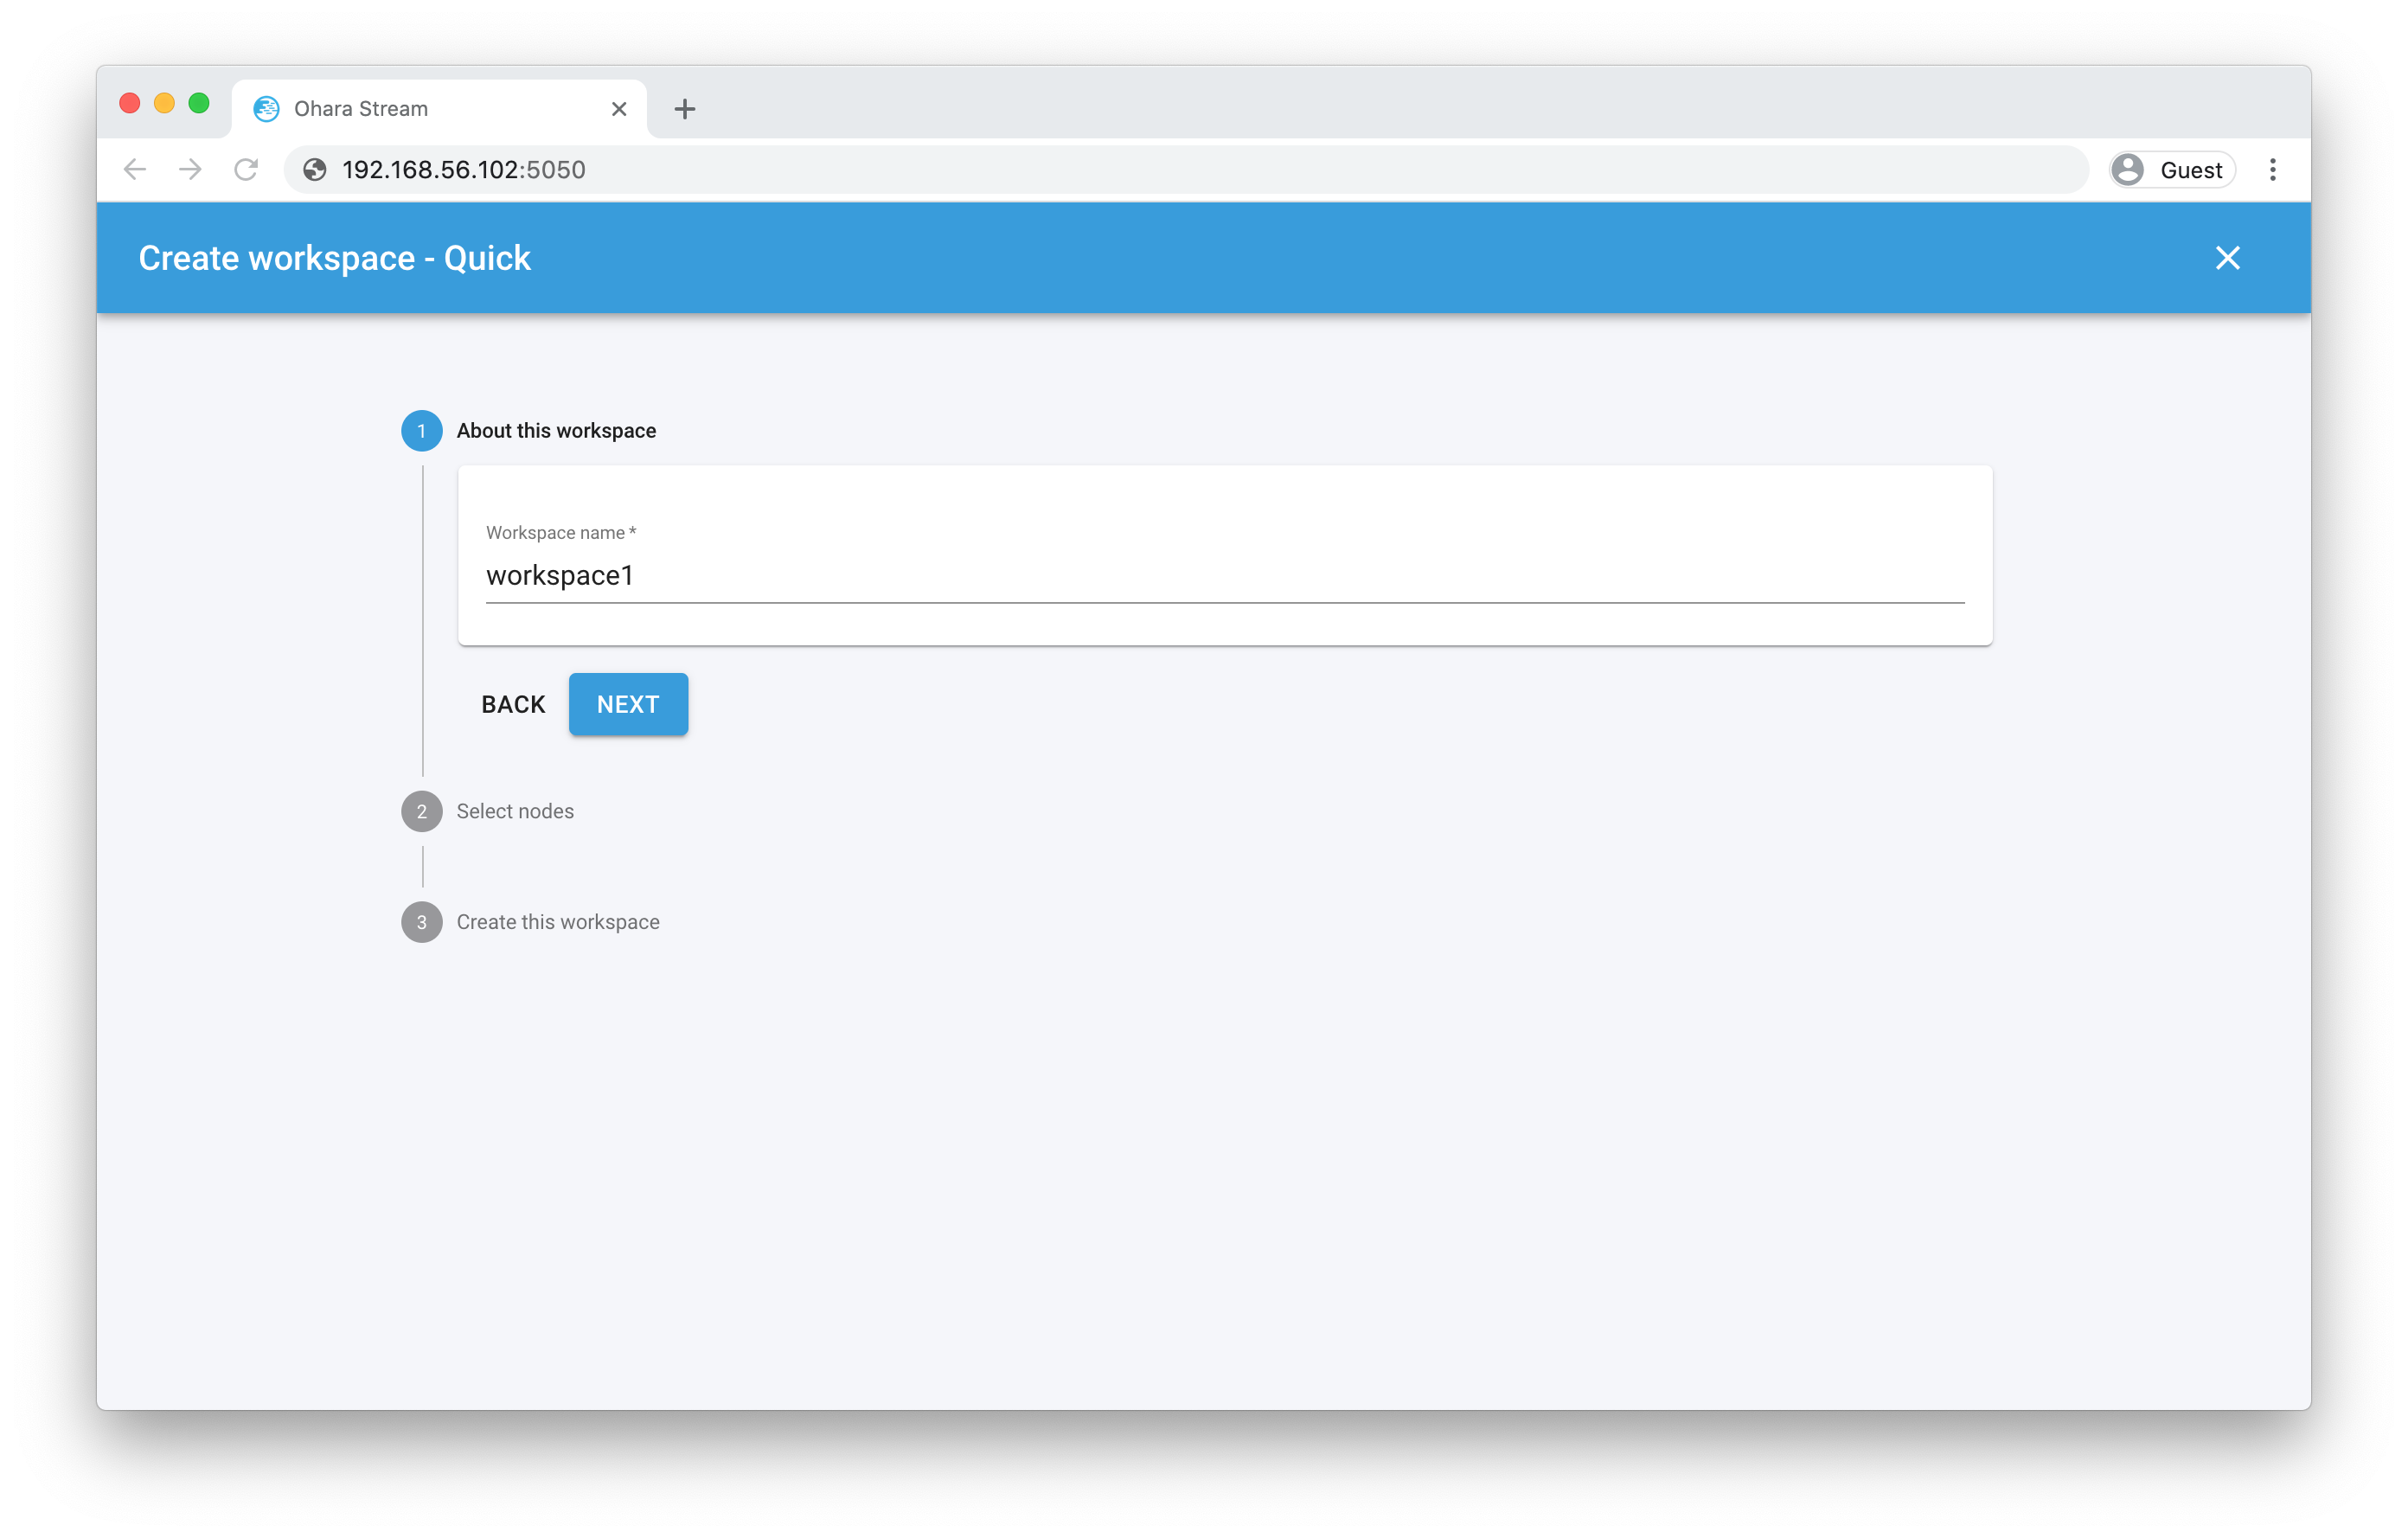
Using the default name: workspace1 and hit the NEXT button
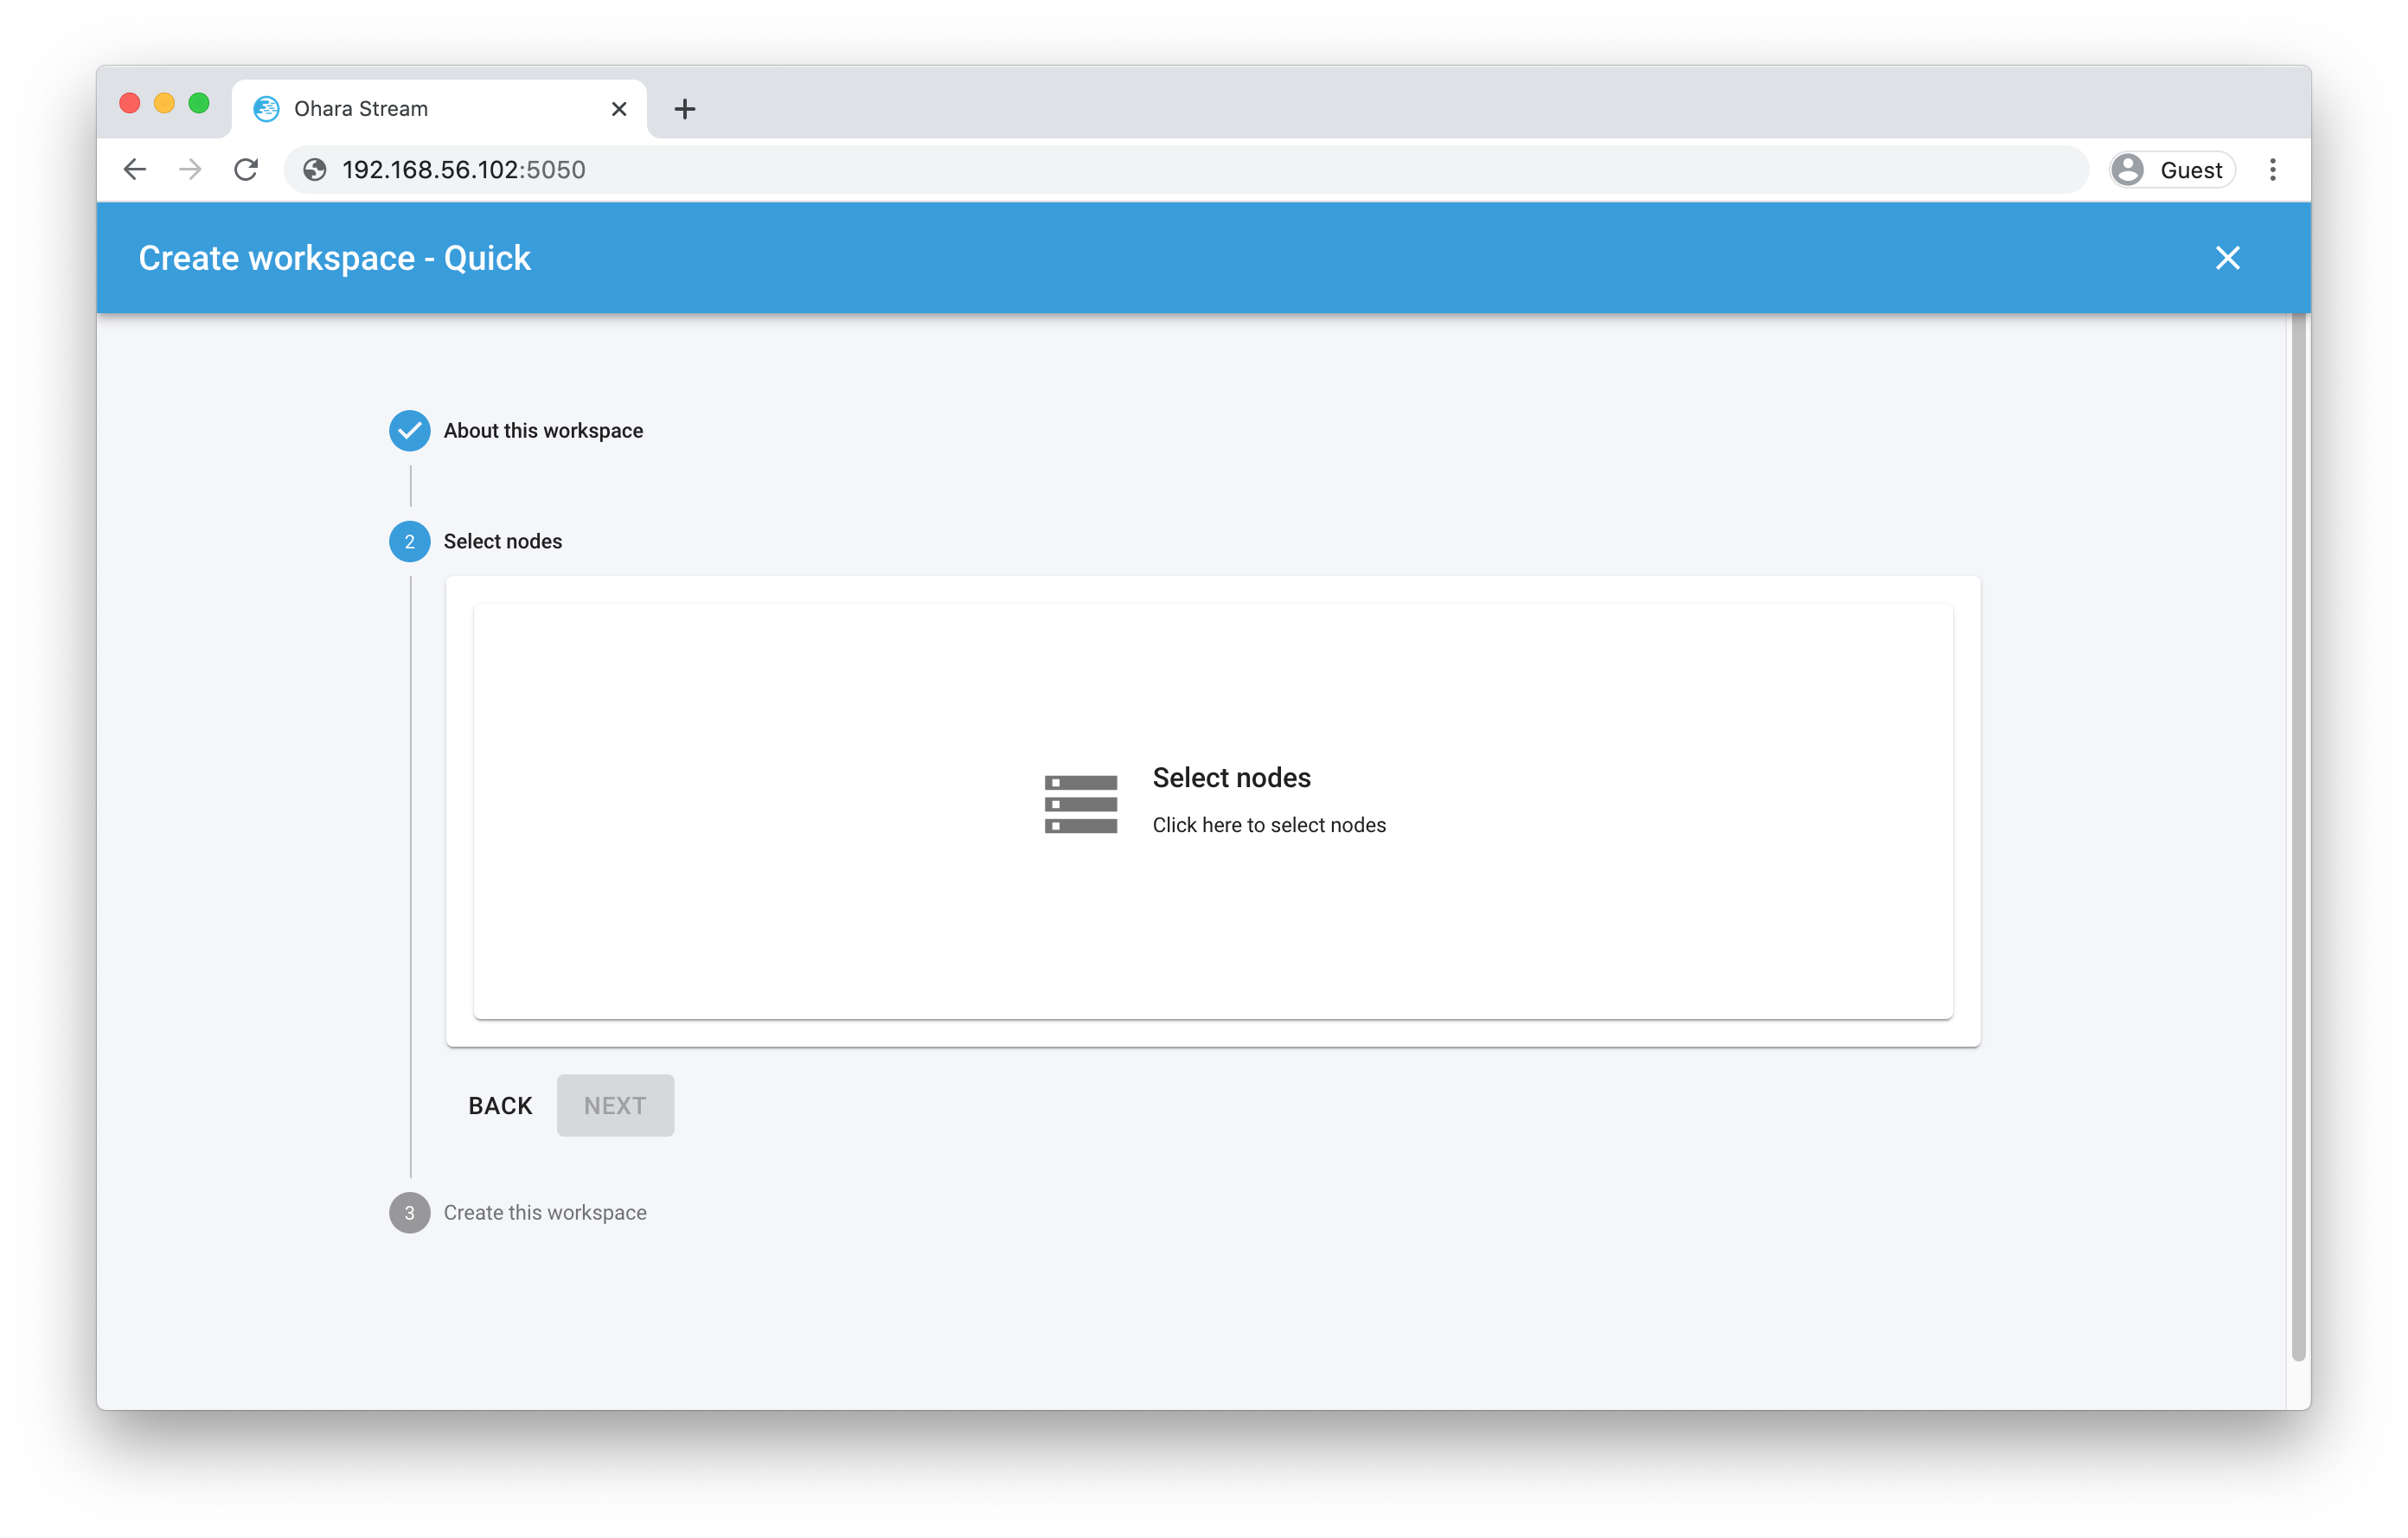
Click on the Select nodes and click on the pencil icon to create a new node.
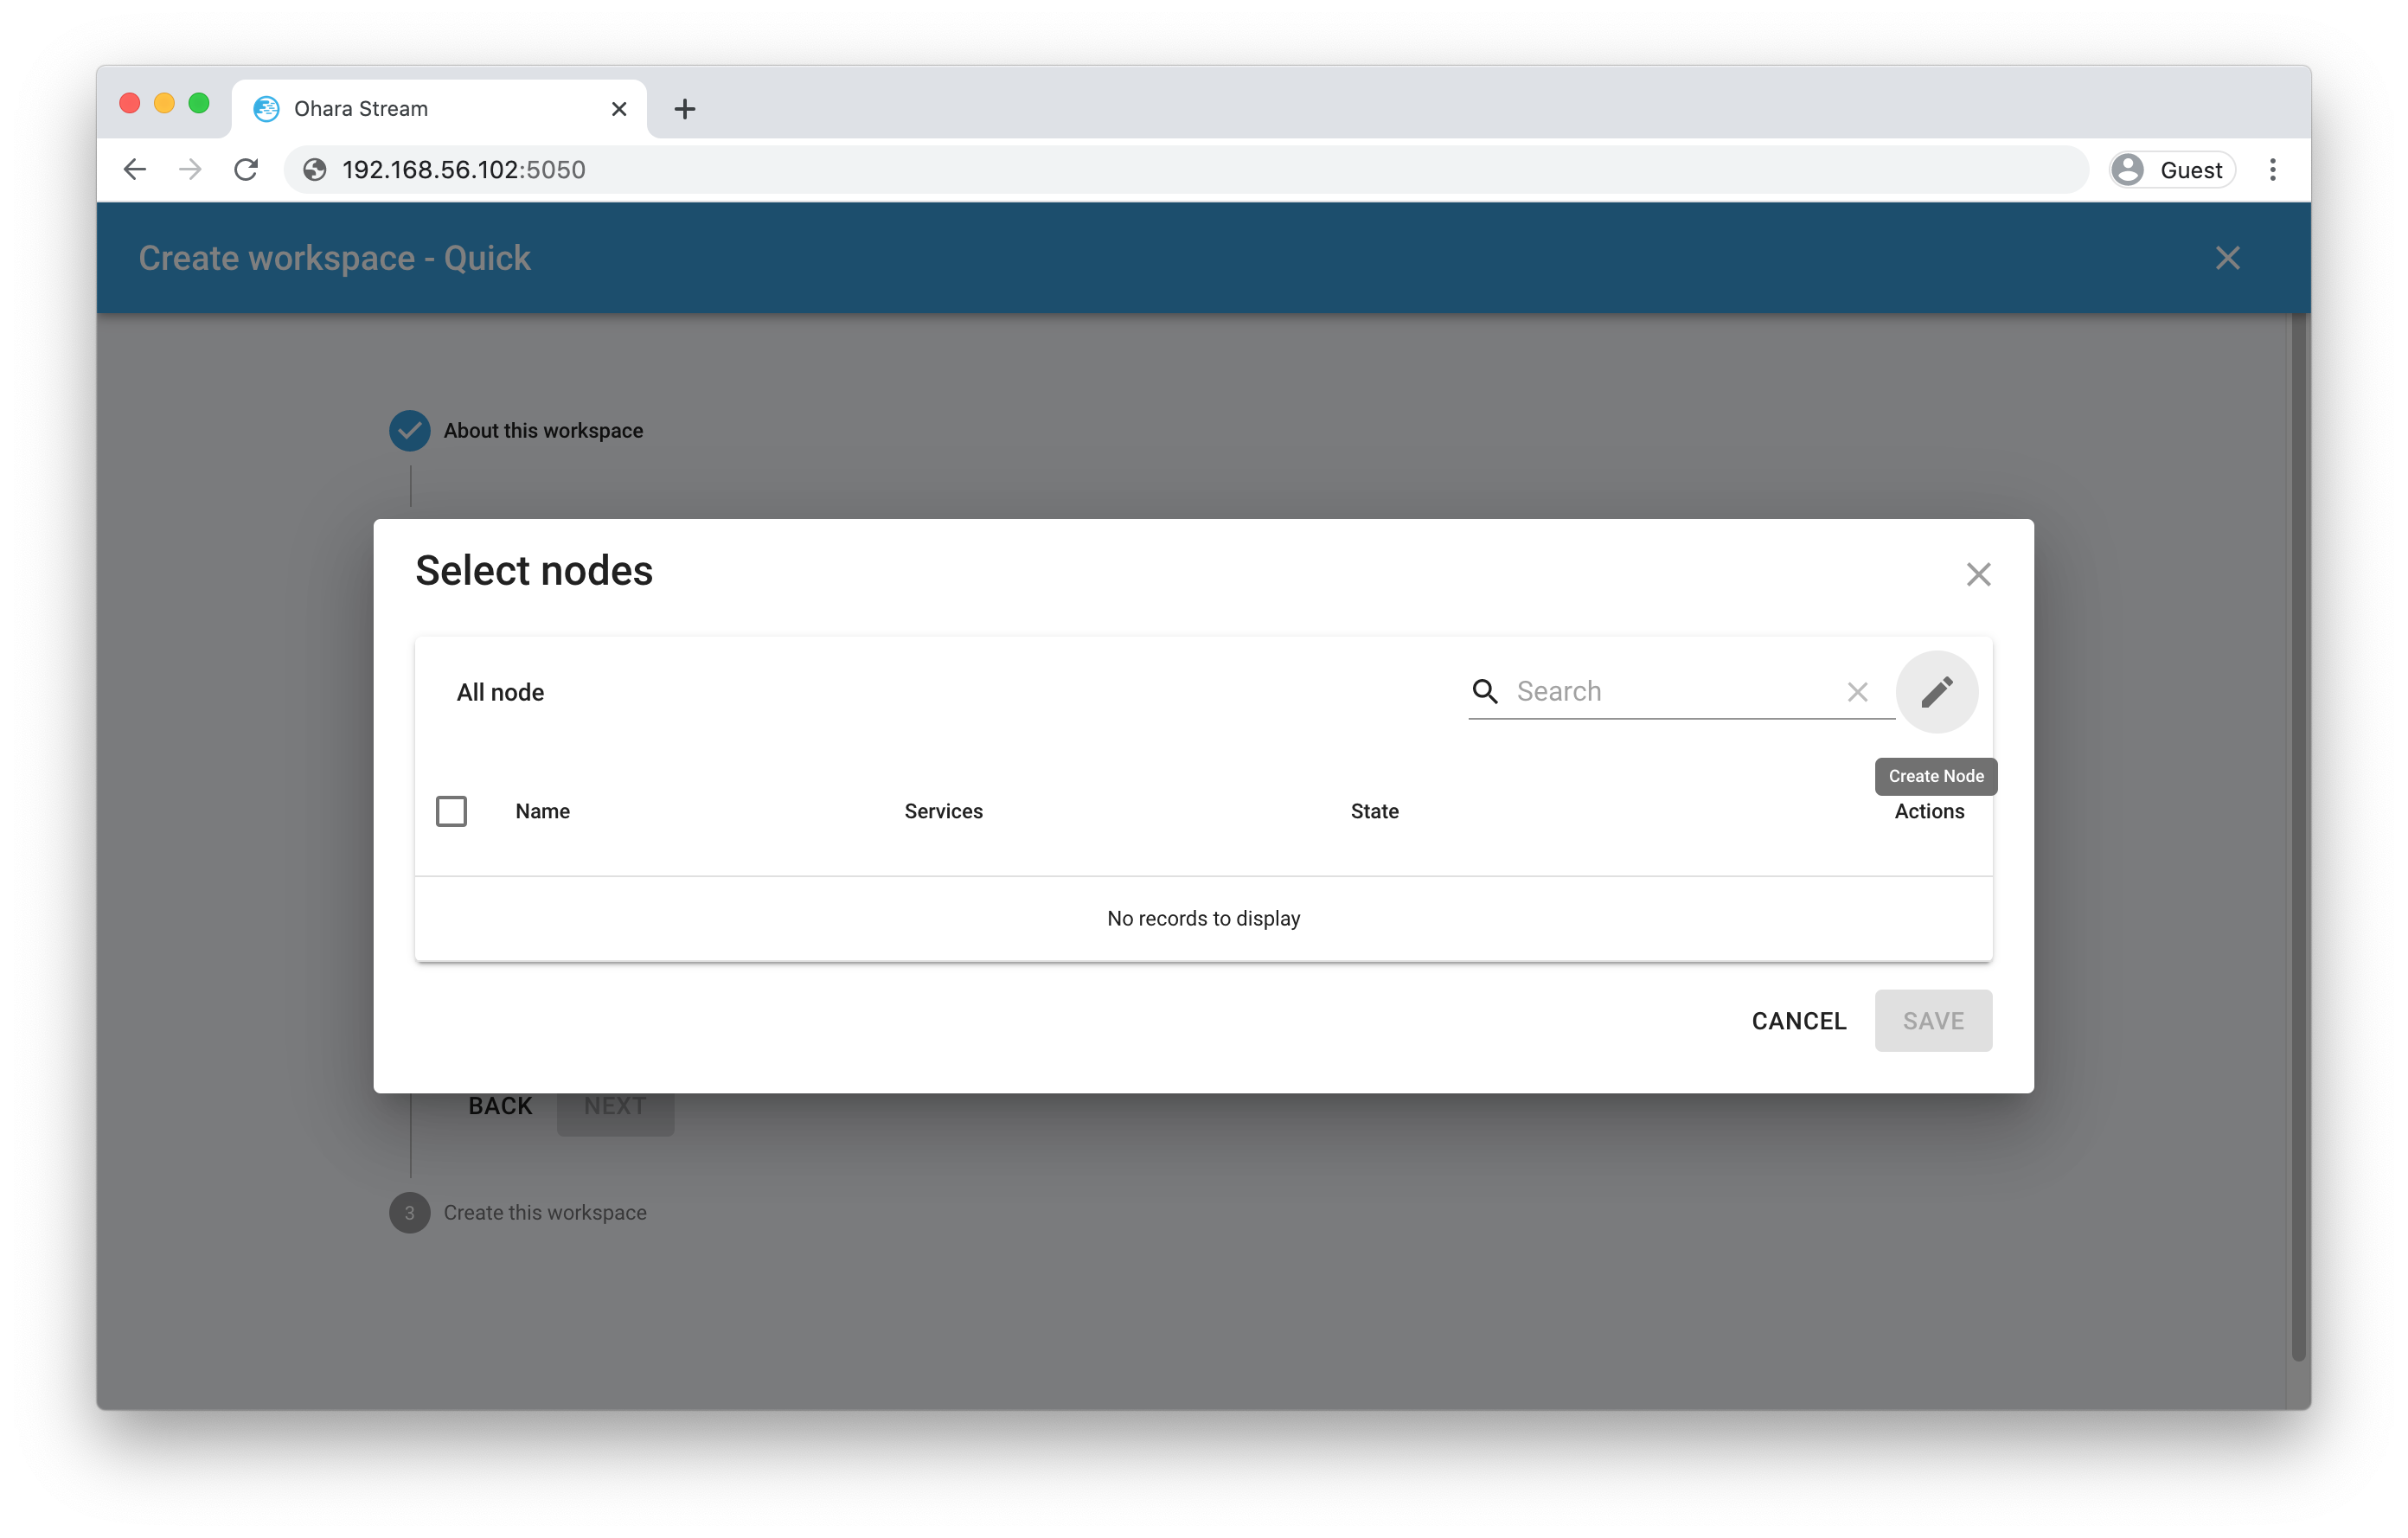
The node info that you need to enter are listed below:
- Hostname: 192.168.56.102 (fill your own hostname here)
- Port: 22
- User: ohara
- Password: oharastream
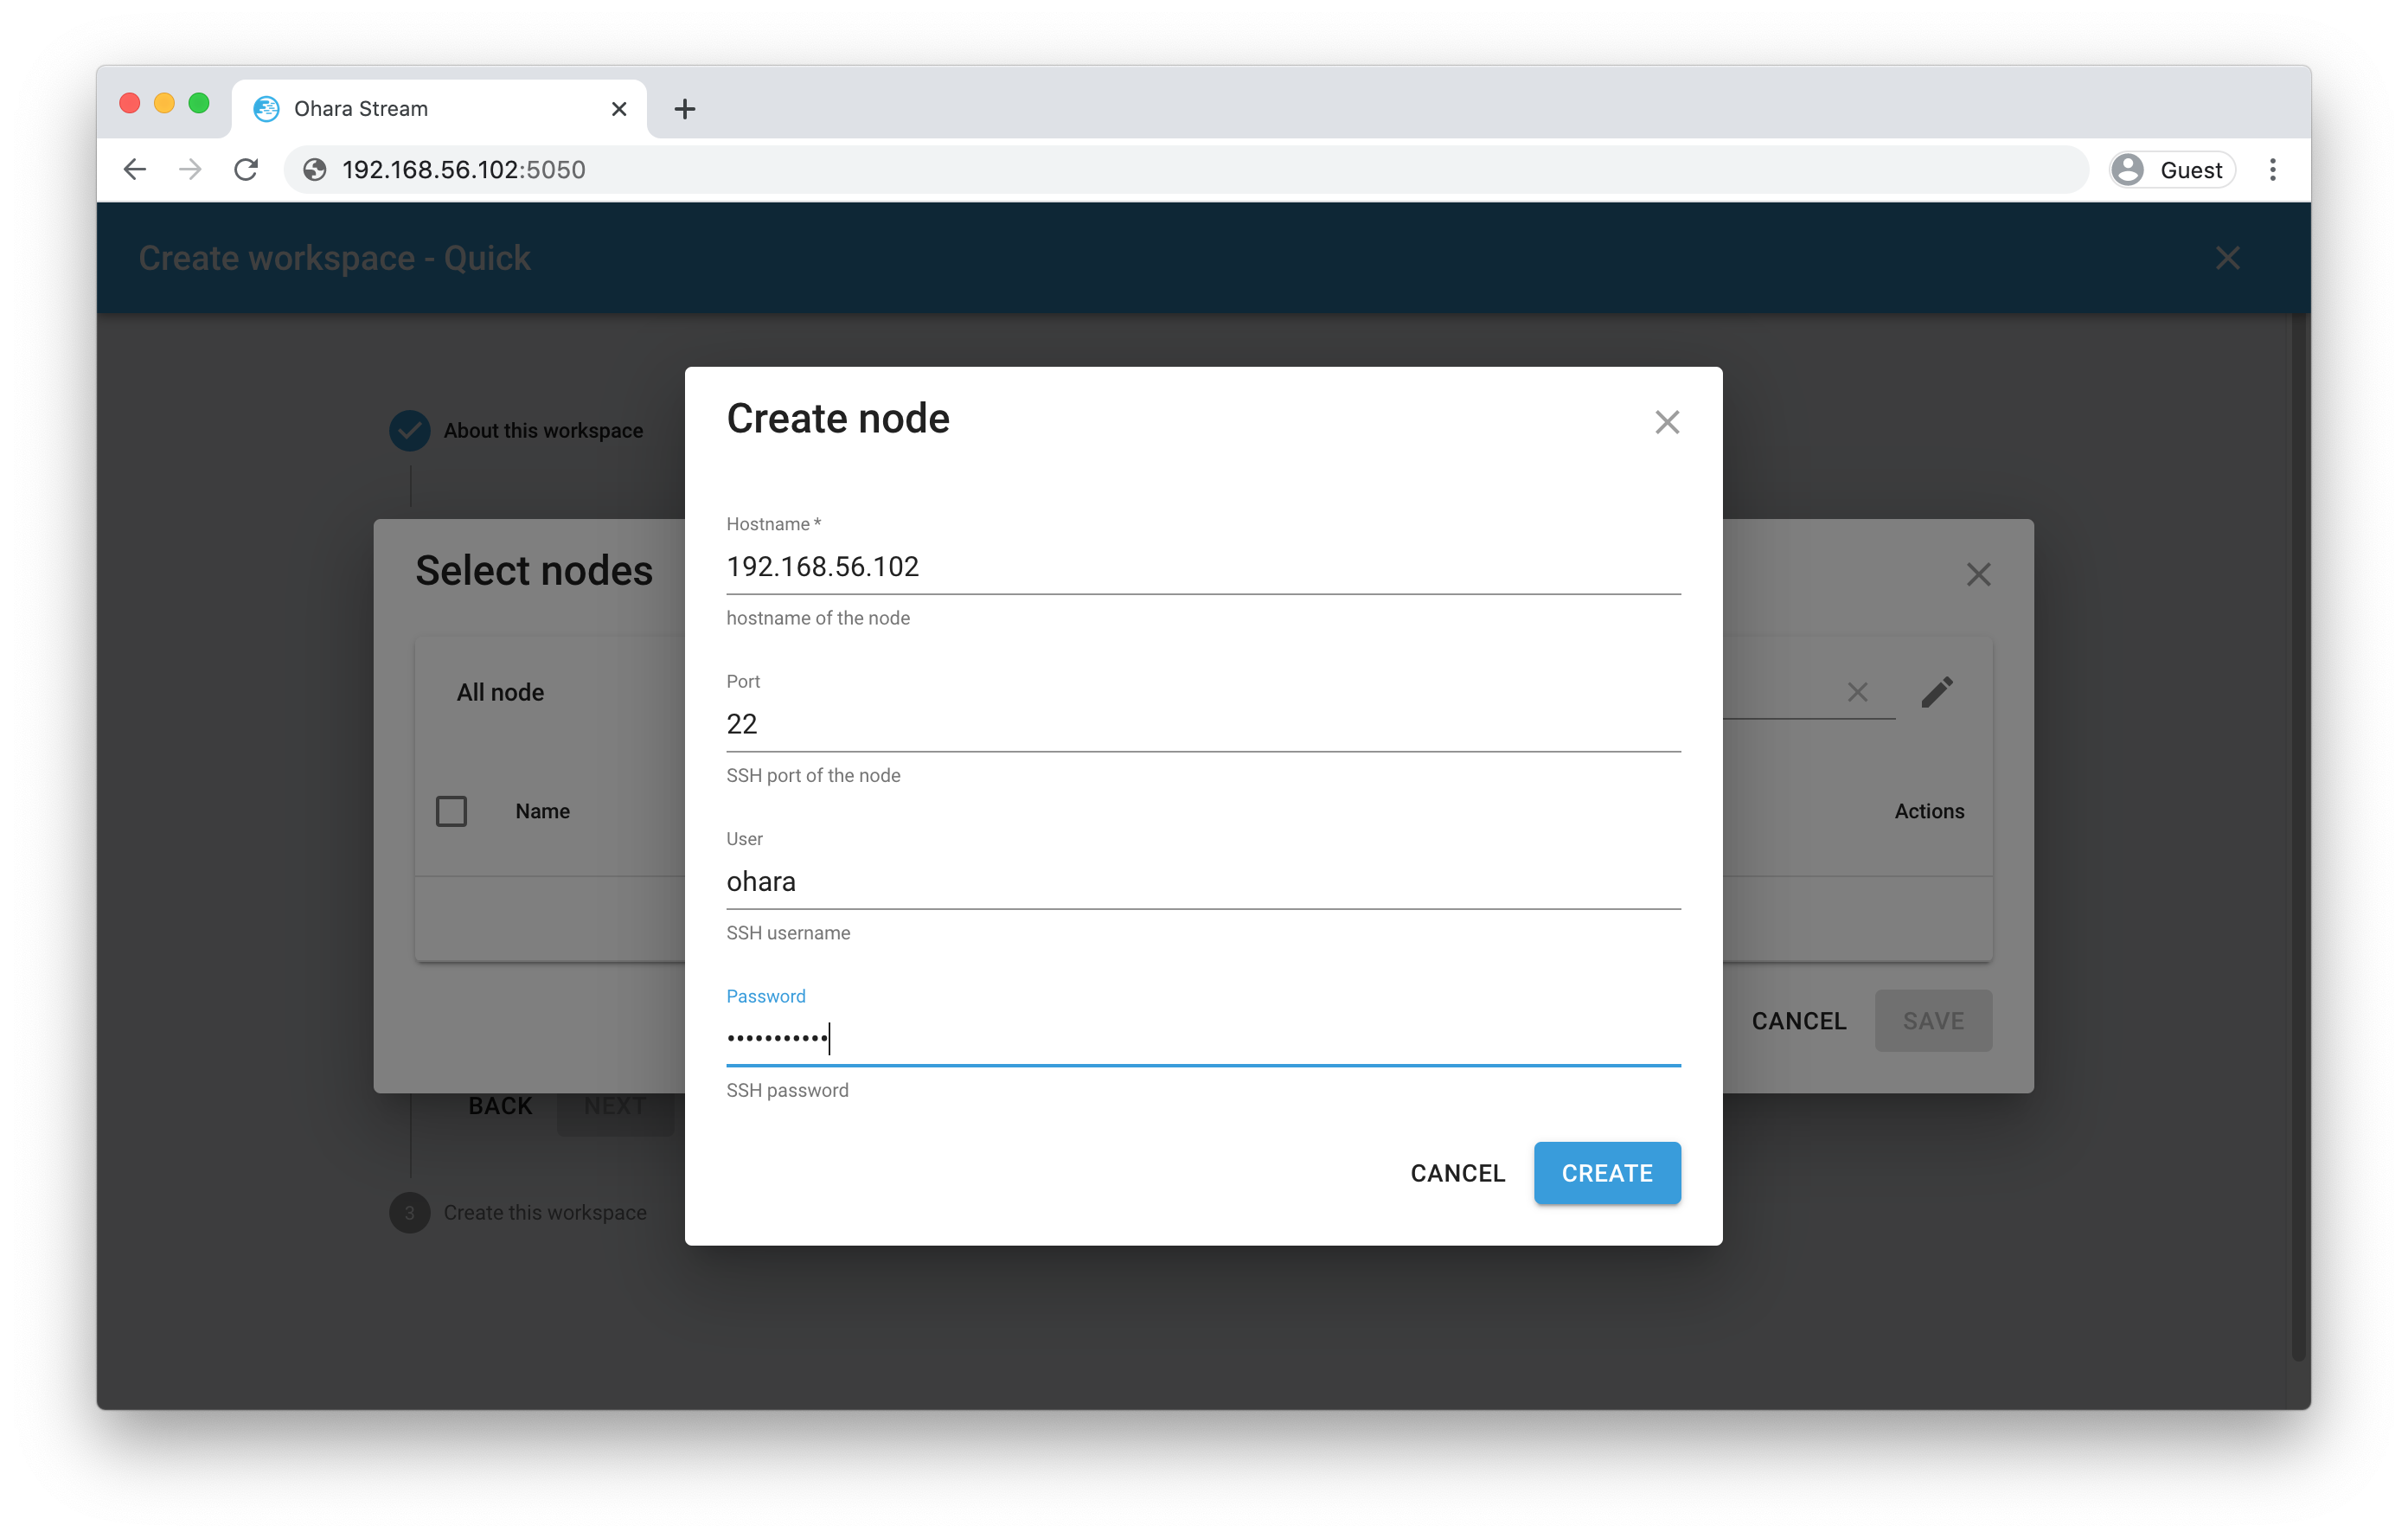
The node should be added into the list. Select the node and click on the SAVE button to close the dialog
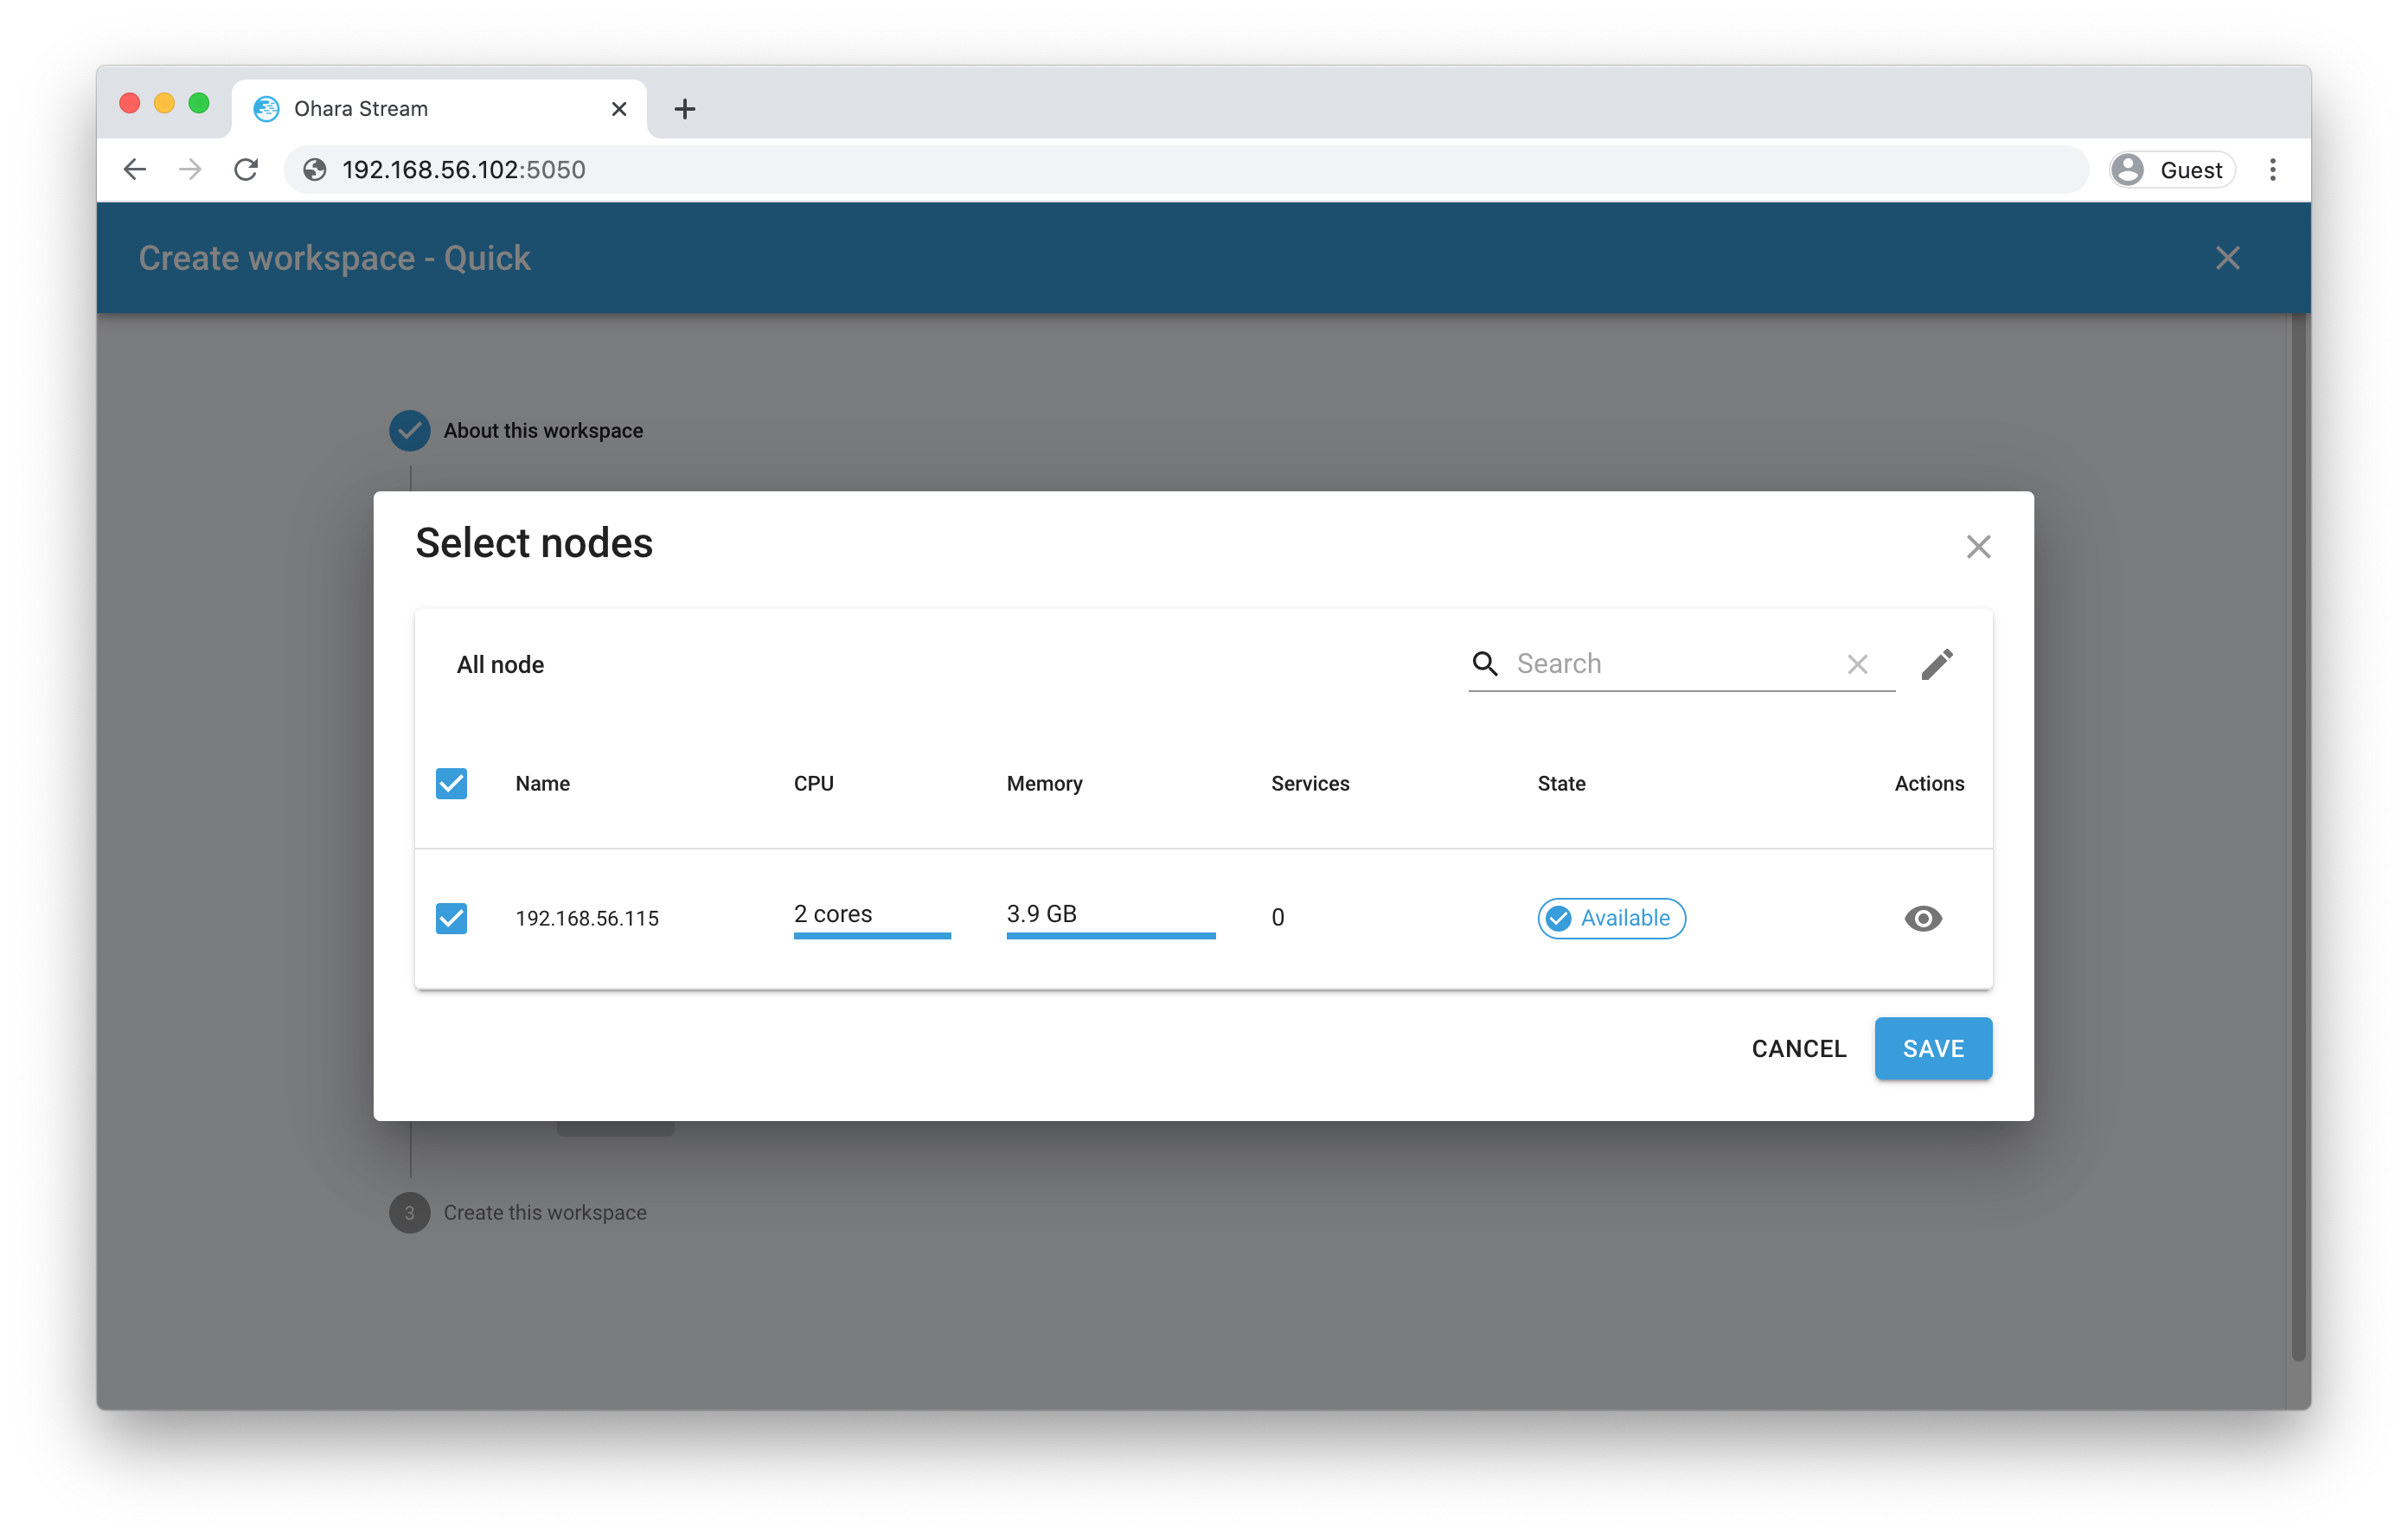
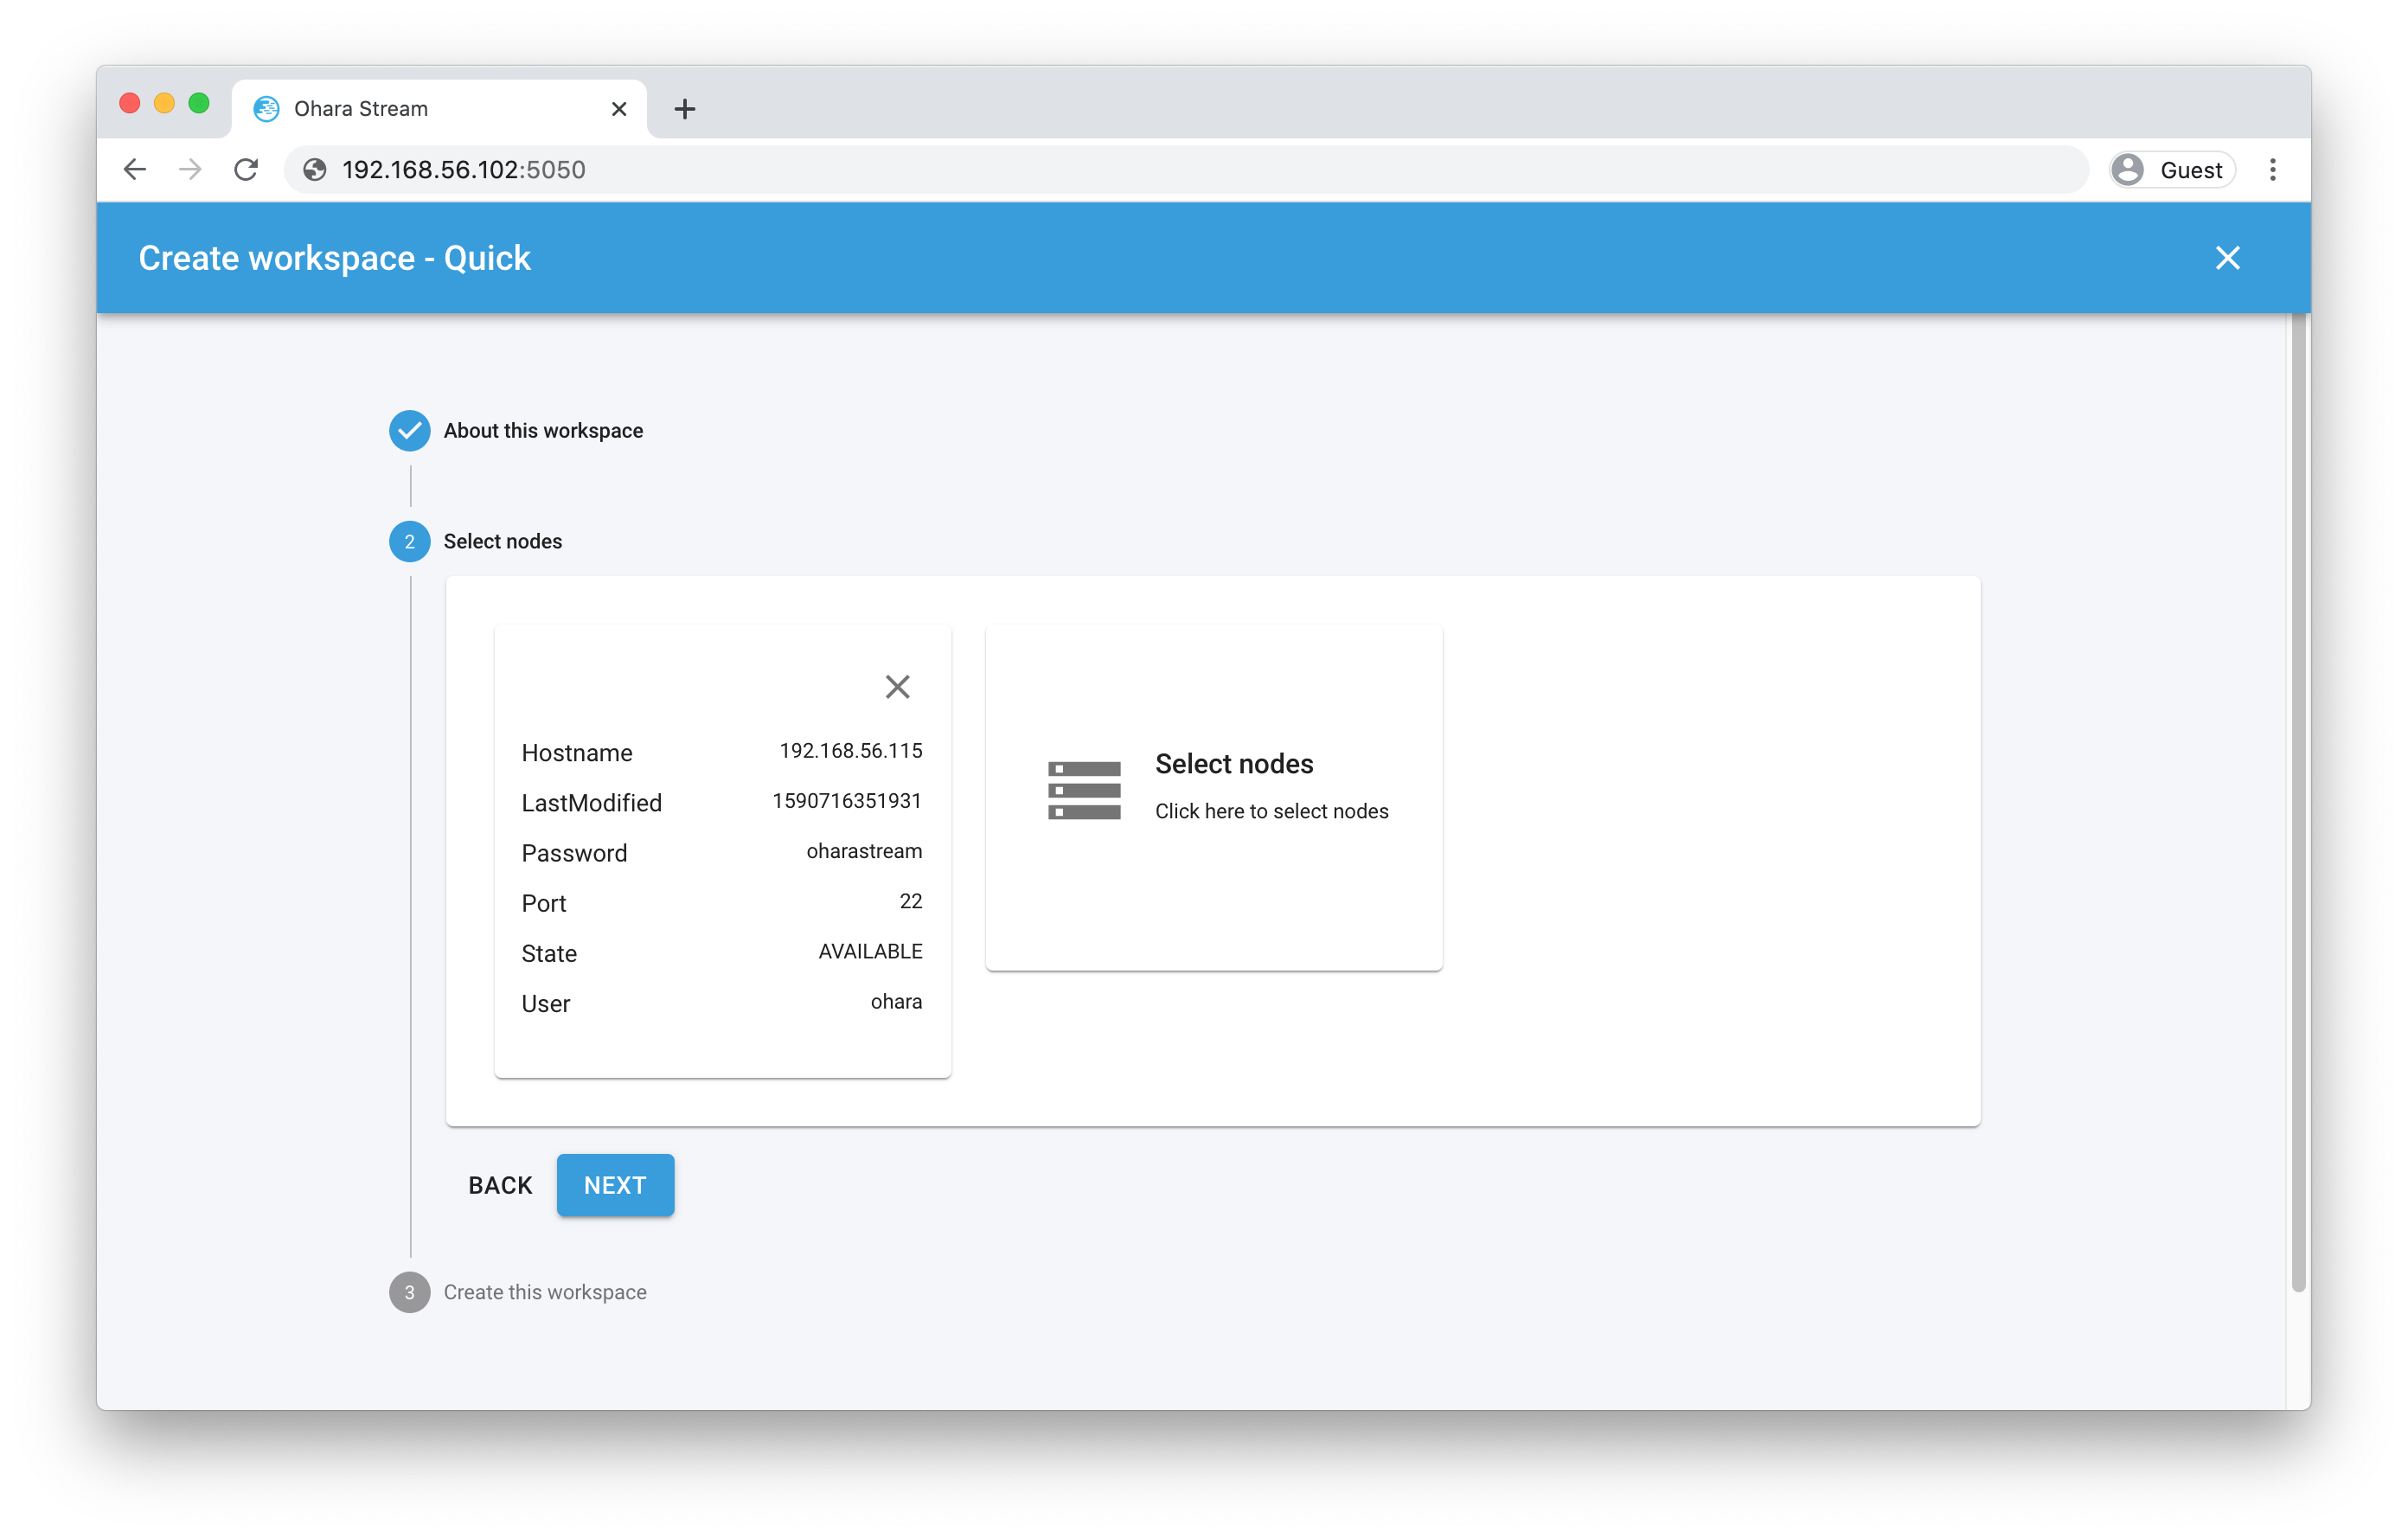
Now, click the NEXT button to finish selecting nodes
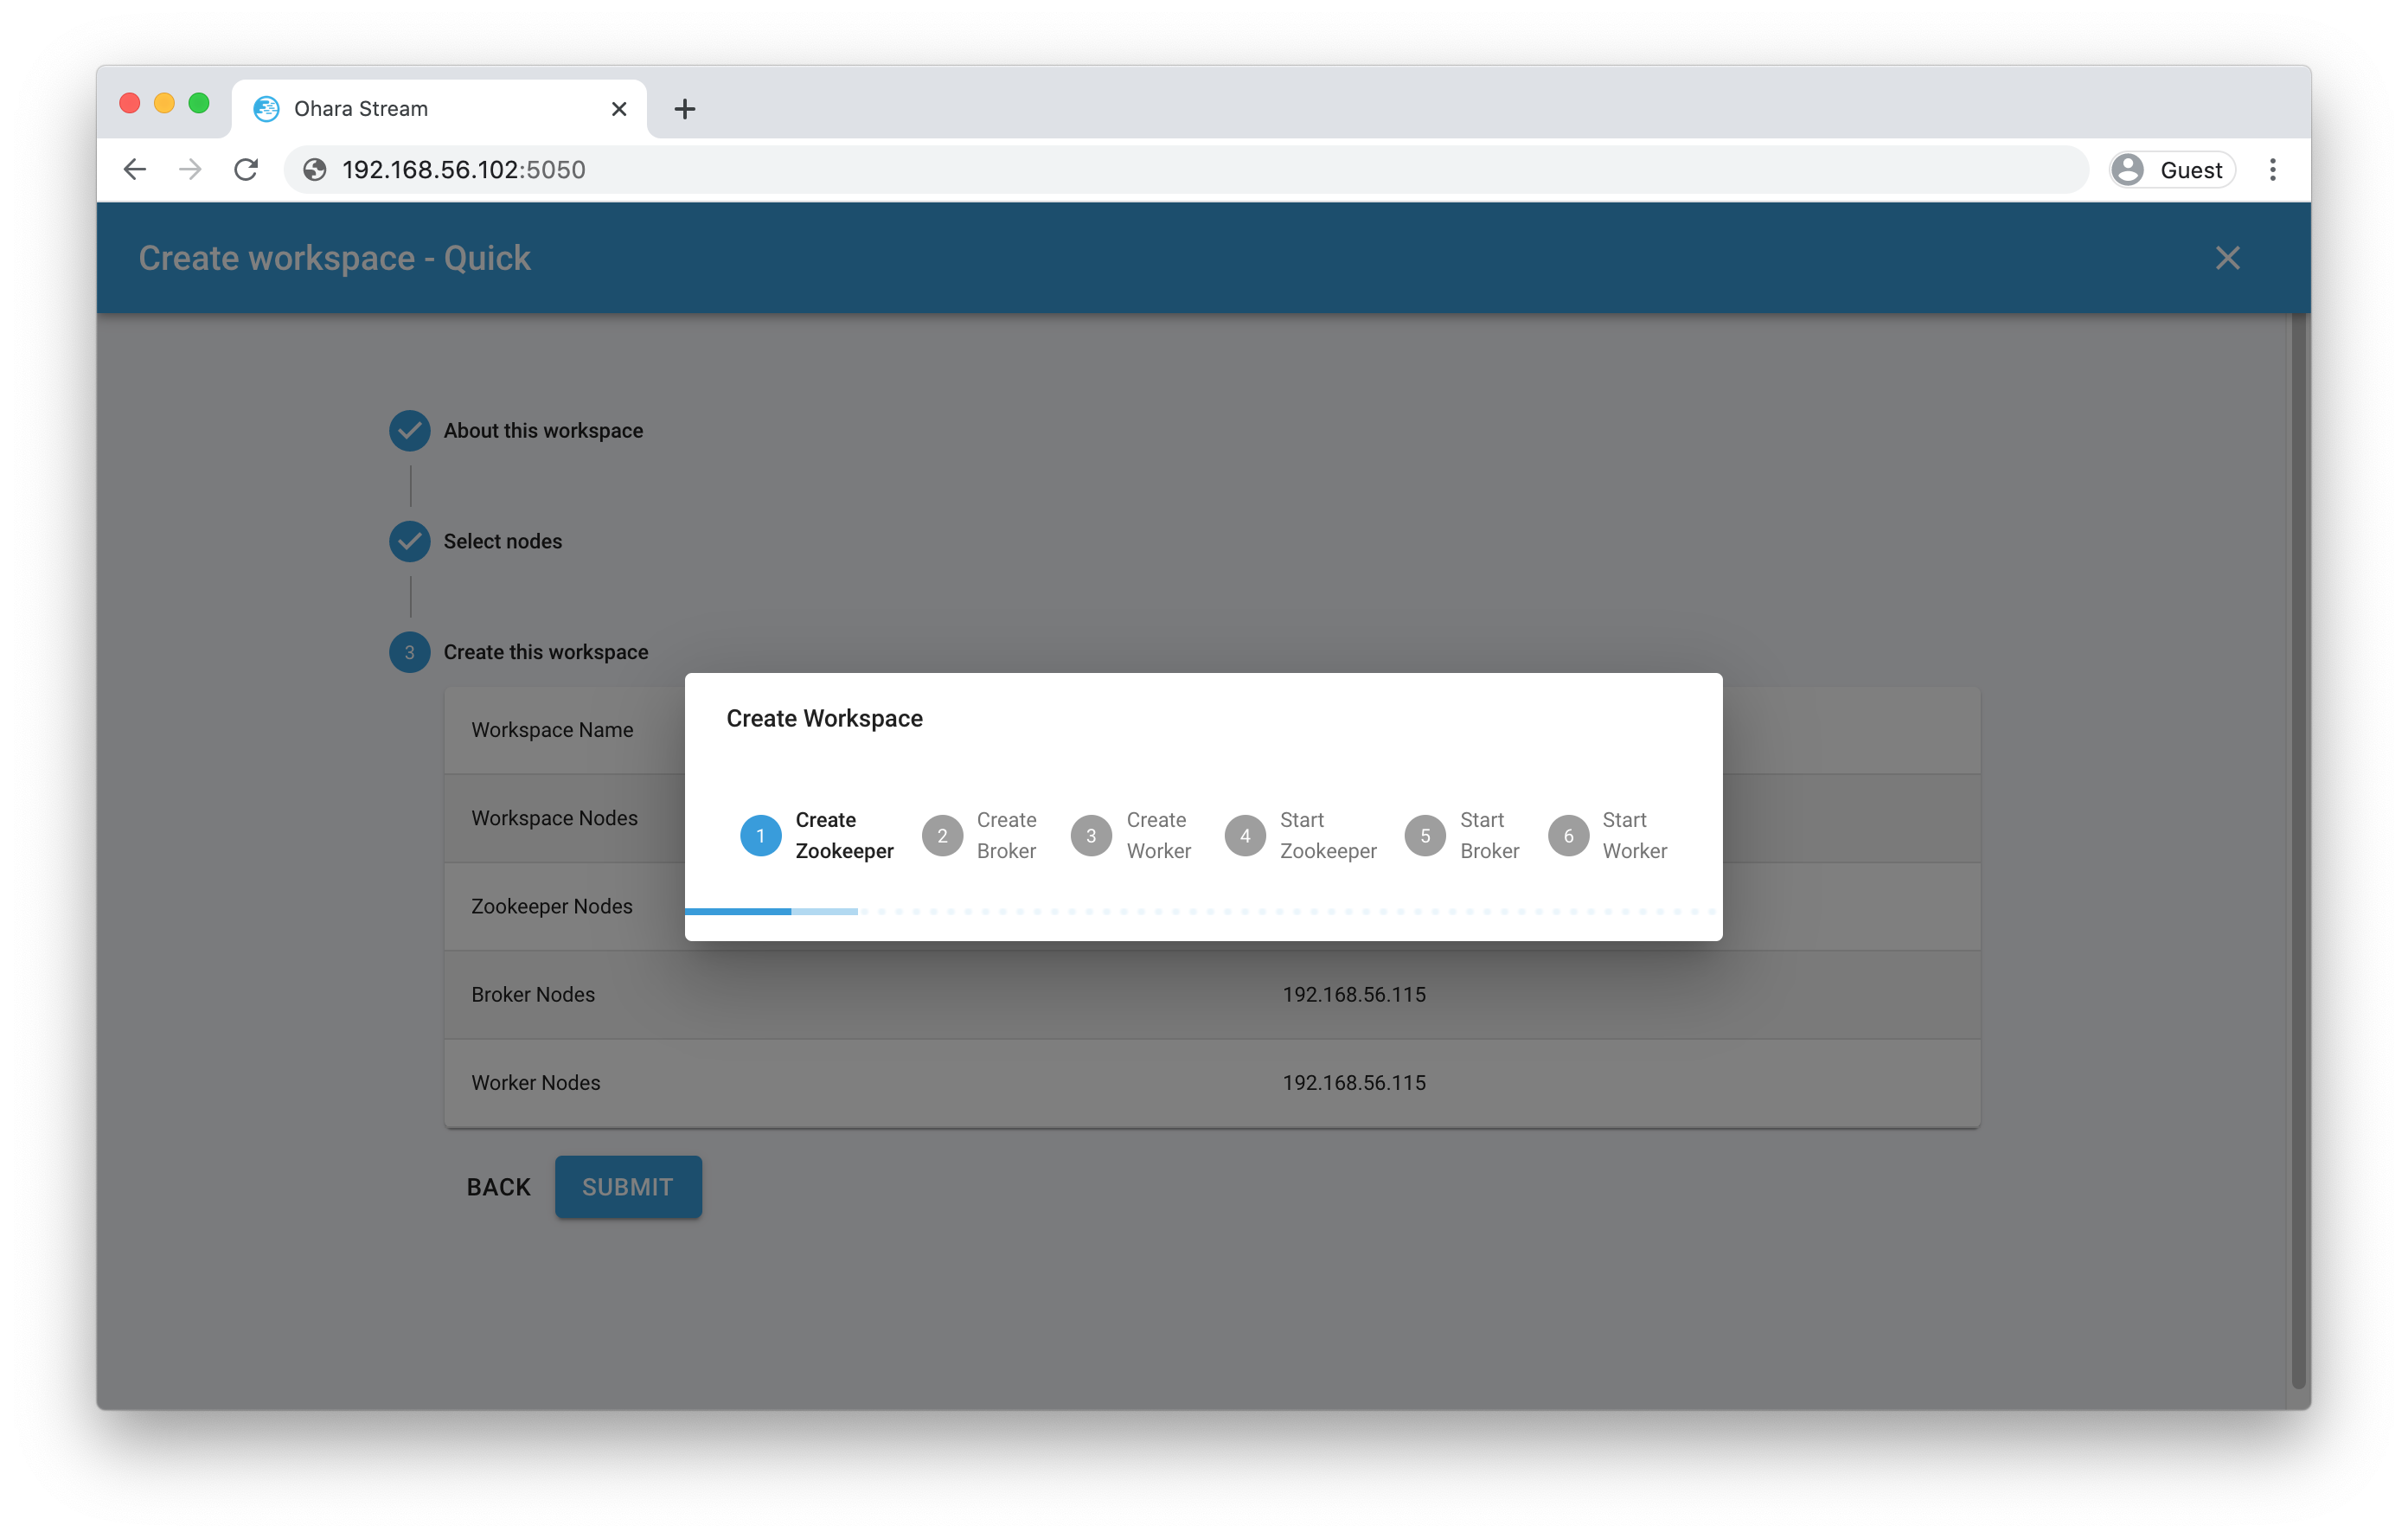
Click on the SUBMIT button to create this workspace.
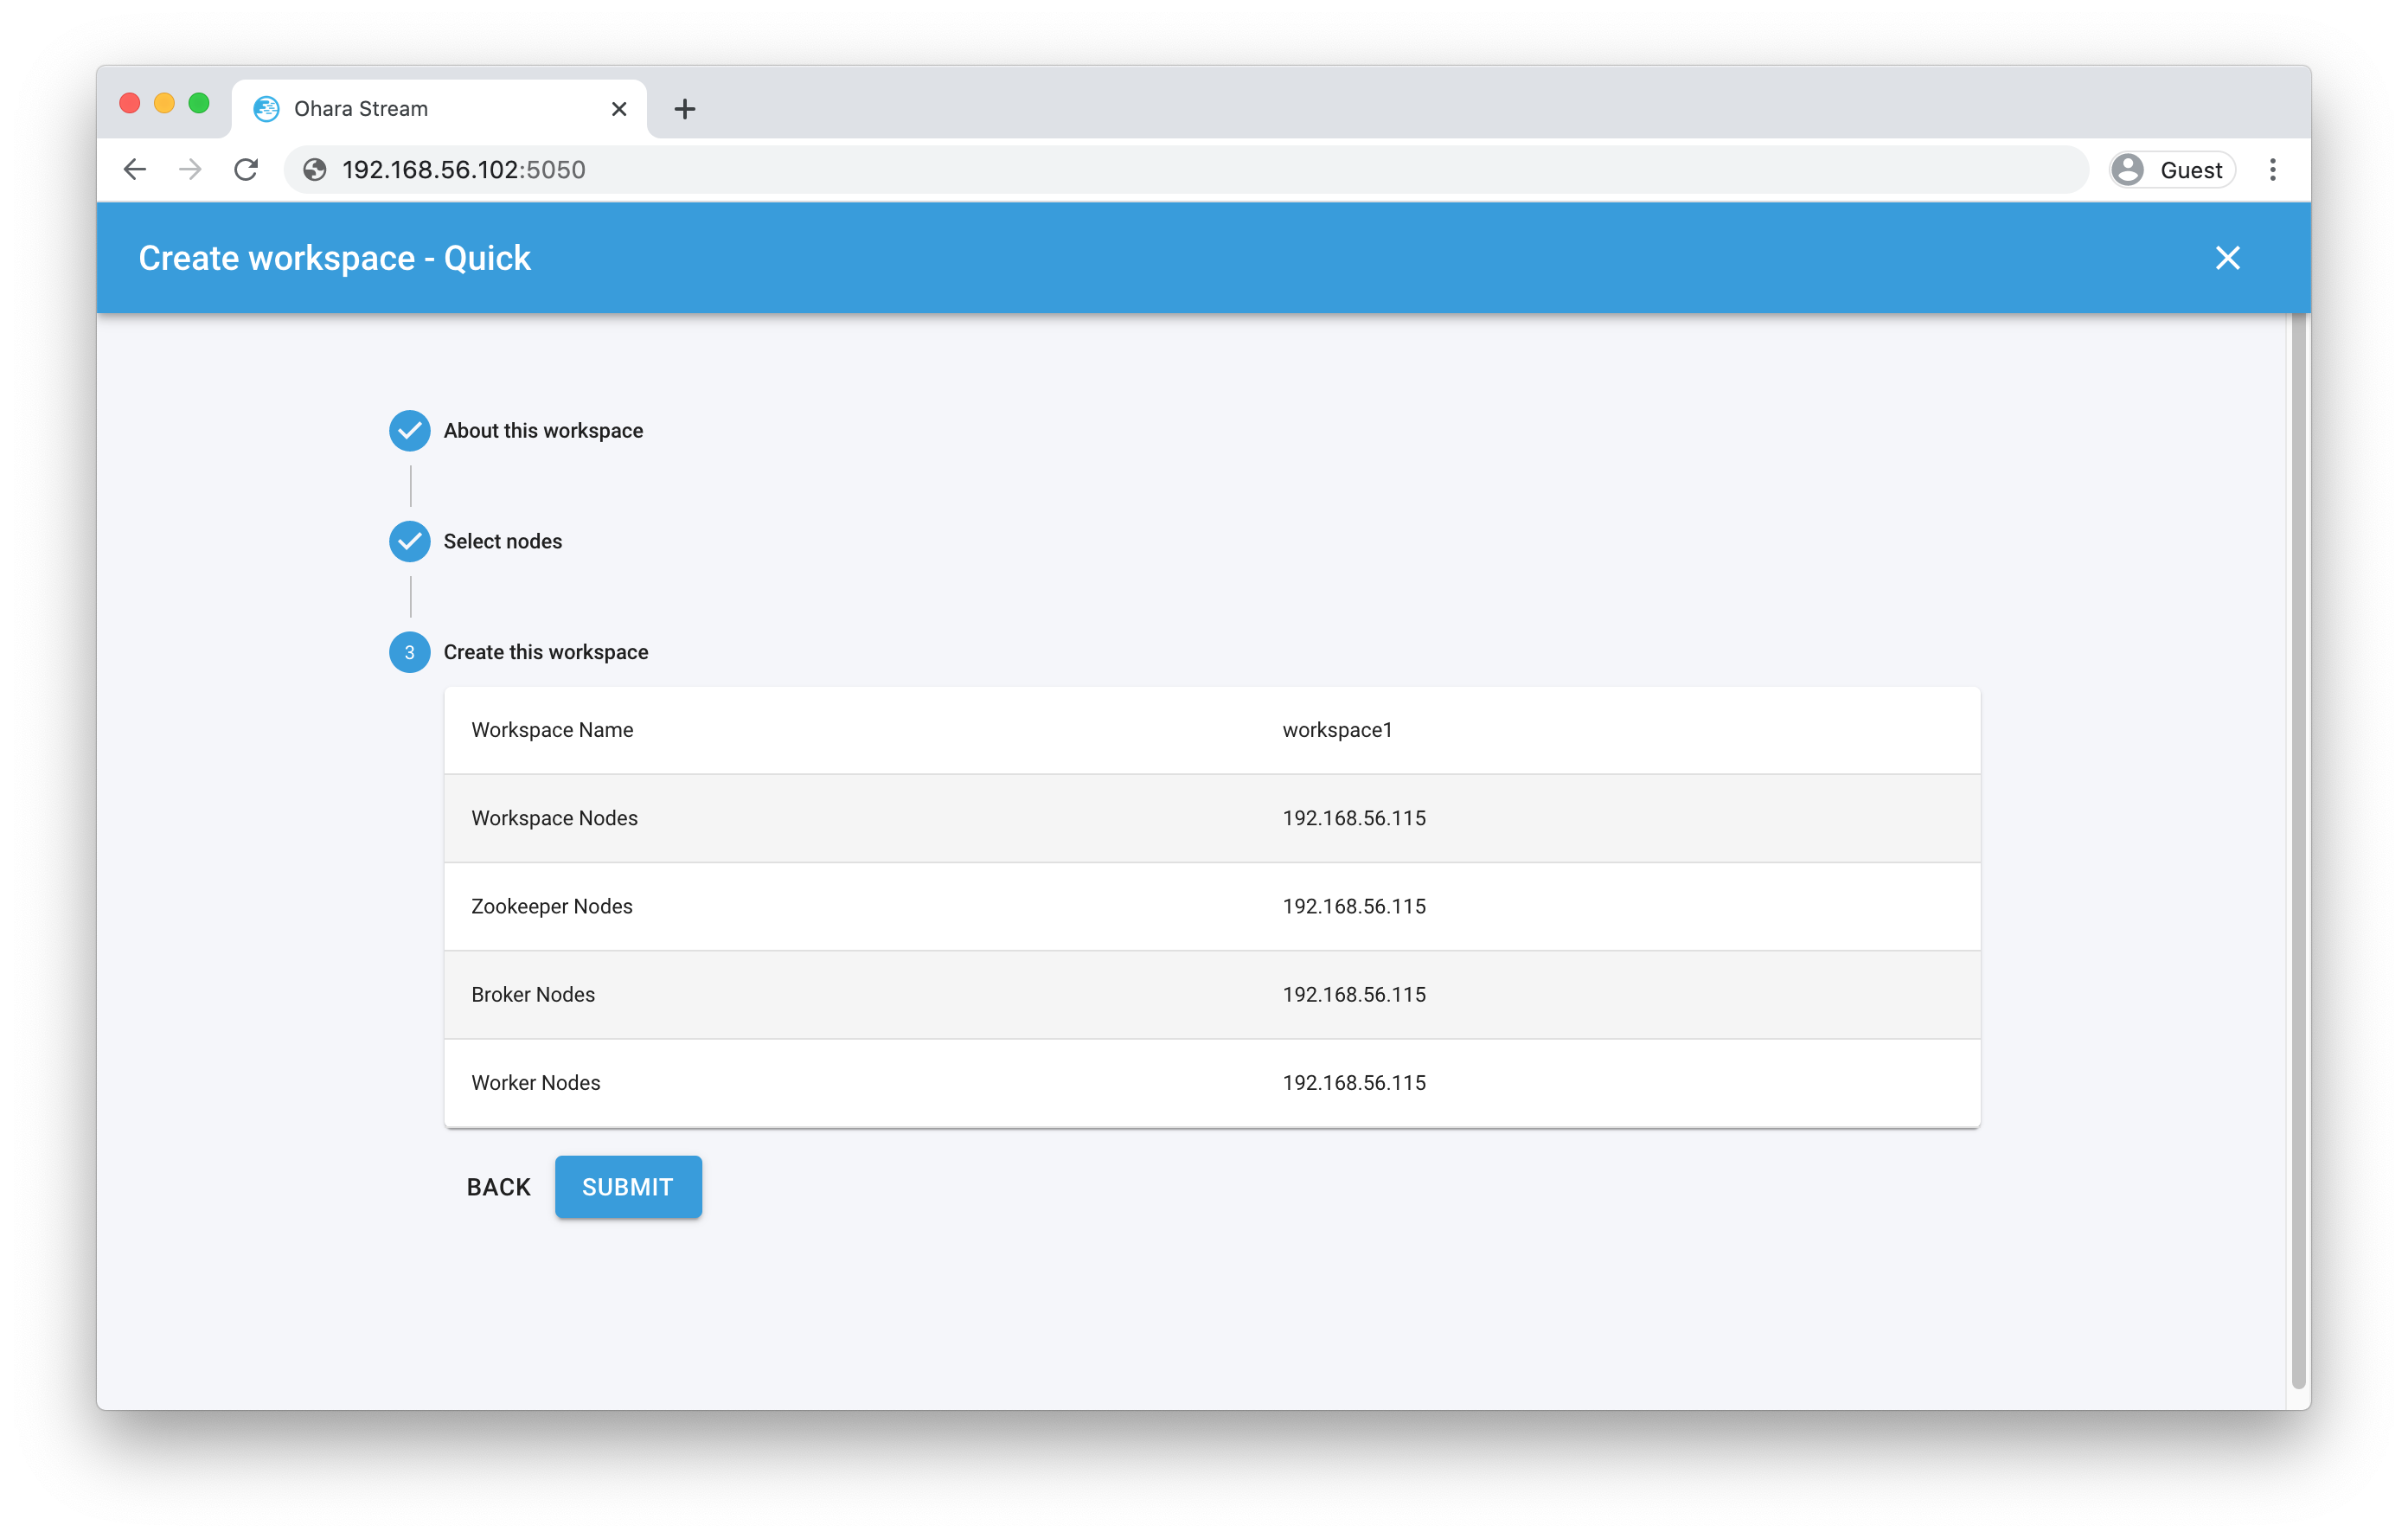
- A new popup window will open where it shows you the creating progress. This usually take a while to finish. Once it’s done, All popup windows will be closed. And the UI will automatically redirect you to the newly created workspace: Workspace1
Tip
You can create more workspace with the plus (+) icon in the App bar.
Warning
Please keep in mind that this is a quick start VM where we run everything on a single node with only 8GB of RAM and 2 CPU cores. We would highly recommend you to add more RAM and CPU core to your VM If you plan to create more than one workspace or lots of pipelines, connectors, streams, etc. This is due to When Ohara is running without enough resources, it could be very unstable and causing unexpected errors.
Create a pipeline
Create a pipeline is fairly simple:
- On the Navigator, click on the plus icon.
- In the popup window, enter the name: pipeline1 and click the ADD button

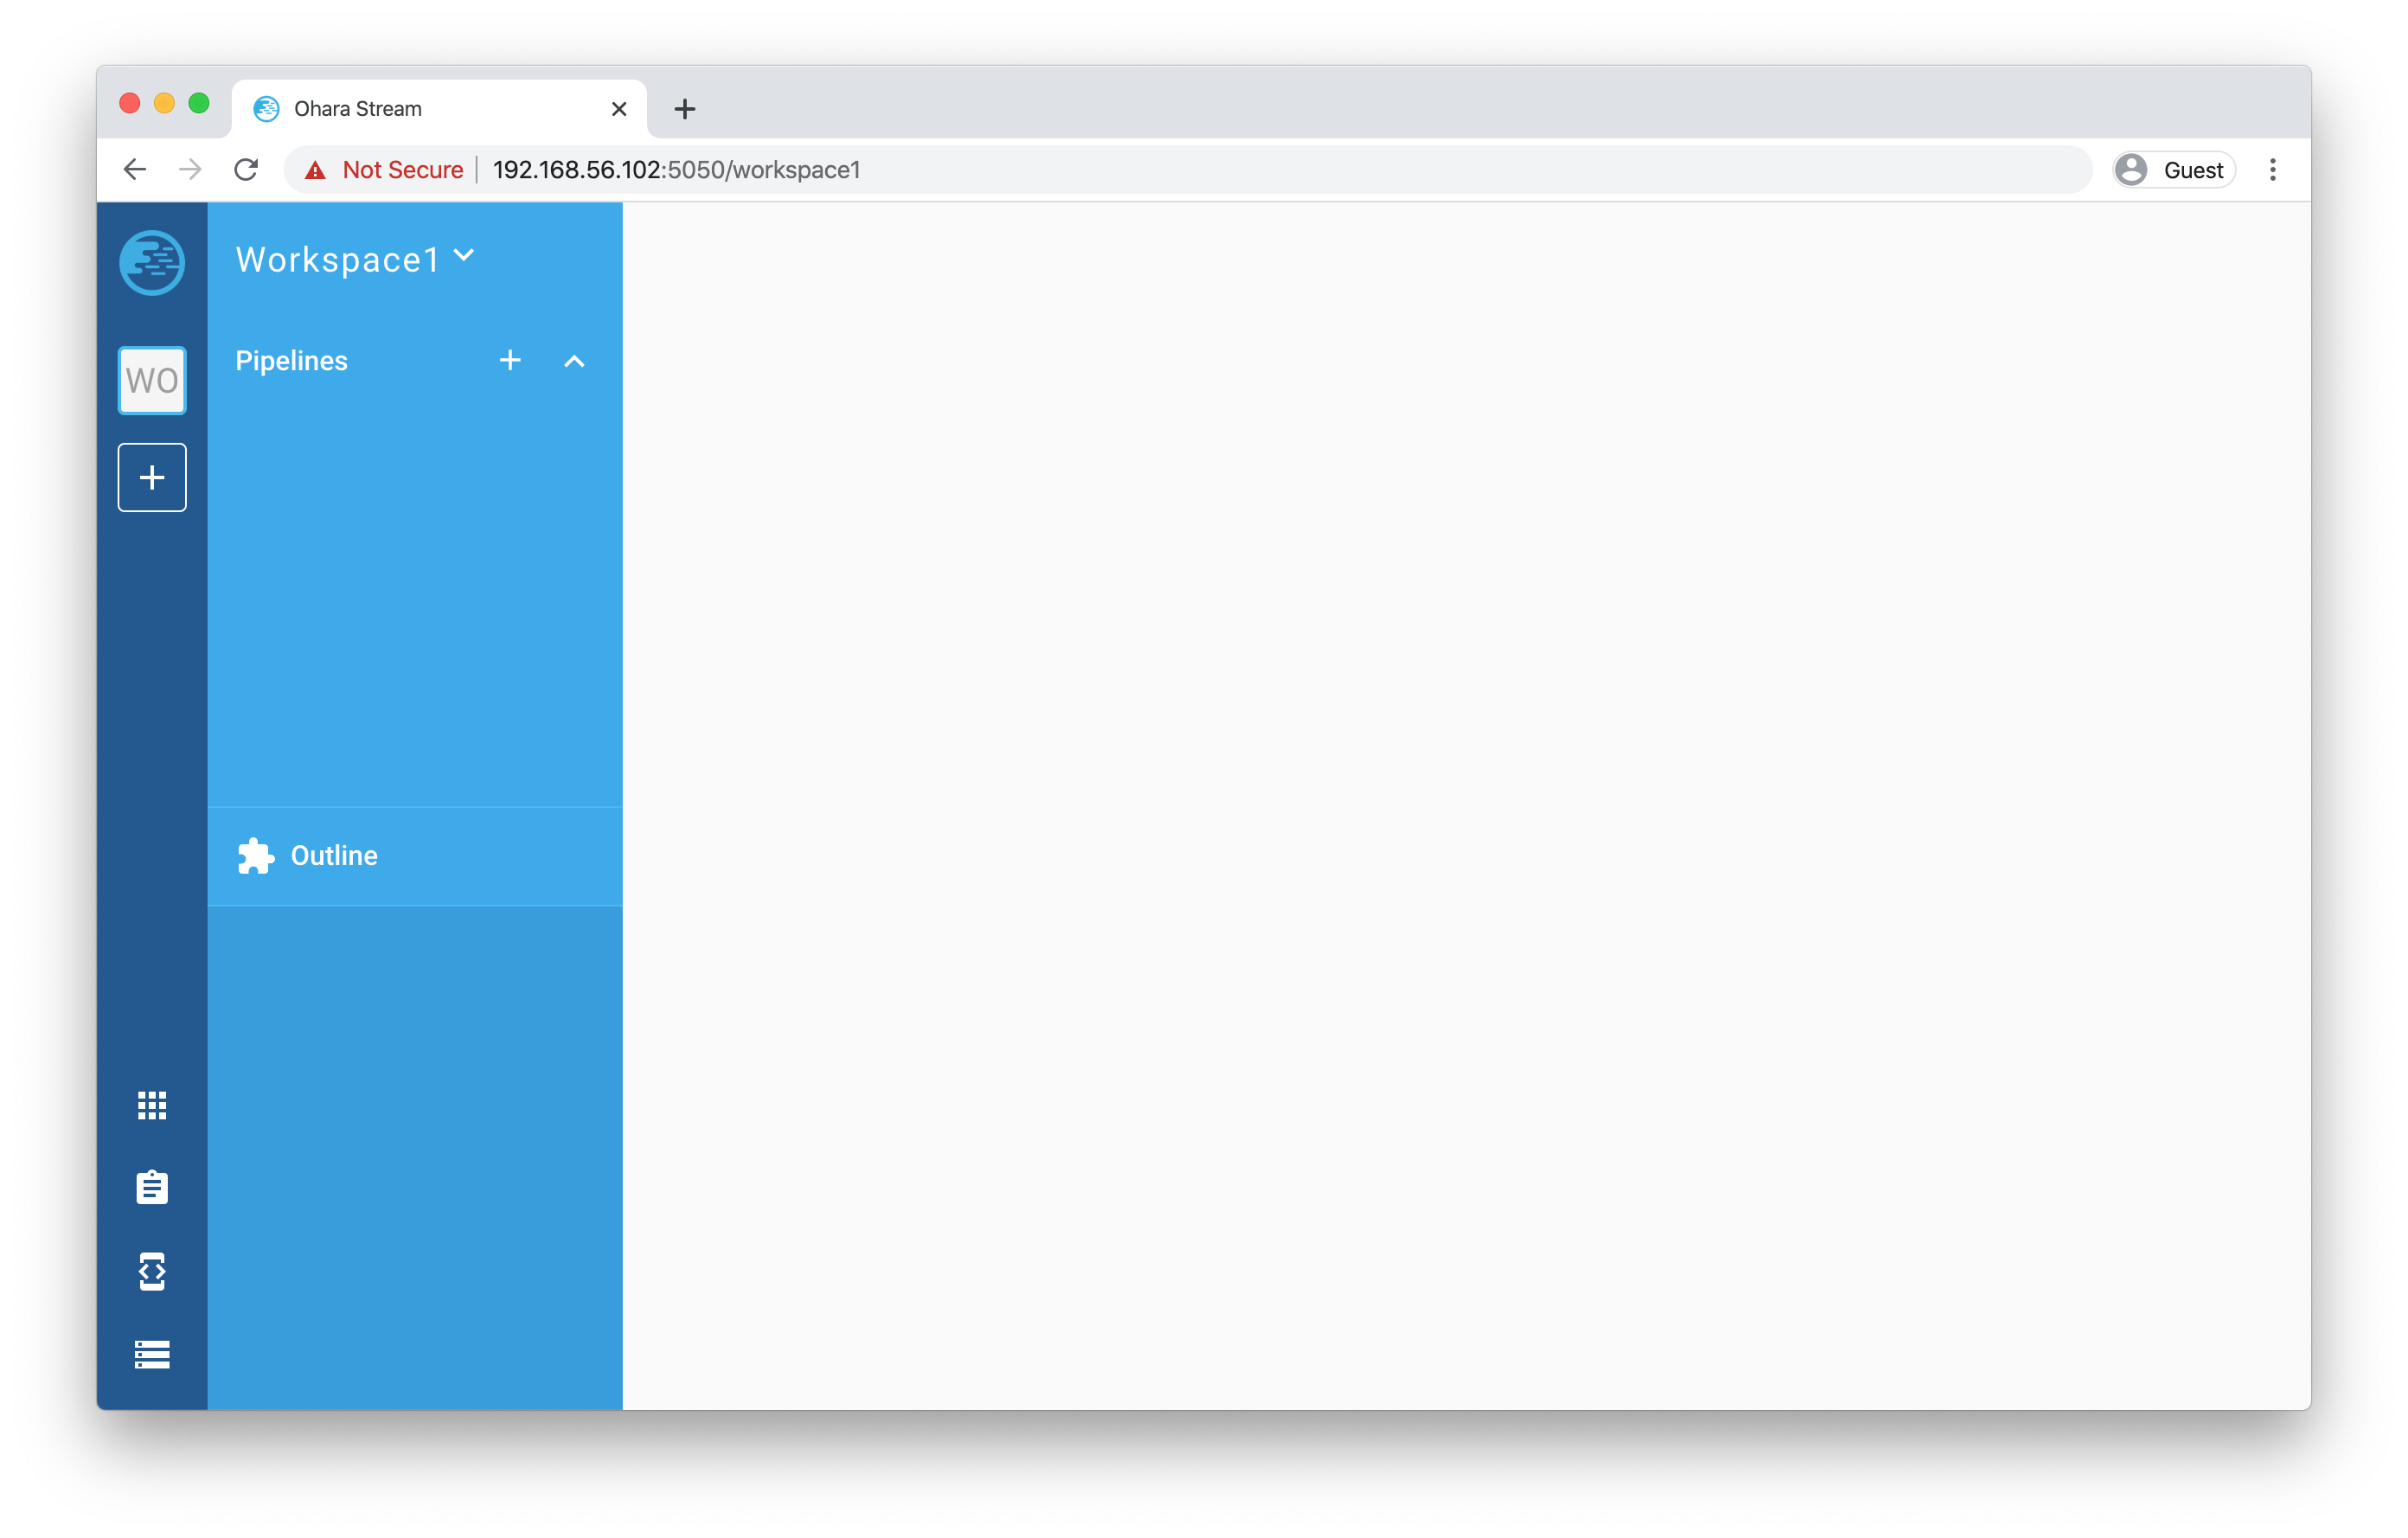
- The new pipeline will be added into the workspace and listed in the Navigator. And just like creating workspace, you are also redirected into the pipeline you just created.

Add pipeline components
Since workspace and pipeline are both ready. We can now add new components into the pipeline. The pipeline connection we’re about to create will look like: FTP source -> topic -> stream -> topic -> FTP sink.
Before we start, please make sure your FTP service is ready and let’s get started!
Drag and drop new pipeline components
FTP source:
- From the Toolbox (Please refer to the overview image for what is Toolbox)
- Click on the title “Source”, the panel will be expanded and display all available source connectors
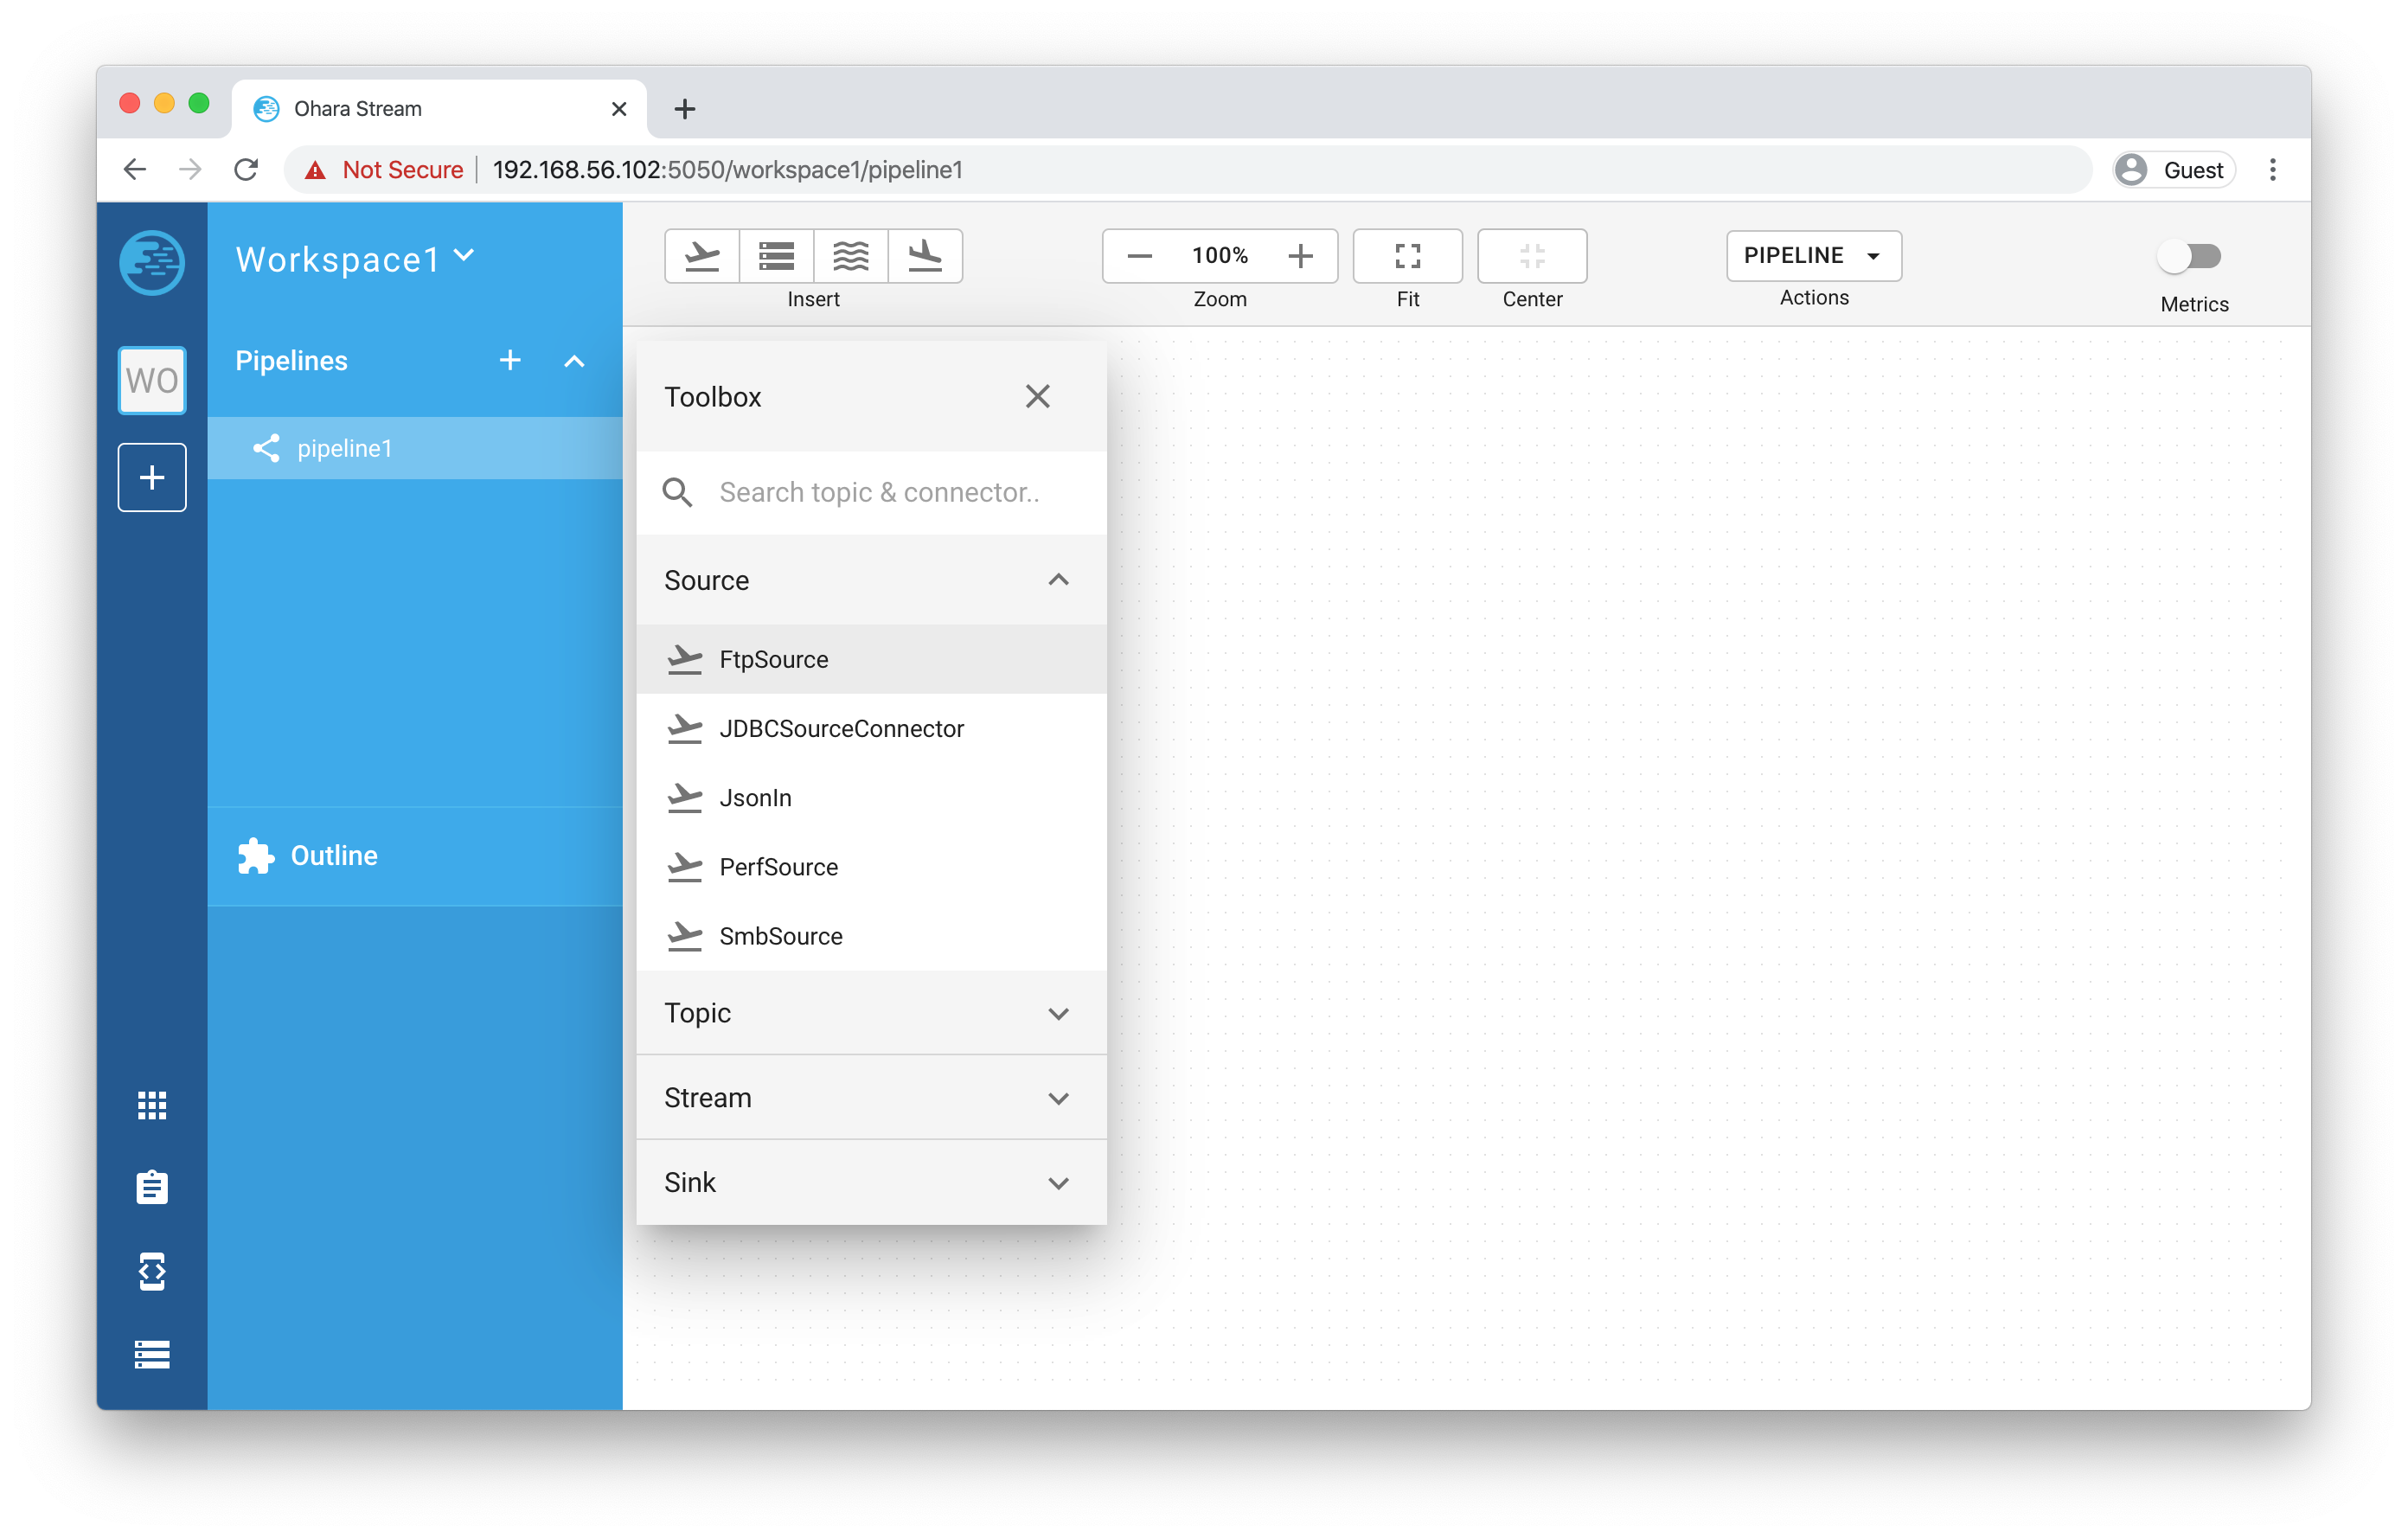
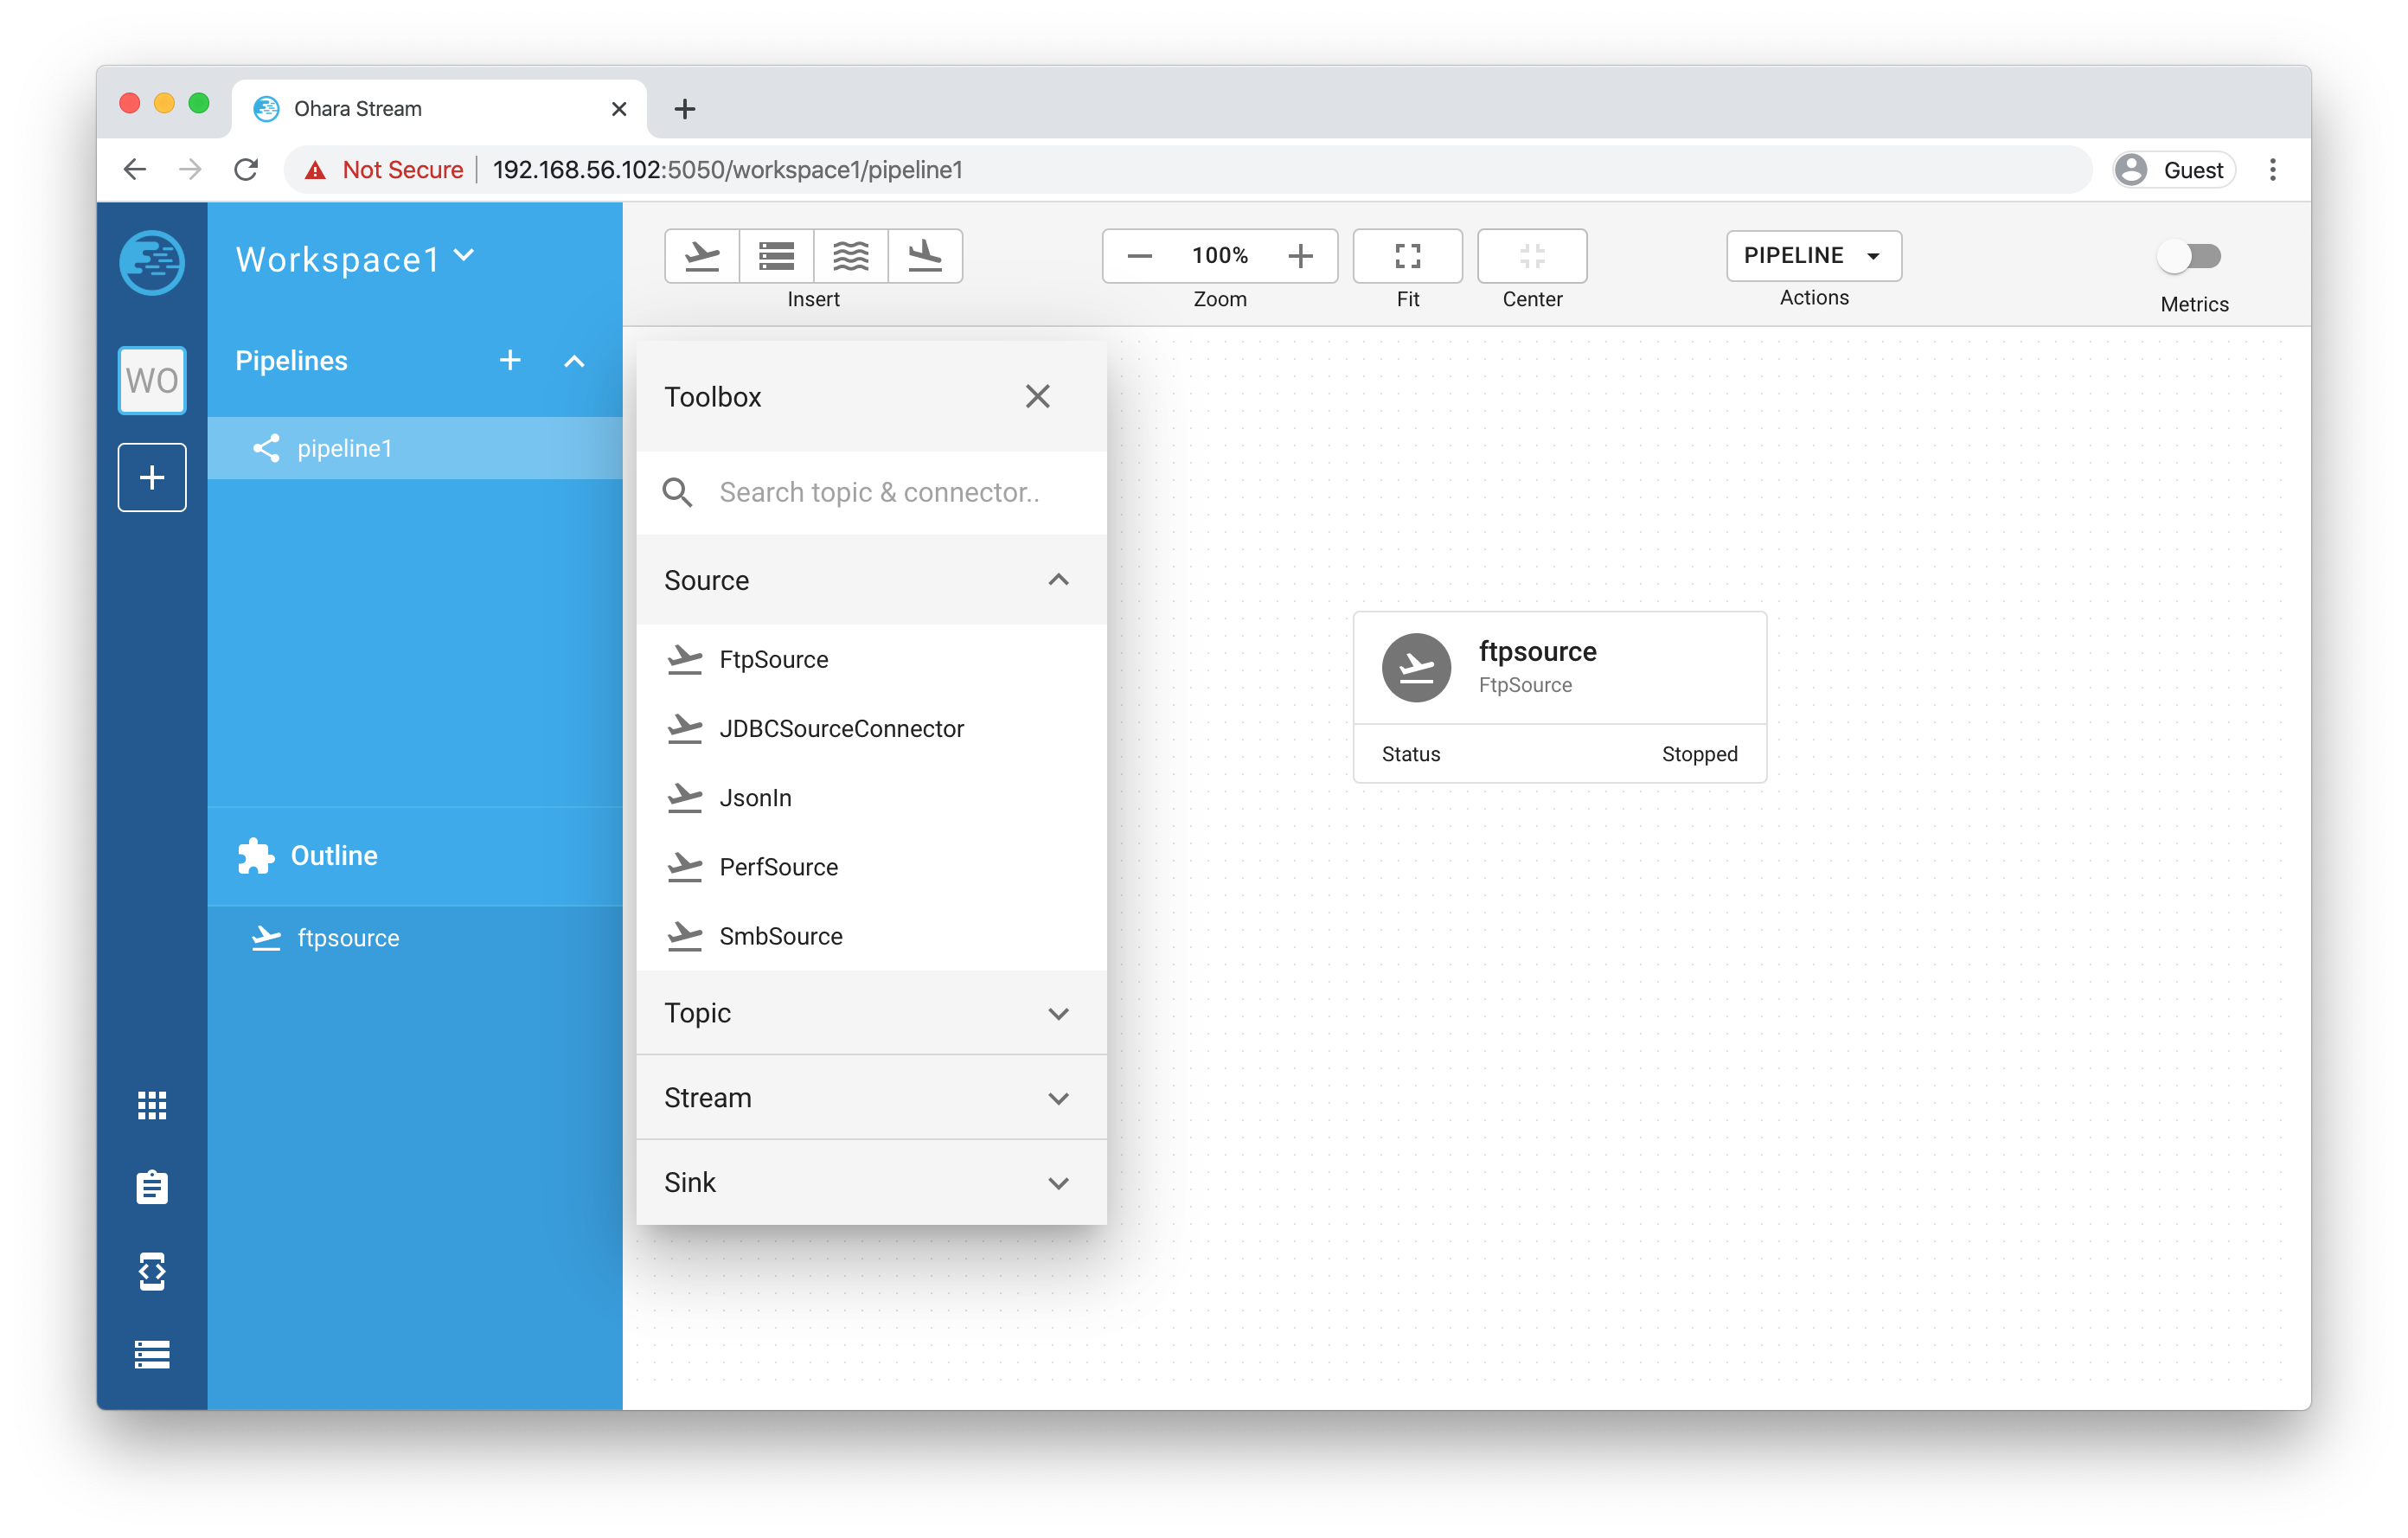
- Drag the “FtpSource” from the list and drop into the Paper (Don’t worry about the position. This can be changed by simply dragging the component after they’re added into the Paper). A prompt will be asking you about the connector name, let’s name it “ftpsource” and click the ADD button.
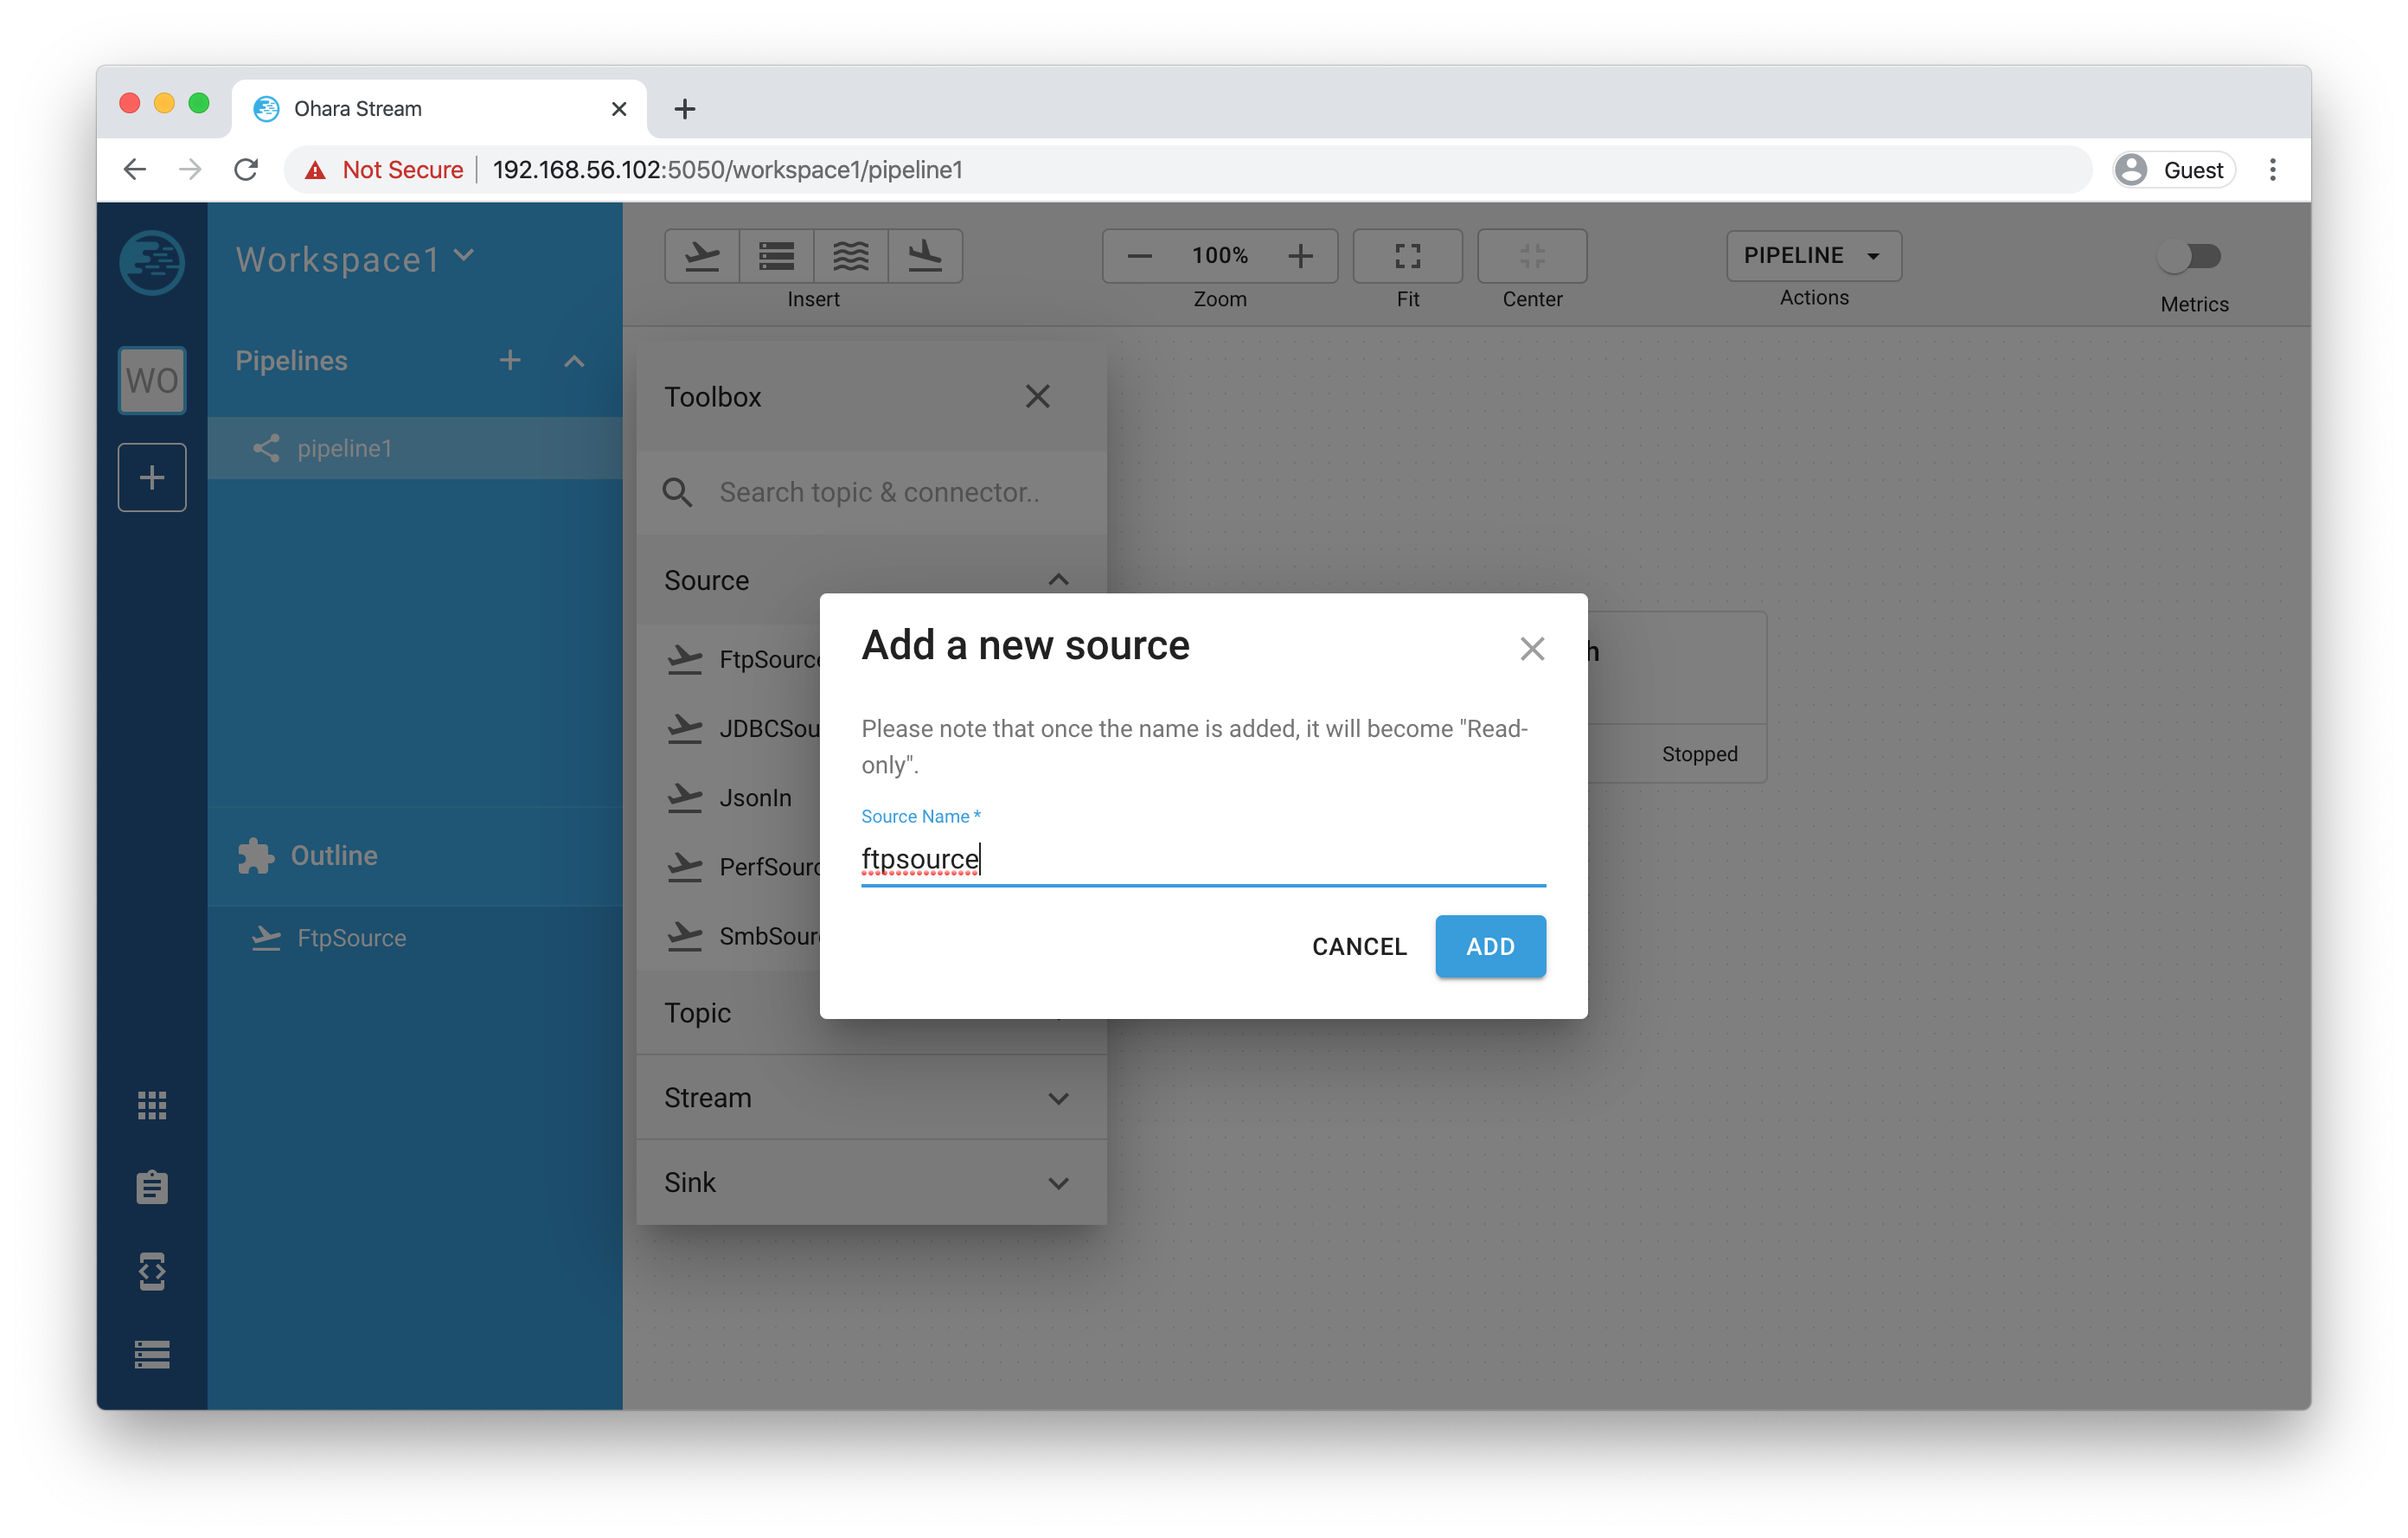
- The FTP Source connector should display in the Paper:
Now, hover over the FtpSource connector, a couple of buttons will show up. These are action buttons, let take a quick look and see what can we do with them (from left to right):
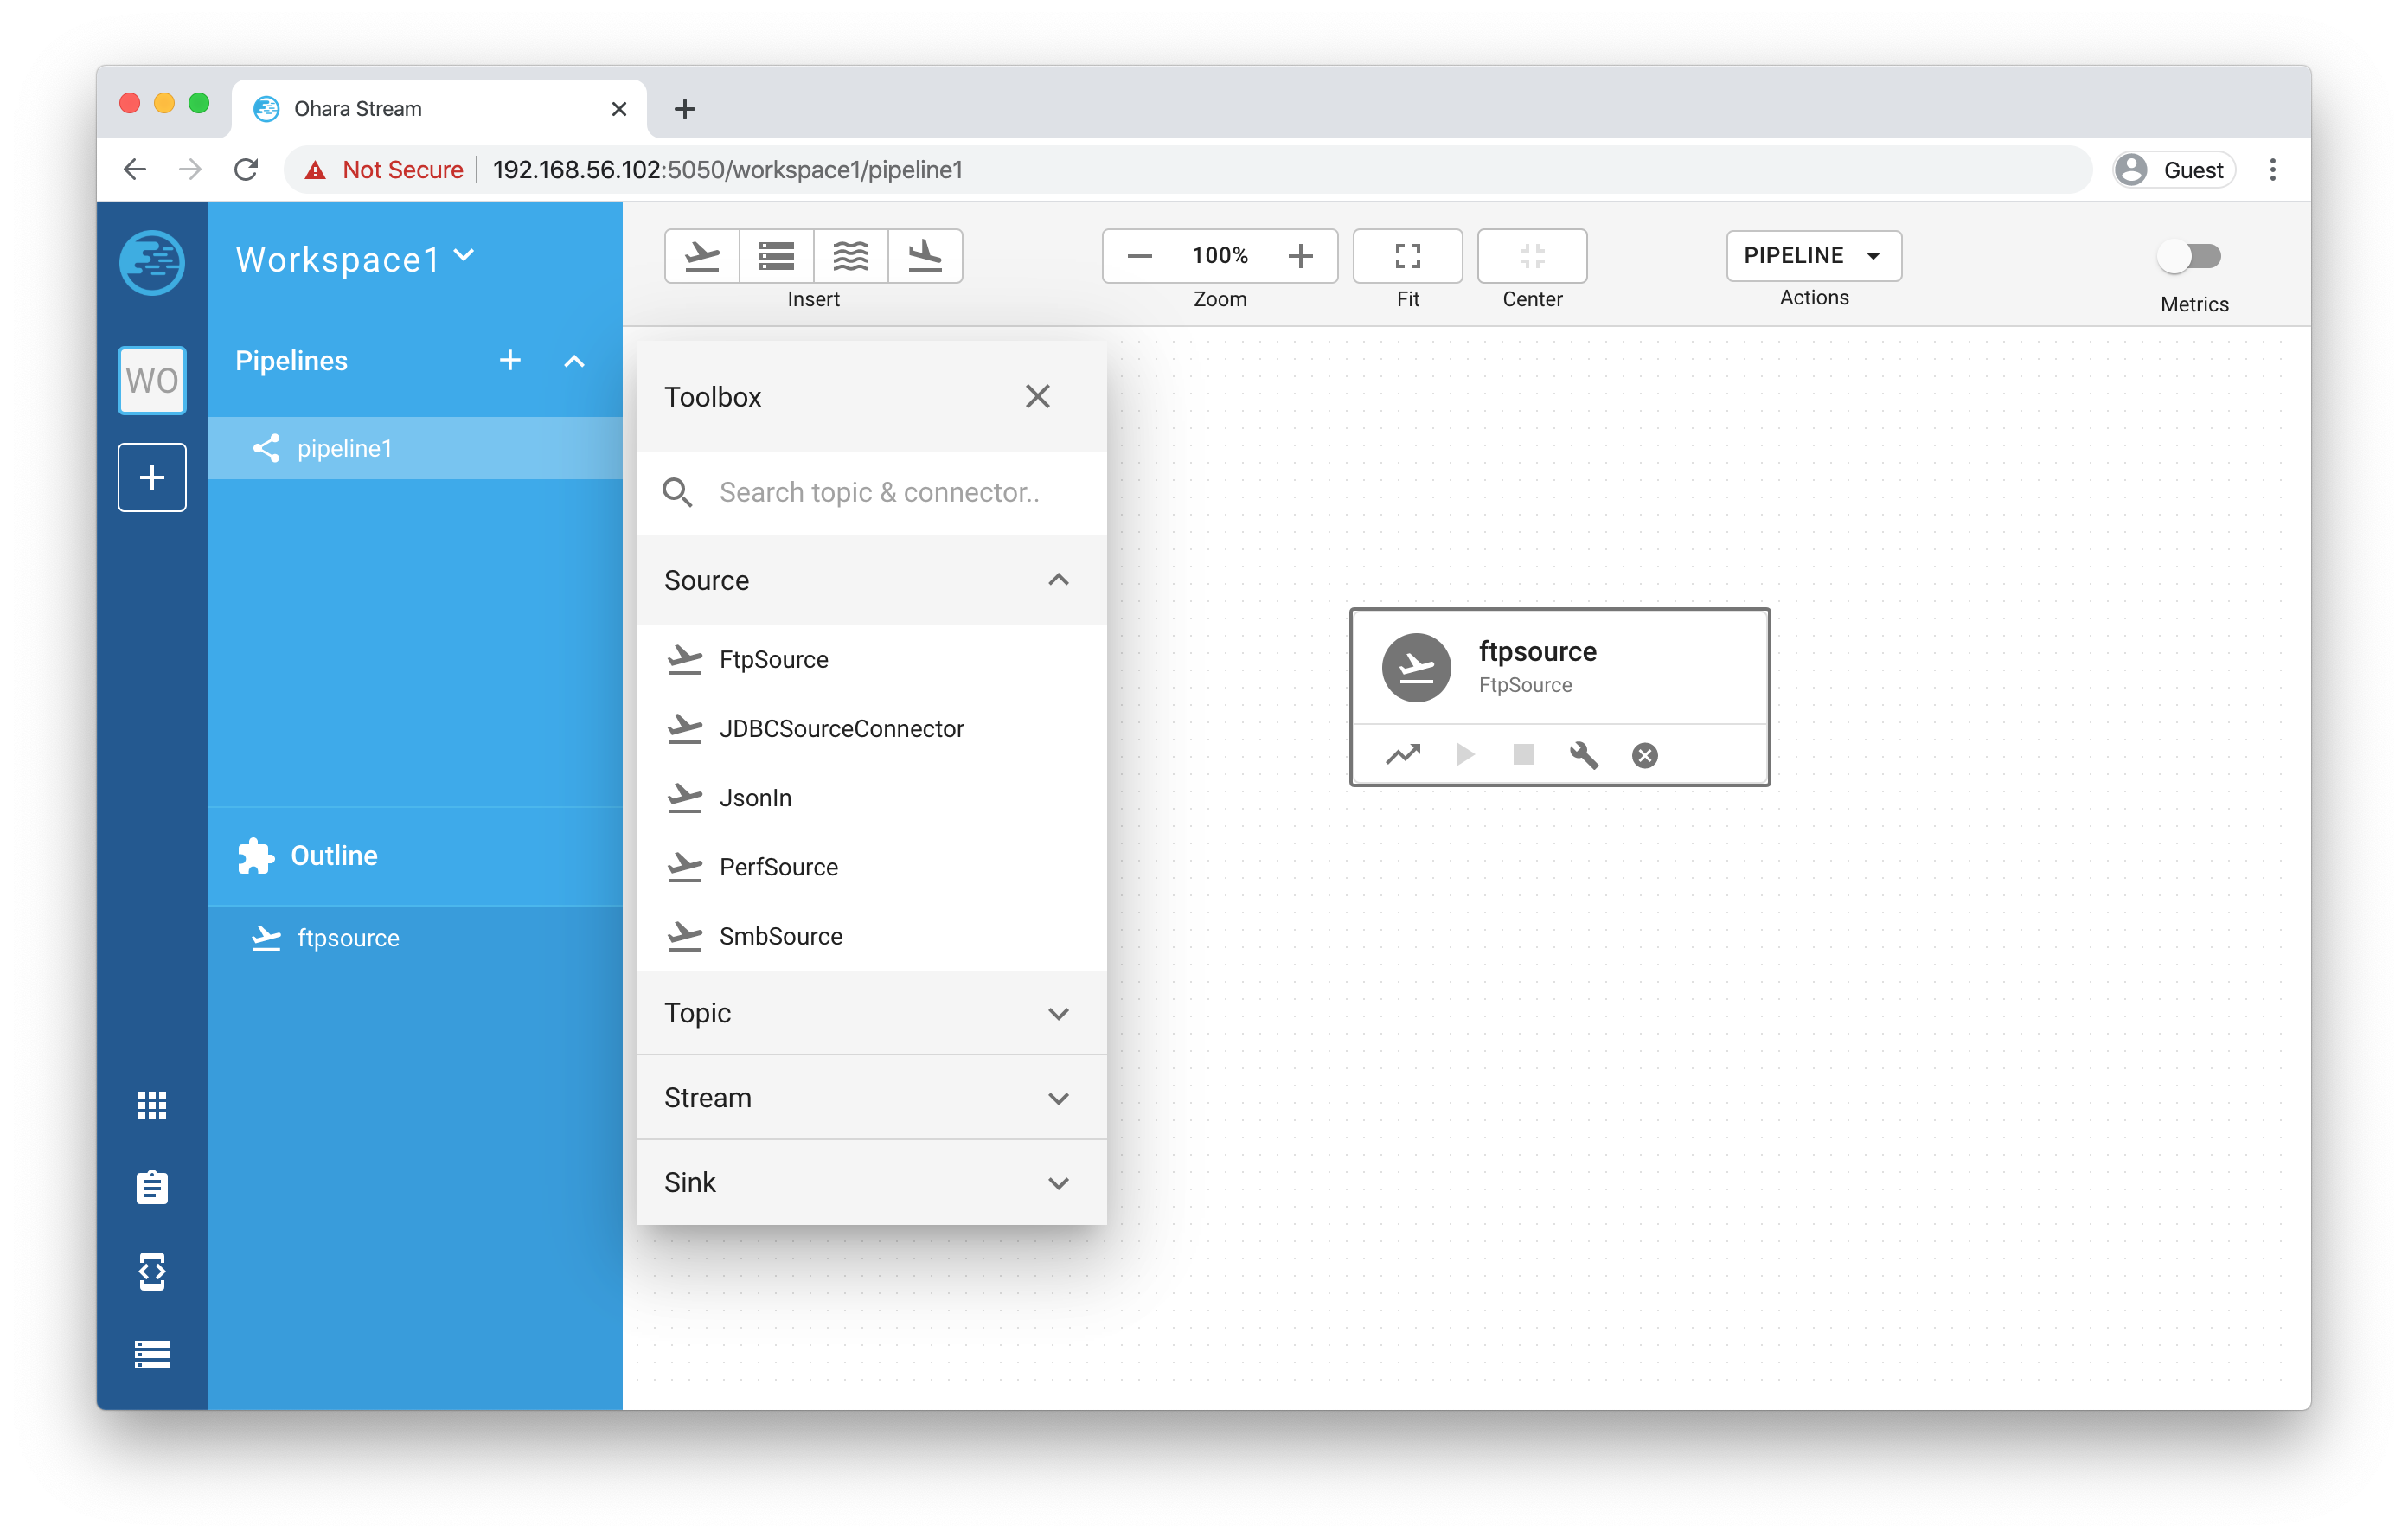
Link: create a new link, once a link is created you can move your mouse and the link will follow along your mouse position. To link to another component, you can hover over it and do a mouse left-click. To cancel the link creation, just click on the blank within the Paper.
Tip
A link can also be interacted with. You can remove it by clicking on the “x” button. And click on any point of the link creates a vertex. The vertex can be moved and tweaked to change its position. You can also delete a vertex by double clicking on it.
Start: start a component. Once the component is properly configured, you can then use this button to start the component.
Stop: stop a running or failed component
Configure: open the Property dialog and fill out necessary configuration for the component.
Delete: delete the selected component.
Okay, that’s enough of these button things. Let’s click on the “configure” icon (a wrench) and fill in the following fields (Note that you need to use your own settings, and create completed, error, input and output directories). For fields that we did not mention below, the default is used:
- Completed Folder: demo/completed
- Error Folder: demo/error
- Hostname of FTP Server: 10.2.0.28
- Port of FTP Server: 21
- User of FTP Server: ohara
- Password of FTP Server: oharastream
- Input Folder: demo/input
Once these settings had been filled out, click on the SAVE CHANGES button.
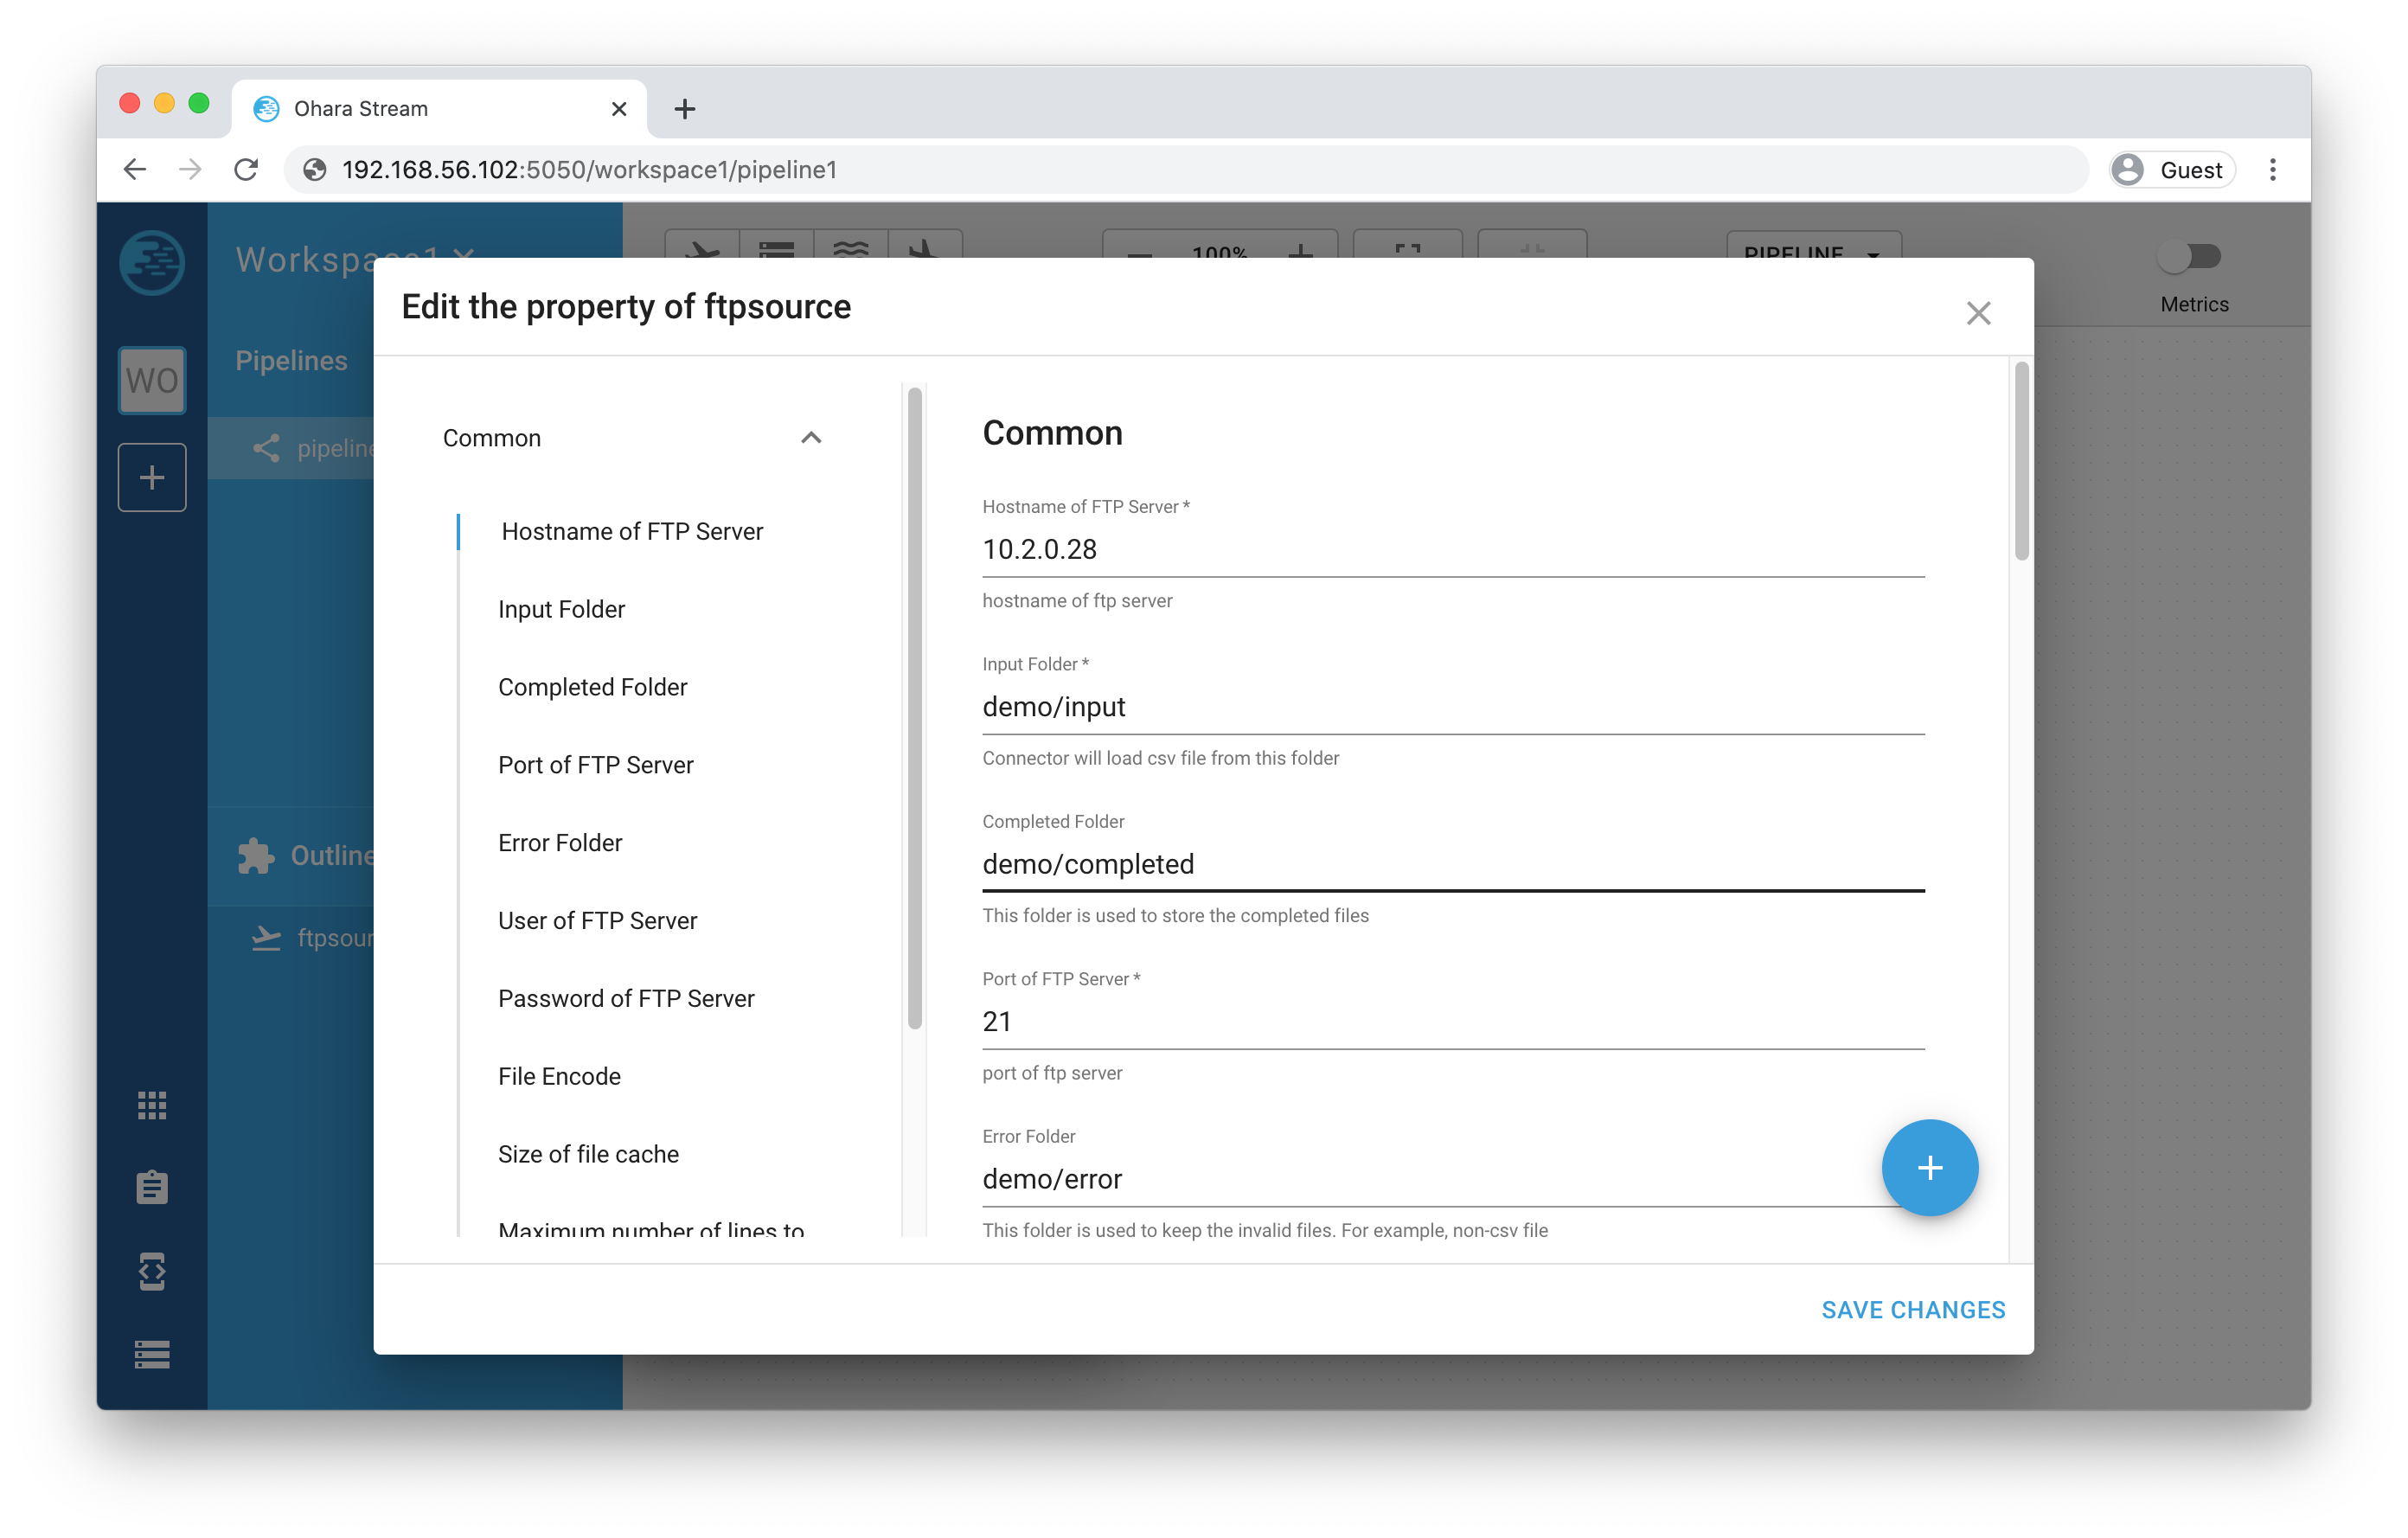
Warning
There are validation rules that prevent you from submitting the form without filling require fields.
FTP sink:
Just like FTP source connector, we can drag and drop a FTP sink connector from the Toolbox and name it “ftpsink”. After it’s added in the Paper, click on its “configure” button. The settings are mostly like FTP source with the only exception: “output”:
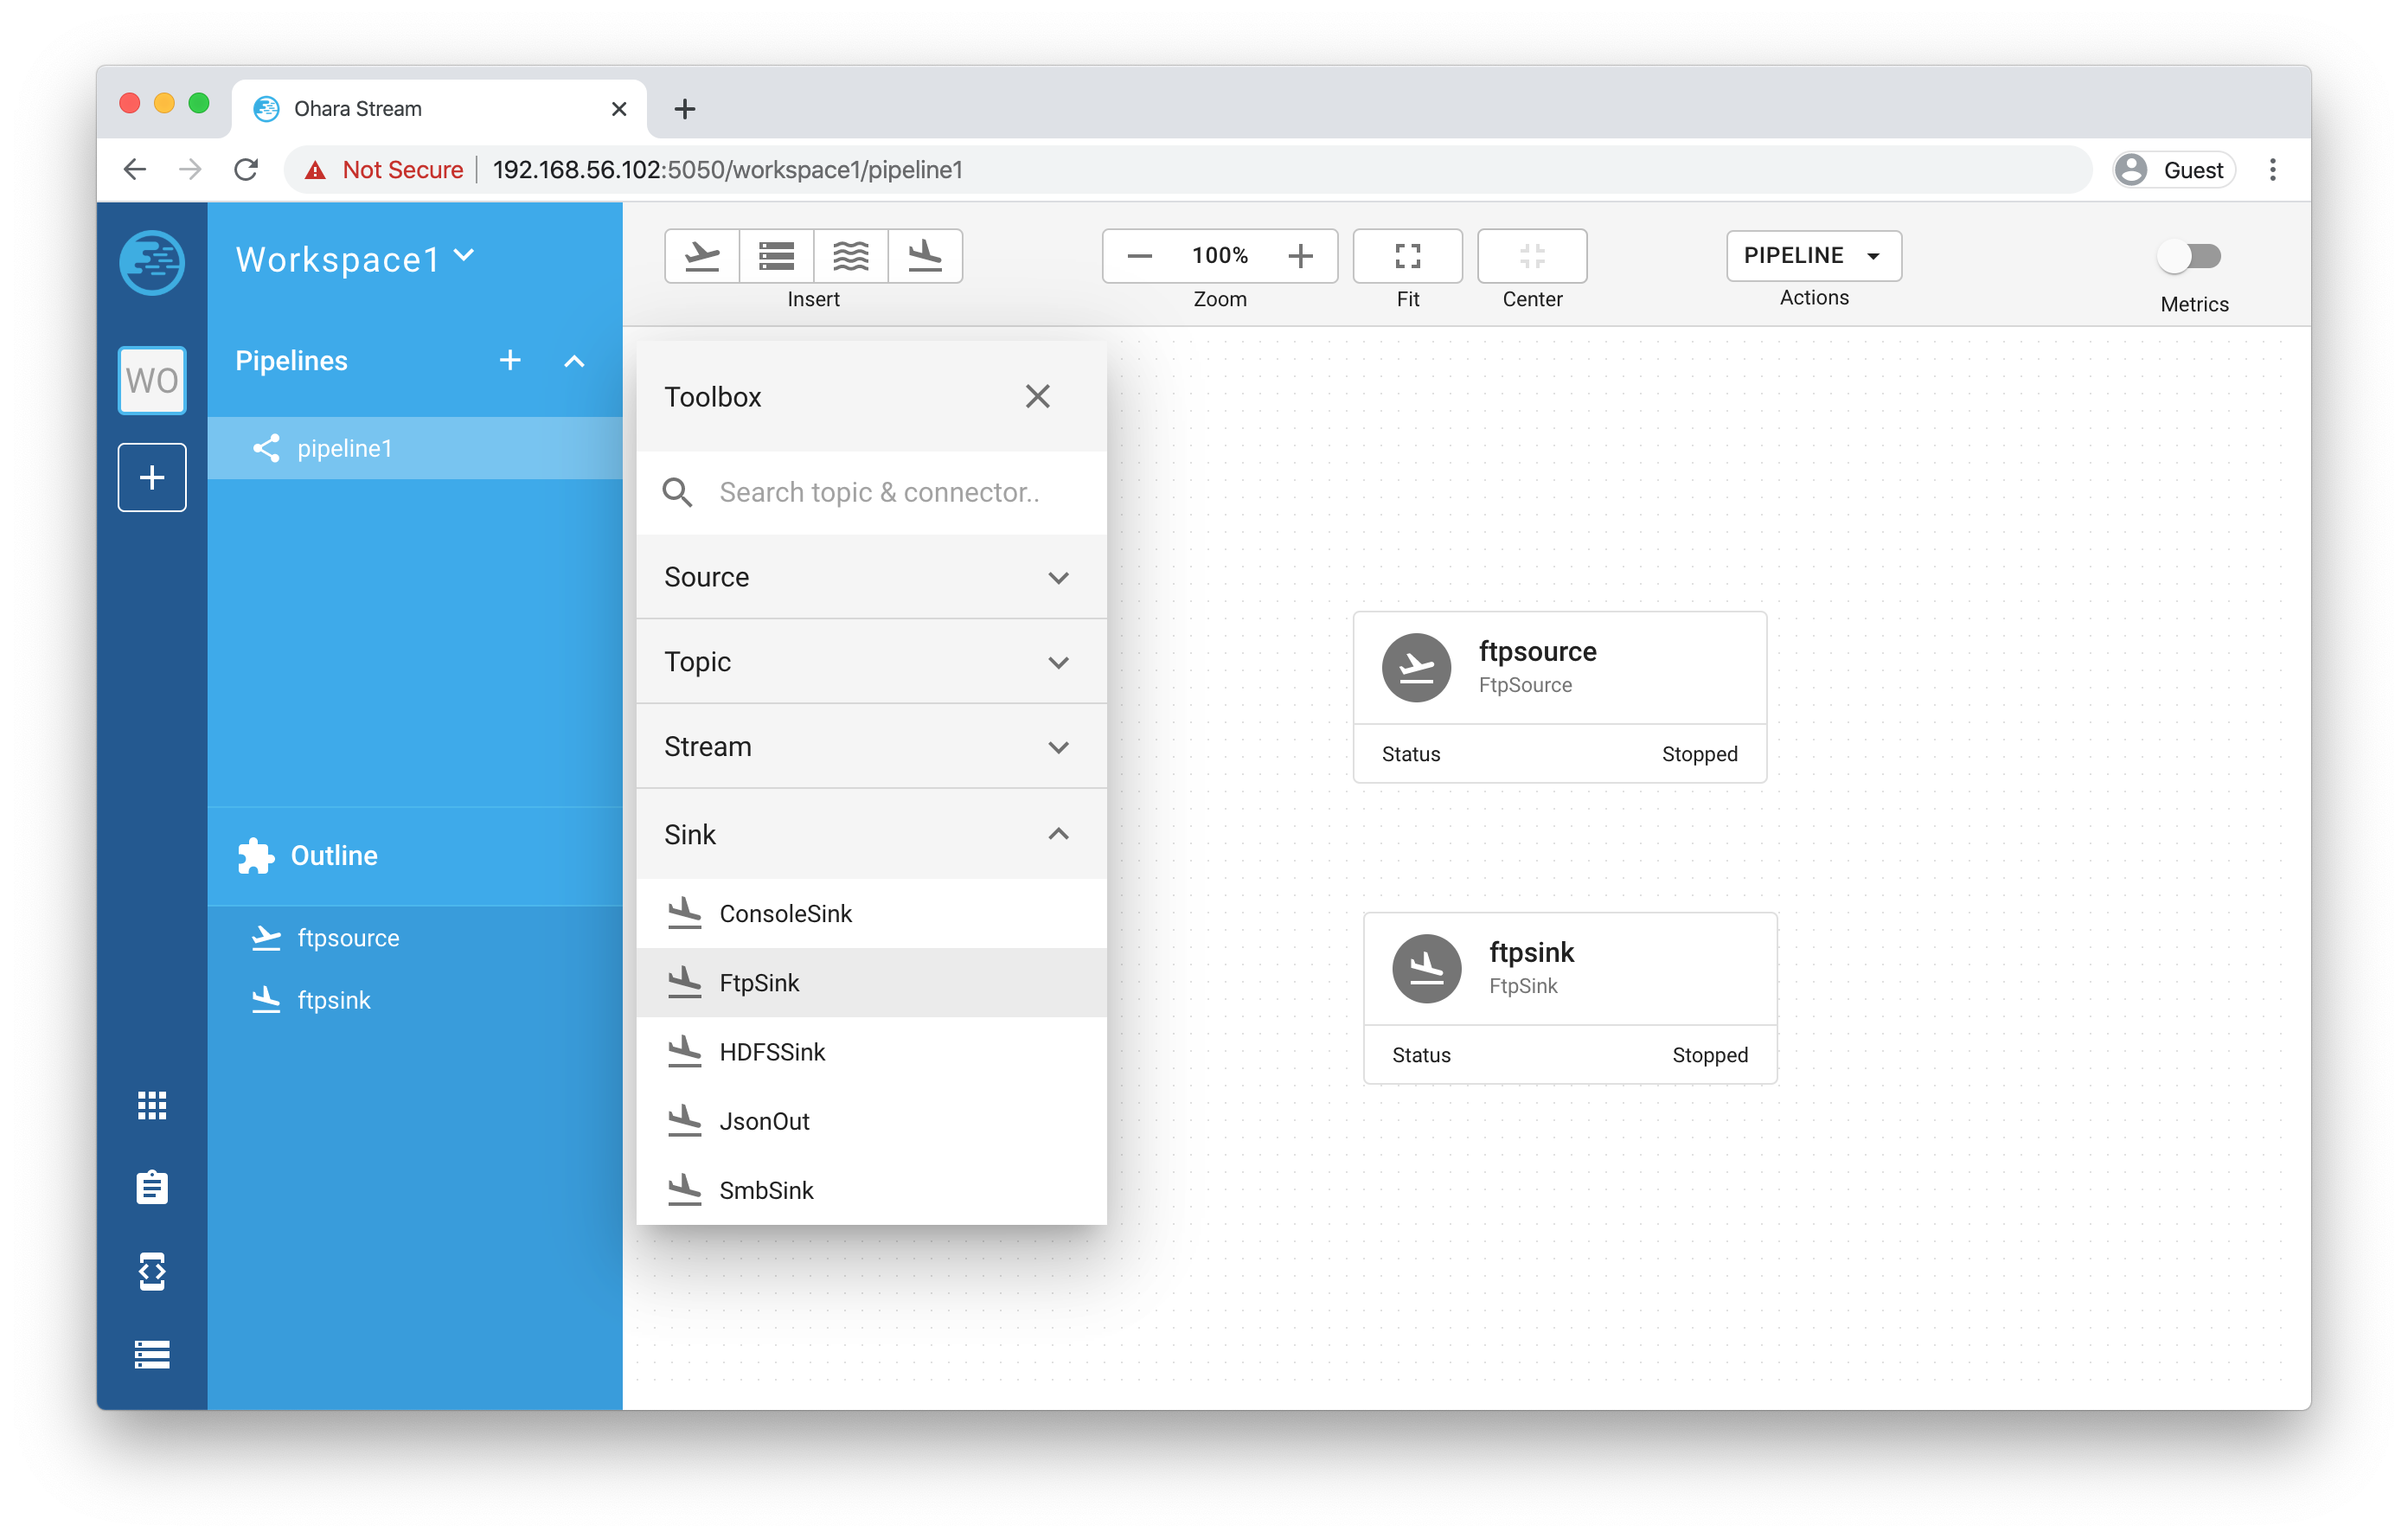
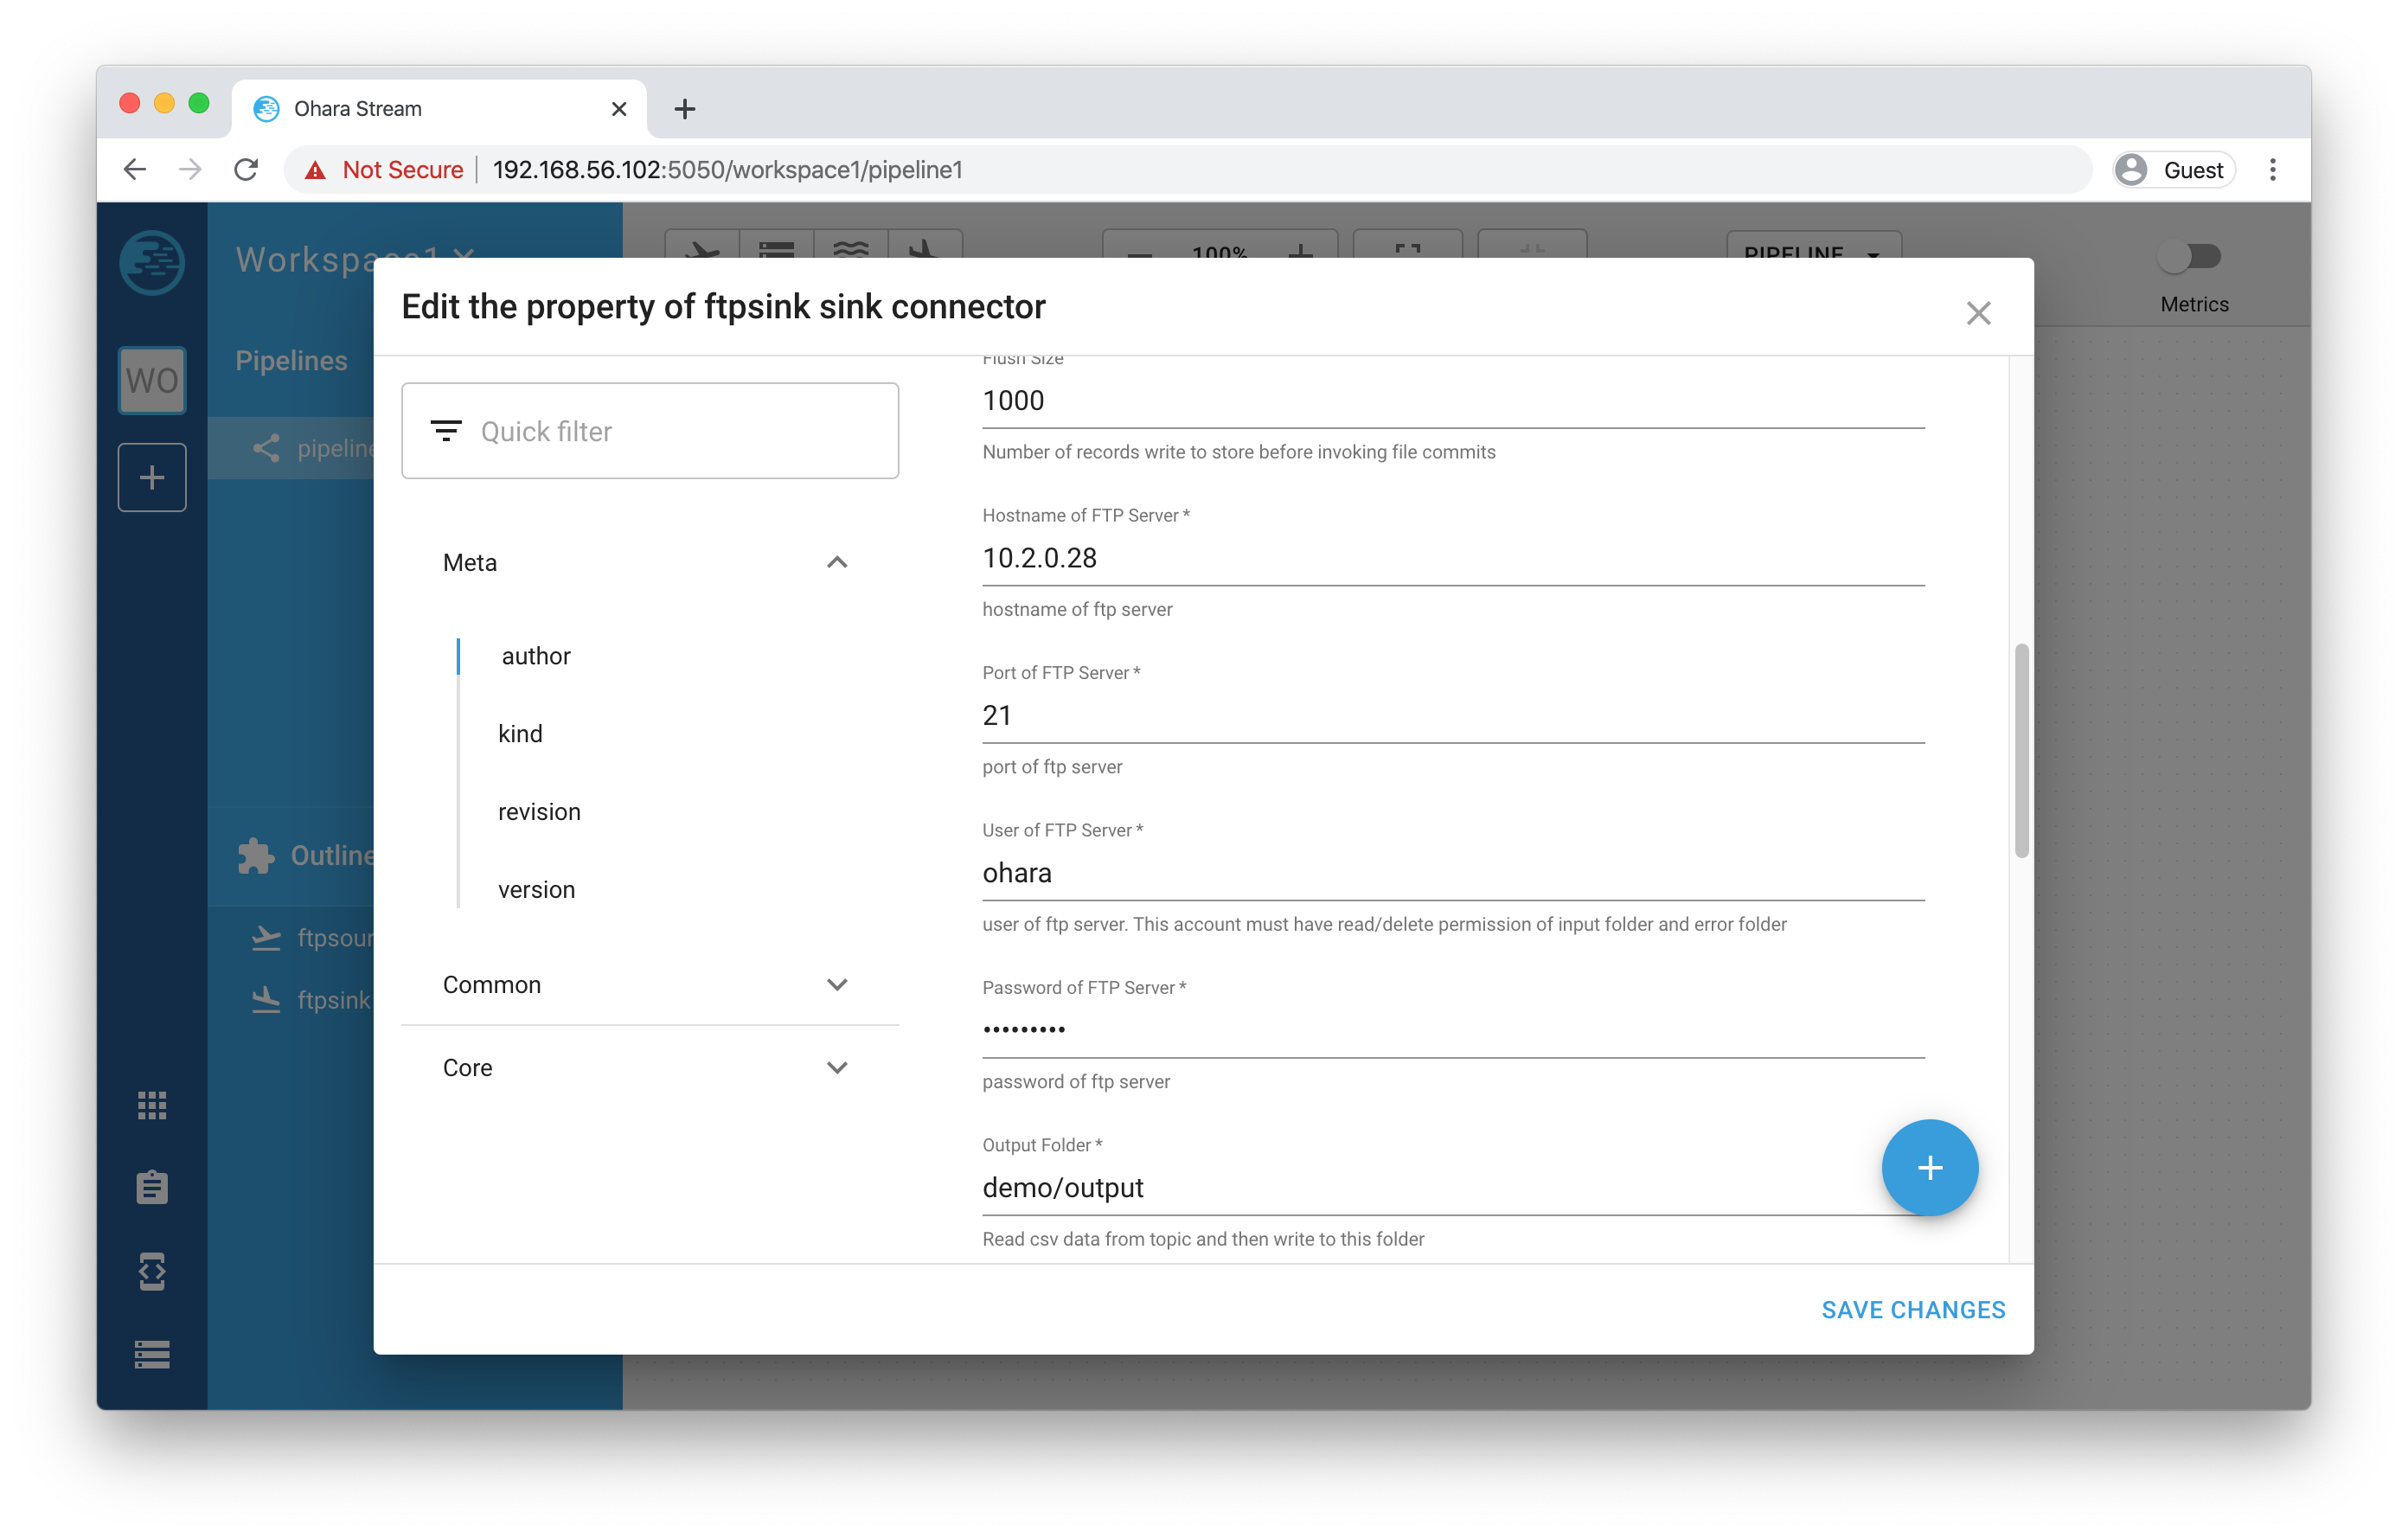
- Hostname of FTP Server: 10.2.0.28
- Port of FTP Server: 21
- User of FTP Server: ohara
- Password of FTP Server: oharastream
- Output Folder: demo/output
Great! Now we have both source and sink connectors ready. Let’s move on to create some topics.
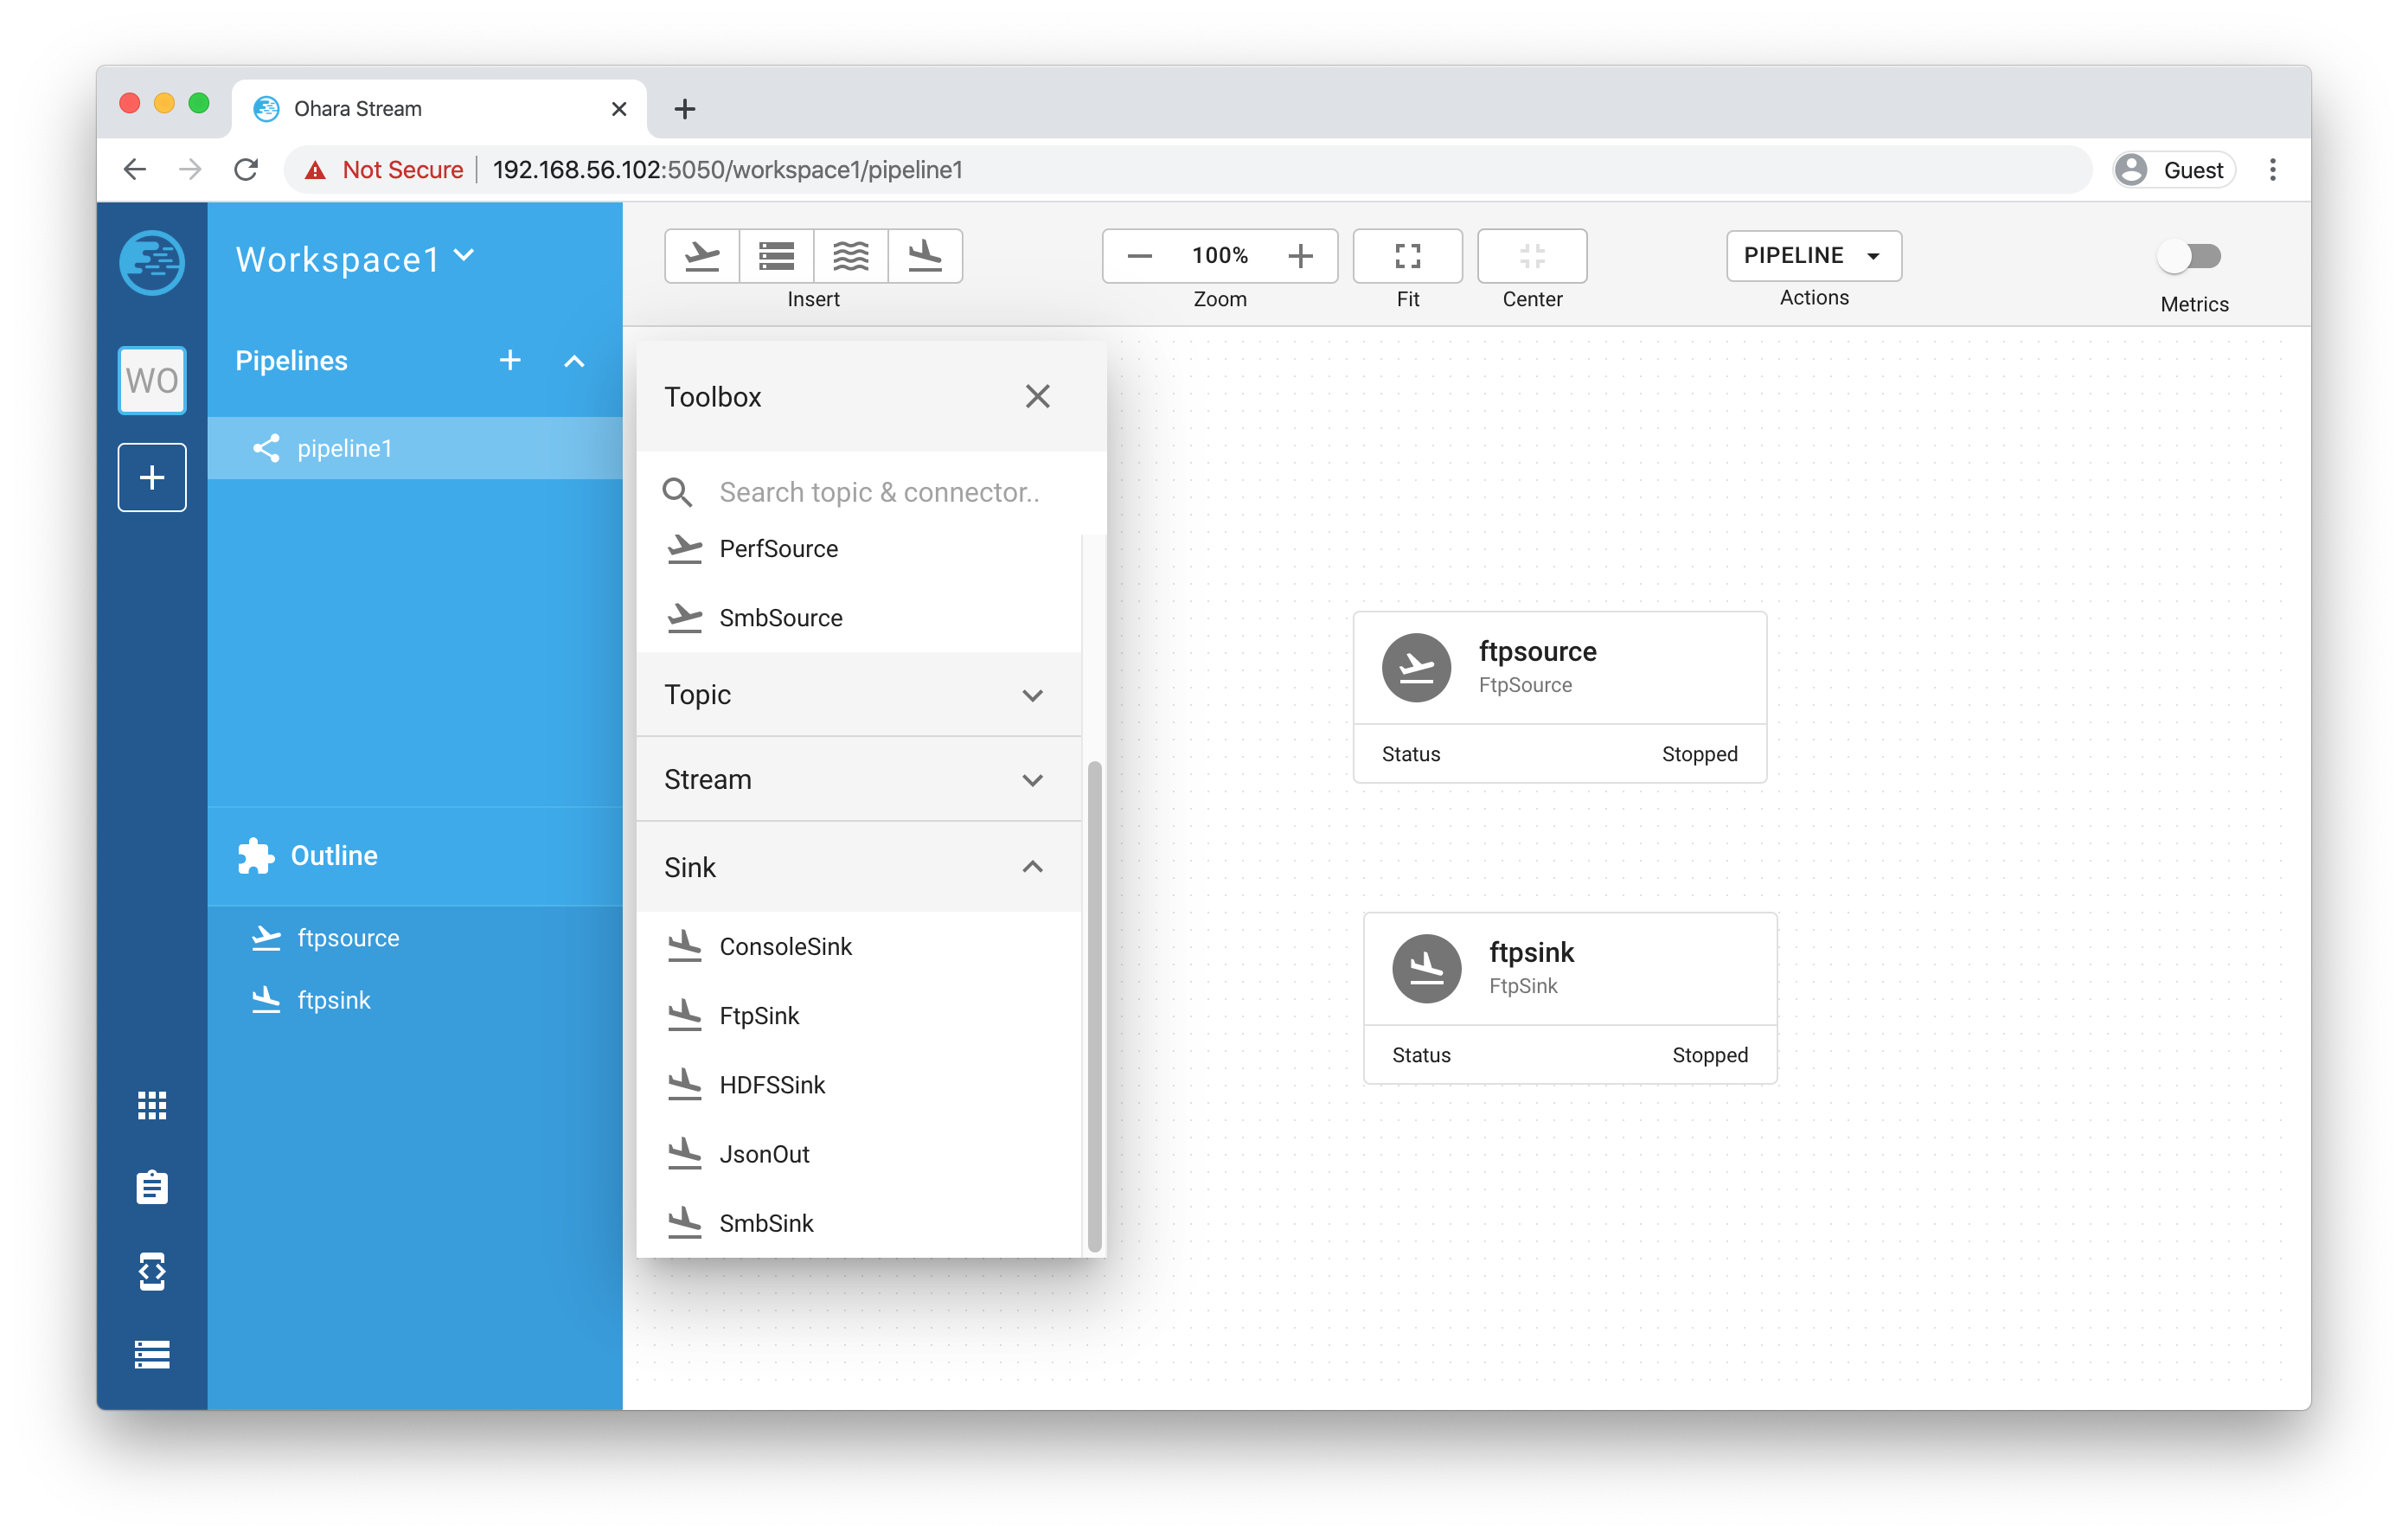
Topic:
In this tutorial, we need two topics for the pipeline, let’s add them from the Toolbox like what we did in the previous steps for FTP connectors:
- From the Toolbox, click on the title “Topic” to expand the topic panel.

- Click and drag “Pipeline Only” item from the list and drop it into the Paper to add a new Topic. Unlike source or sink connector, adding a topic doesn’t require entering a name, the name will be auto-generated like (T1, T2, T3, etc.)
- Repeat the above step to create another Topic. You should now have two topics (T1, T2) in your Paper in addition to those FTP connectors:
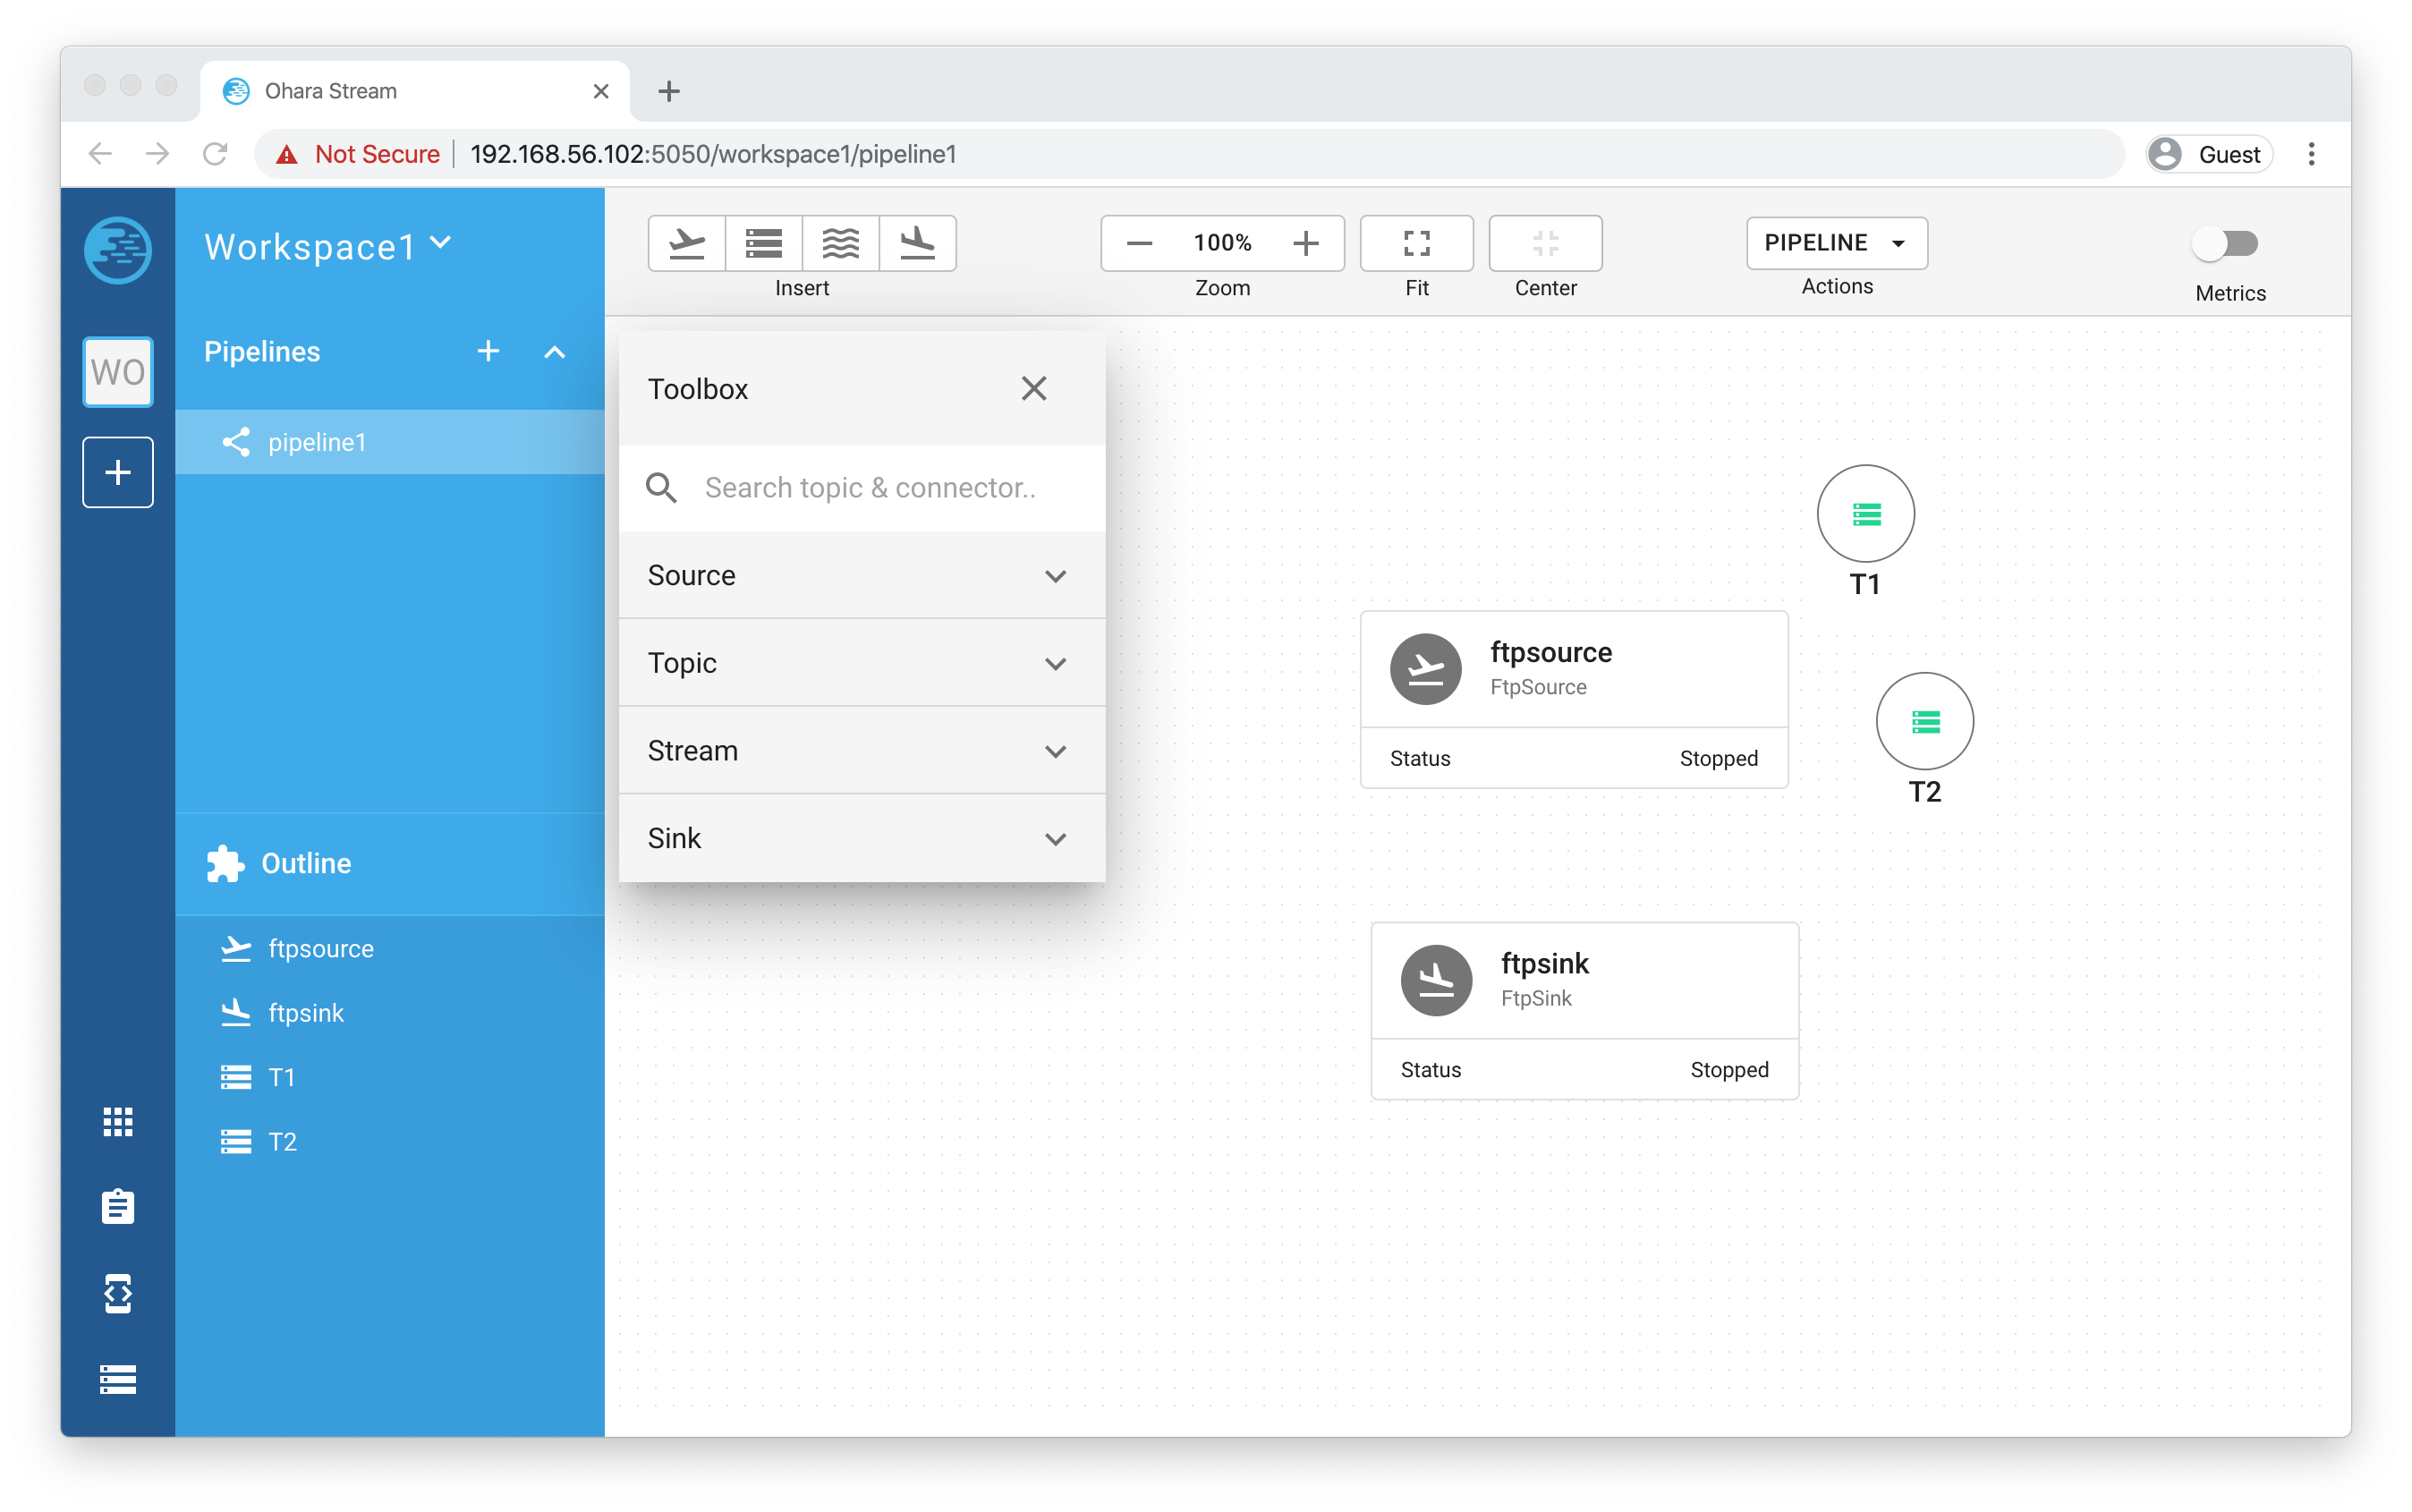
And luckily, there’s no need to configure these topic as they’re preconfigured and already running. (what a time saver!)
Note
In Ohara, topics can either be a “Pipeline-only topic” or a “Shared topic”. The pipeline-only topics are topics that only live within a pipeline. And on the other hand, shared topics can be shared and used across different pipelines. For simplicity sake, we only use pipeline-only topics throughout the tutorial.
Tip
For quickly creating a new pipeline-only topic, you can also just add a source and a sink (or stream) connector and then link them together with the “Link” button from the source connector component. The pipeline-only topic will be created automatically.
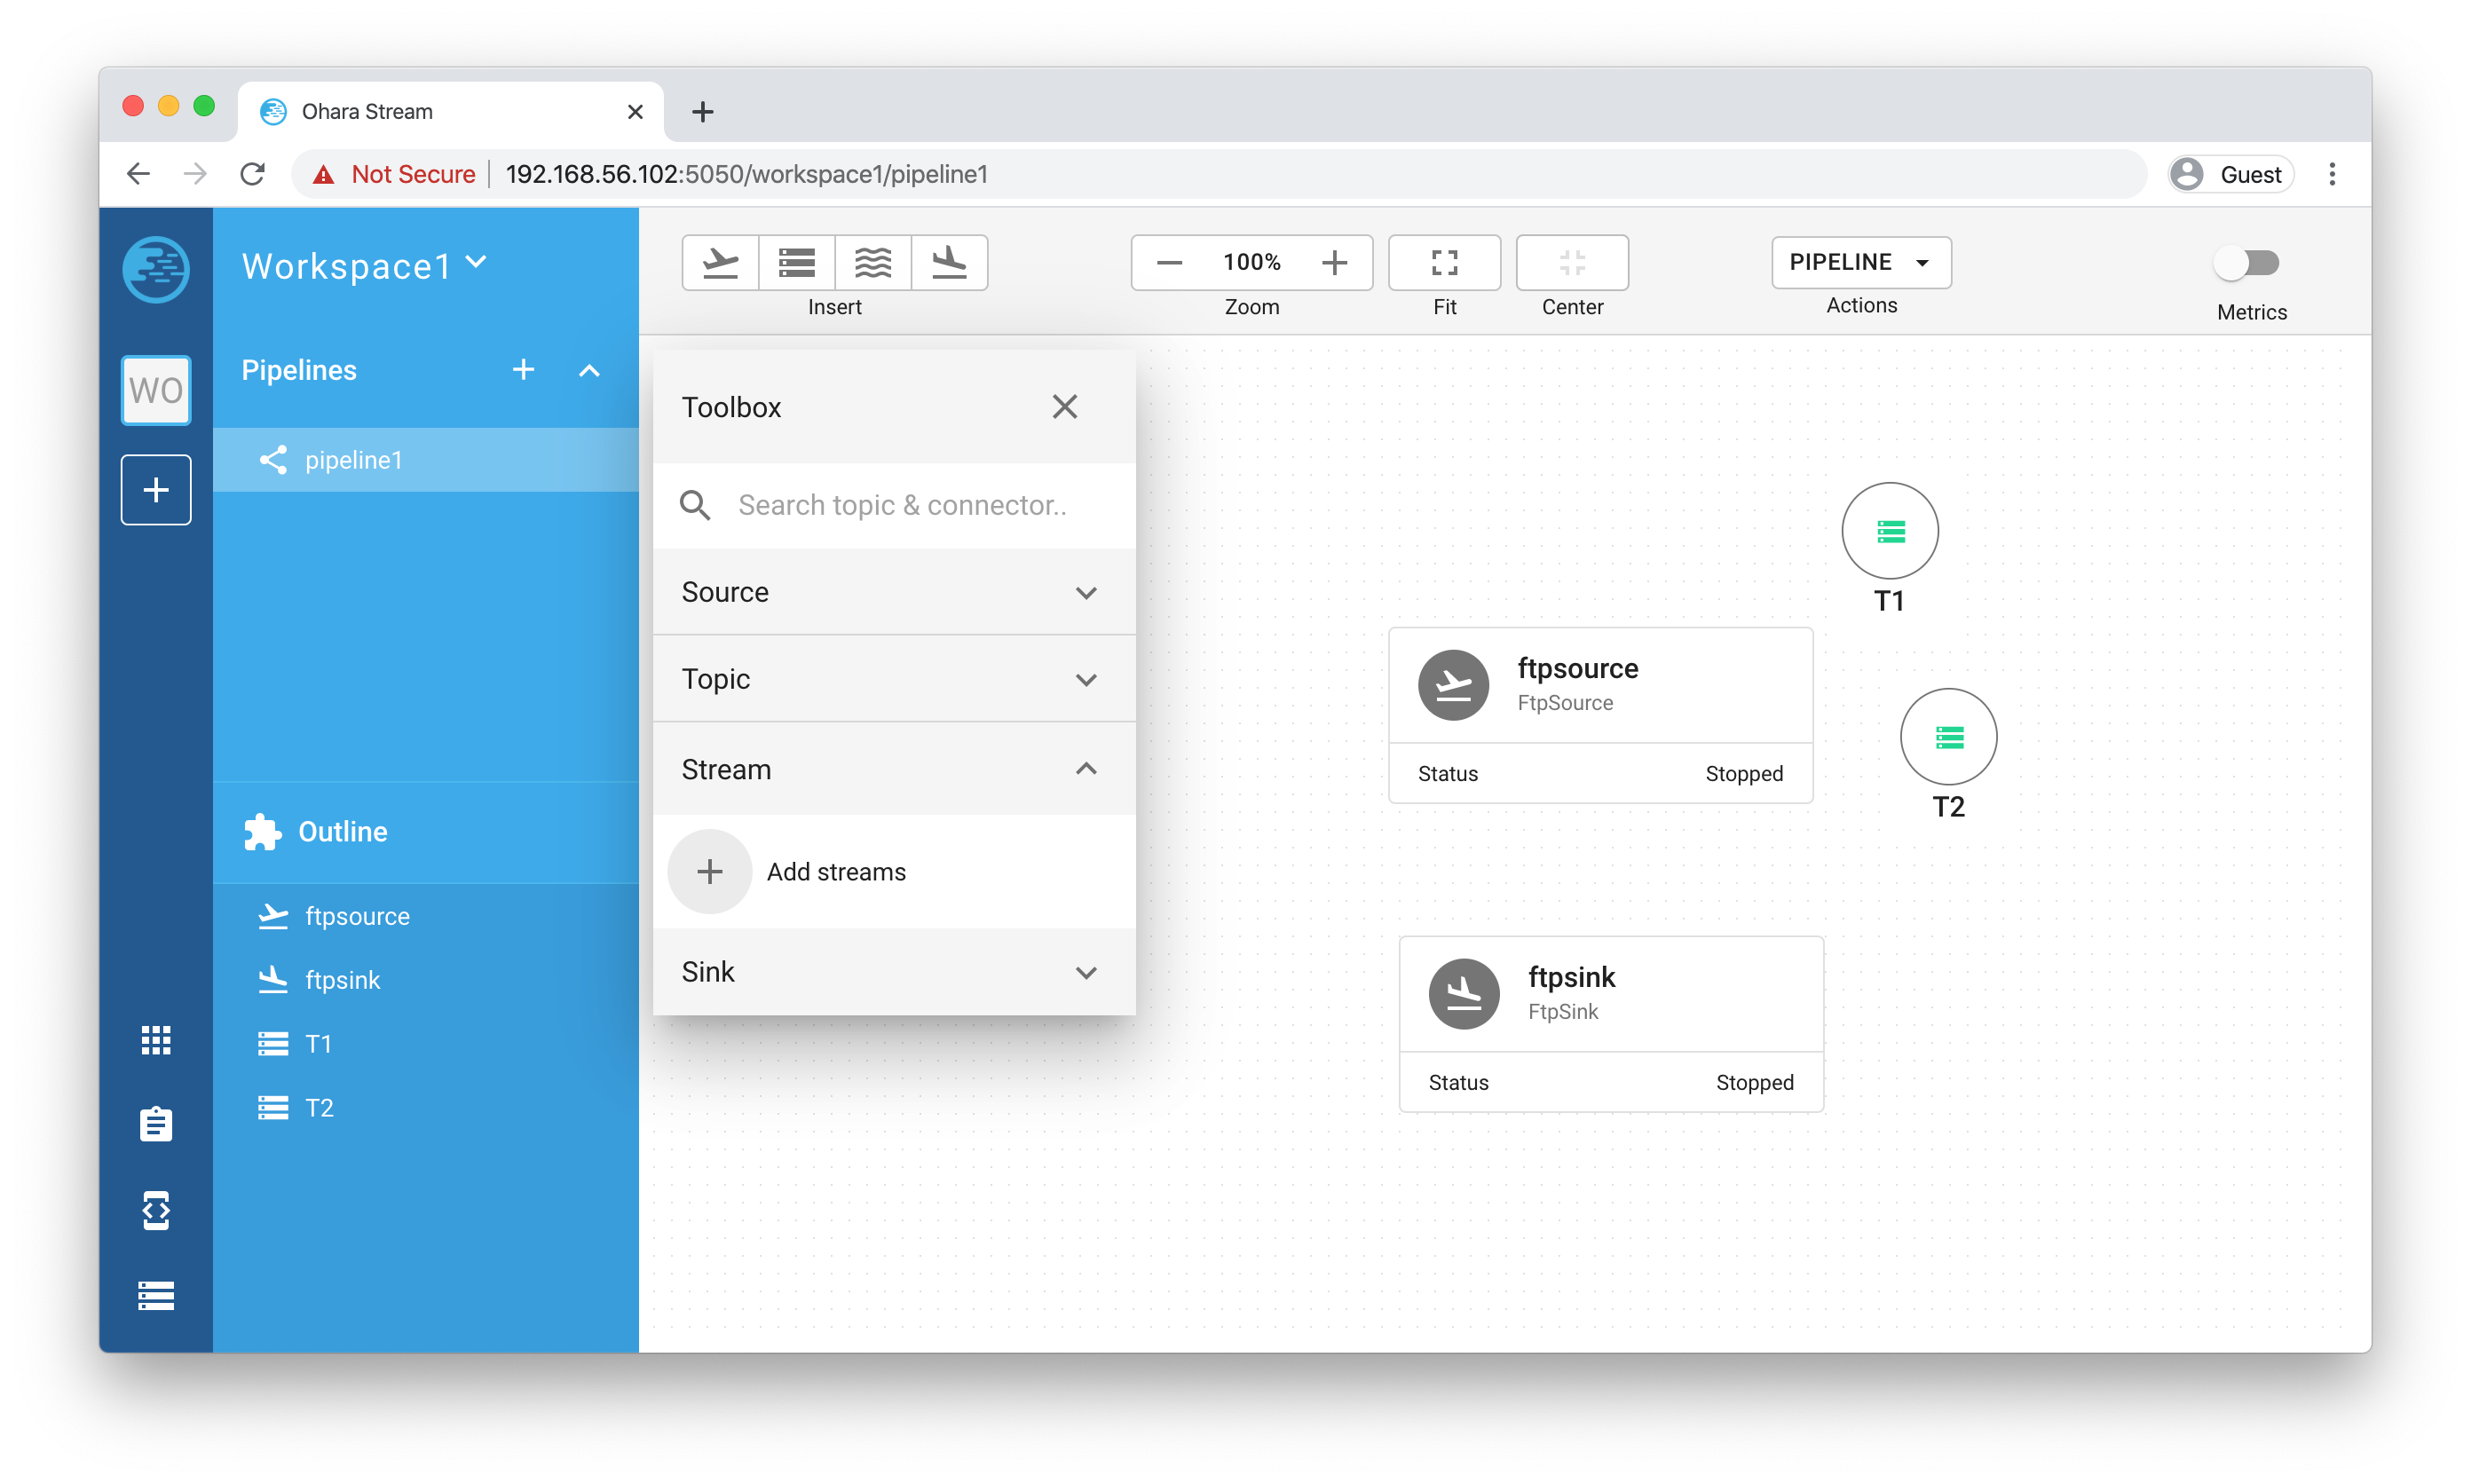
Stream:
Stream is our last missing piece of the “pipeline”. Let’s add one very quick!
Remember the stream jar you downloaded along with the quickstart image? It’s time to use it:
- Click on the “Stream” panel on the Toolbox and then click on the “Add streams” button
- It will open workspace settings and redirect you to the stream jars page:
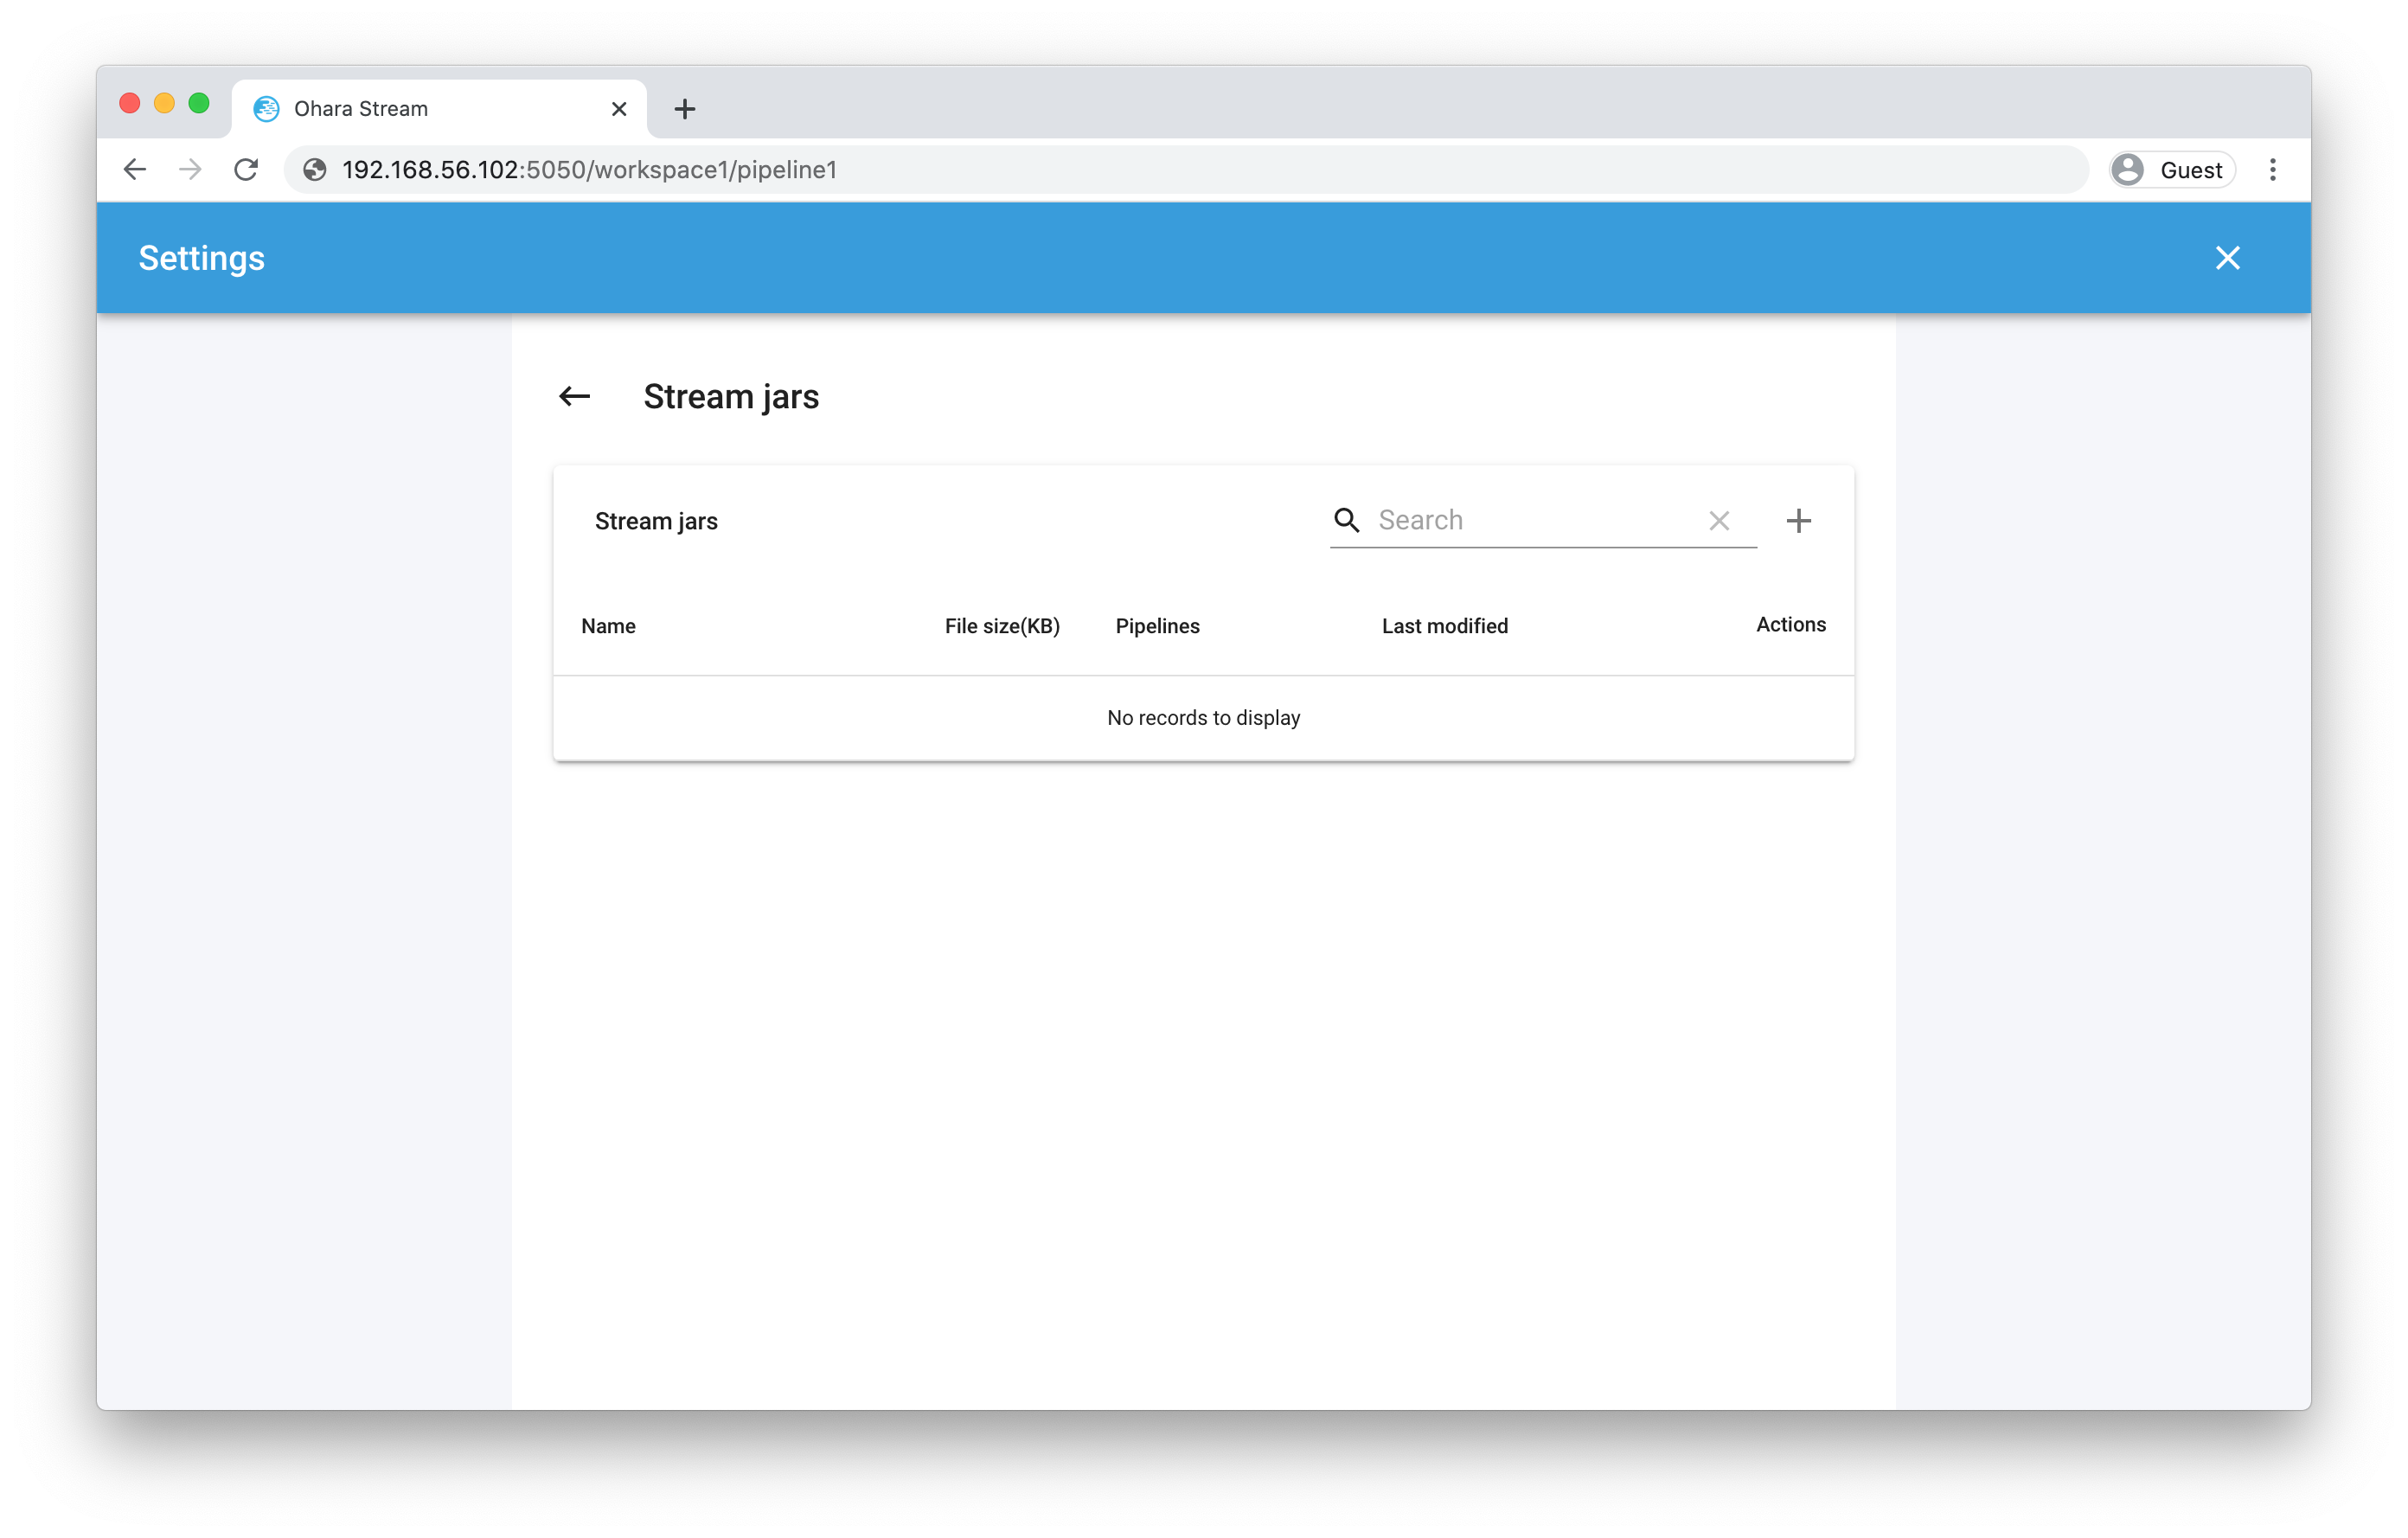
- Click on the plus icon to open select file dialog:
- The workspace file list are currently empty, let’s add a new file by clicking on the upload icon. This will open your OS file system, you can then select the stream jar file you downloaded. The stream class will be loaded and displayed in the list:
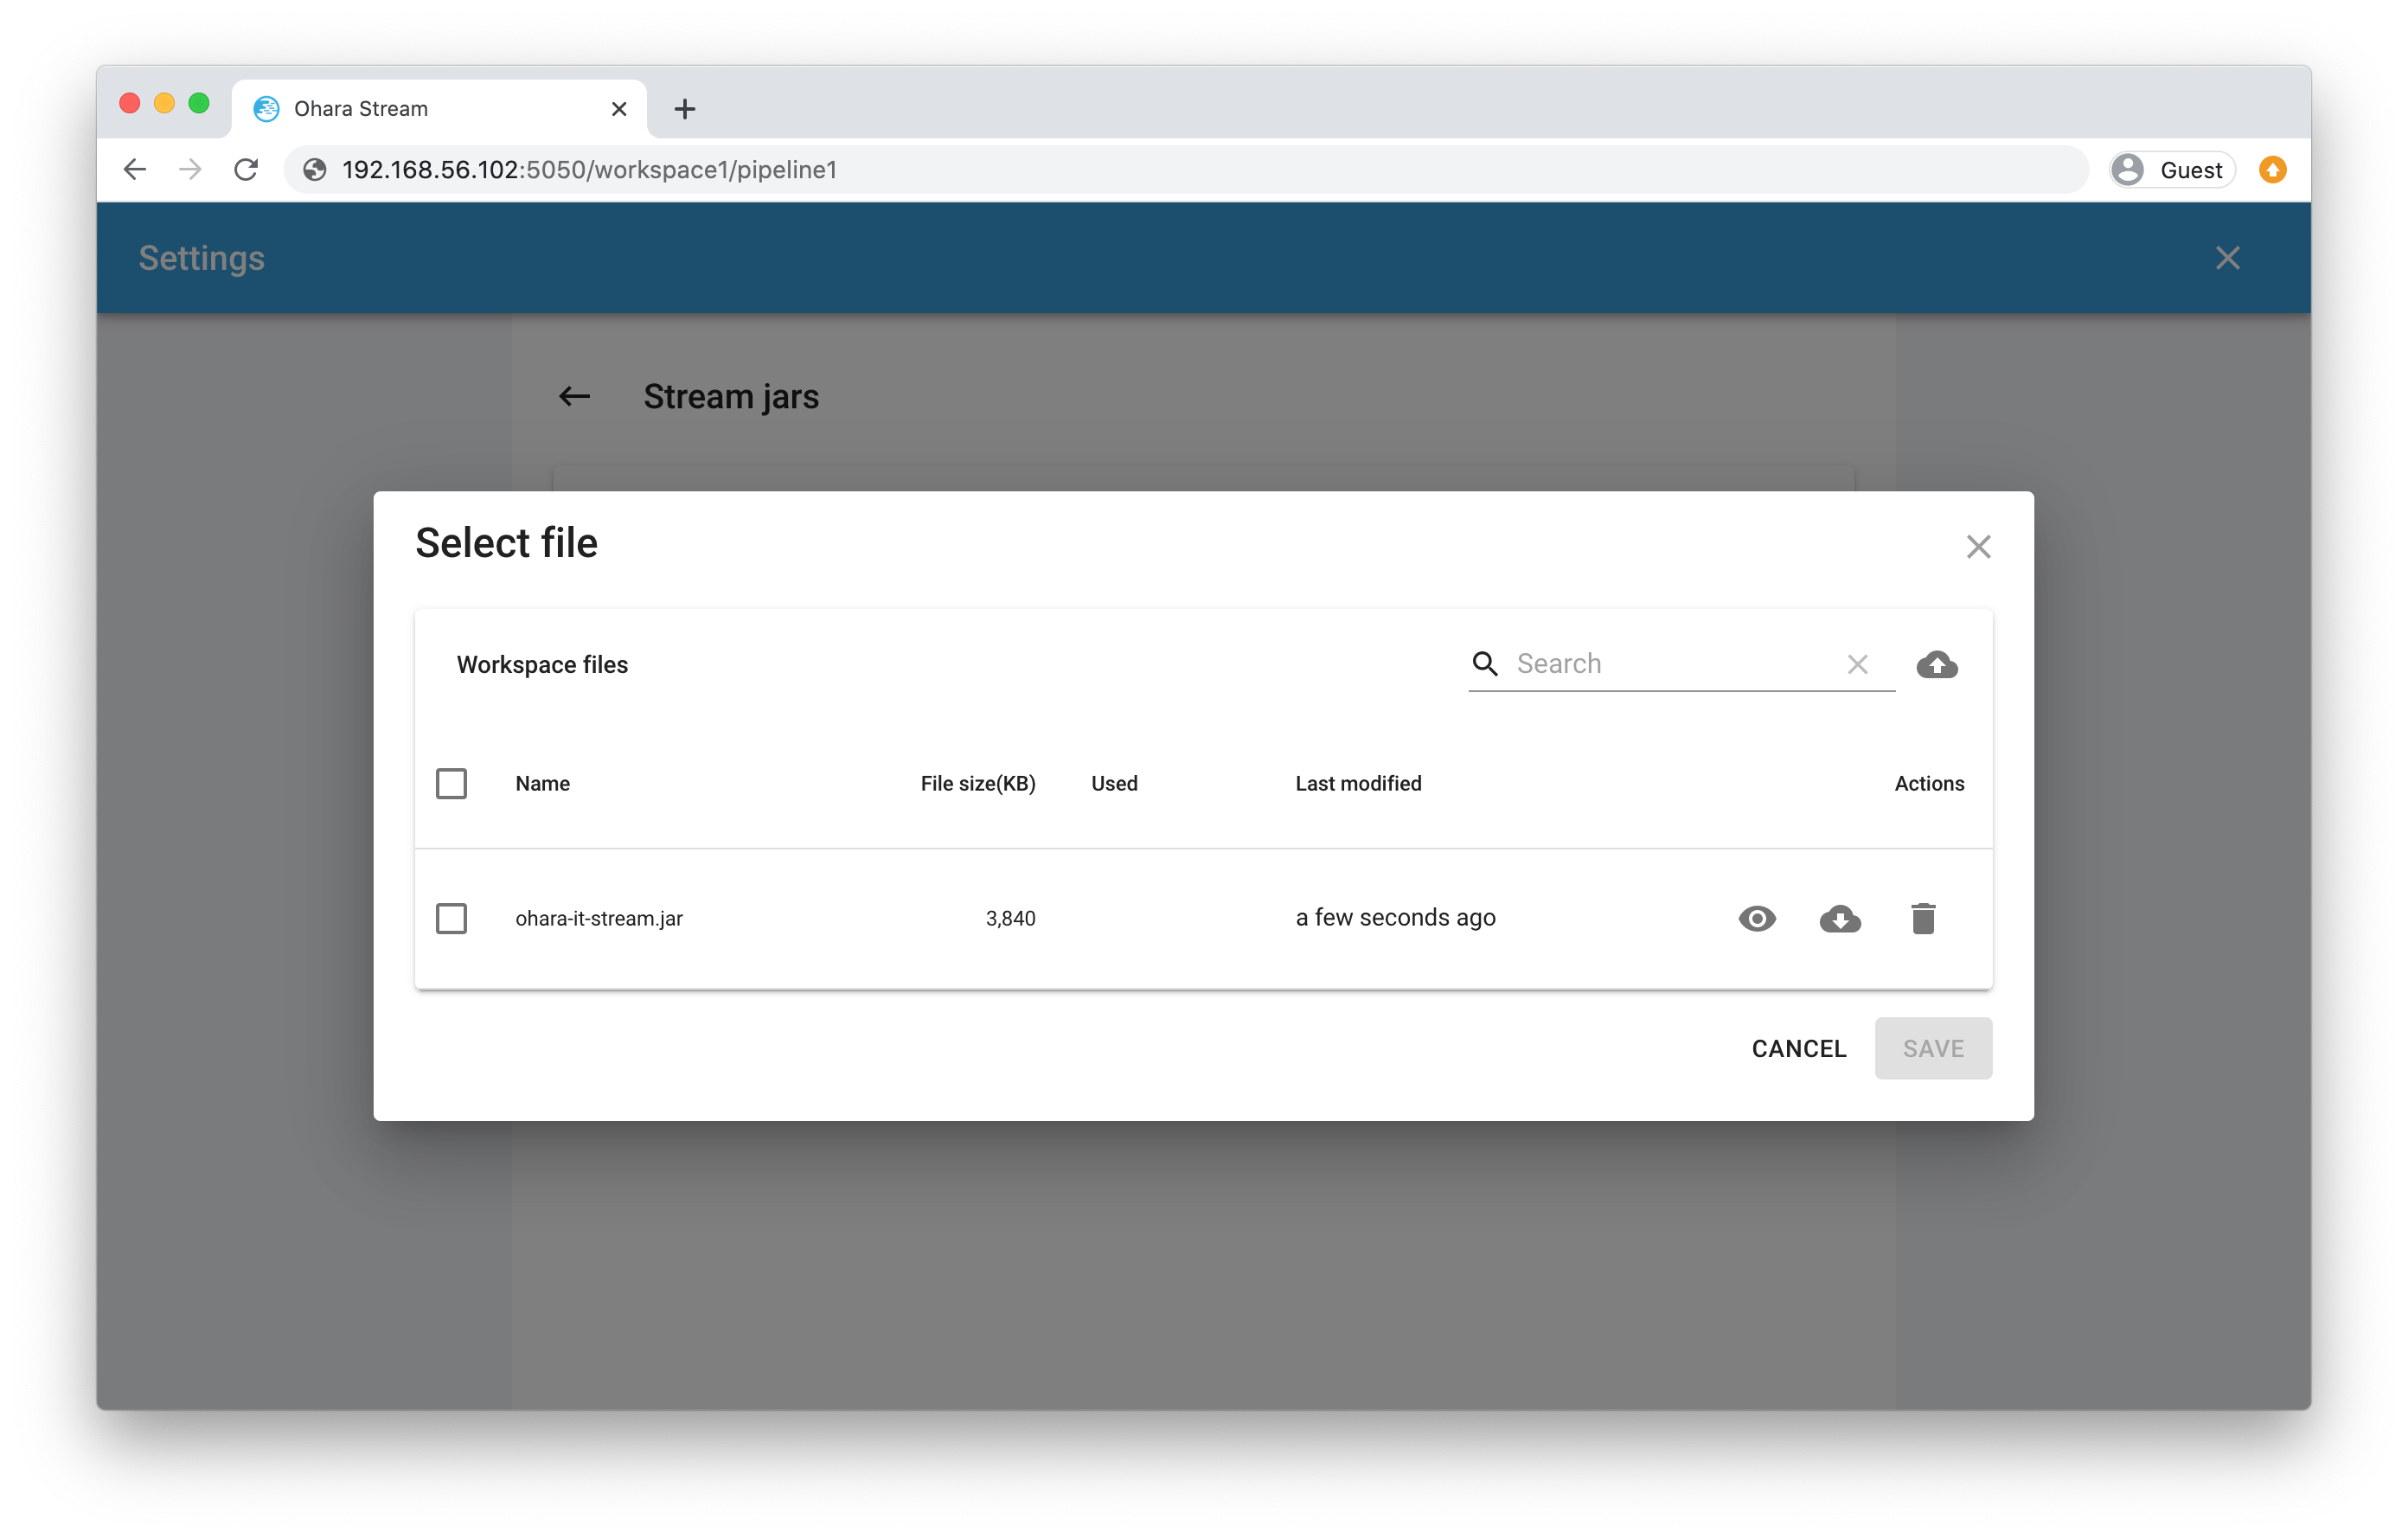
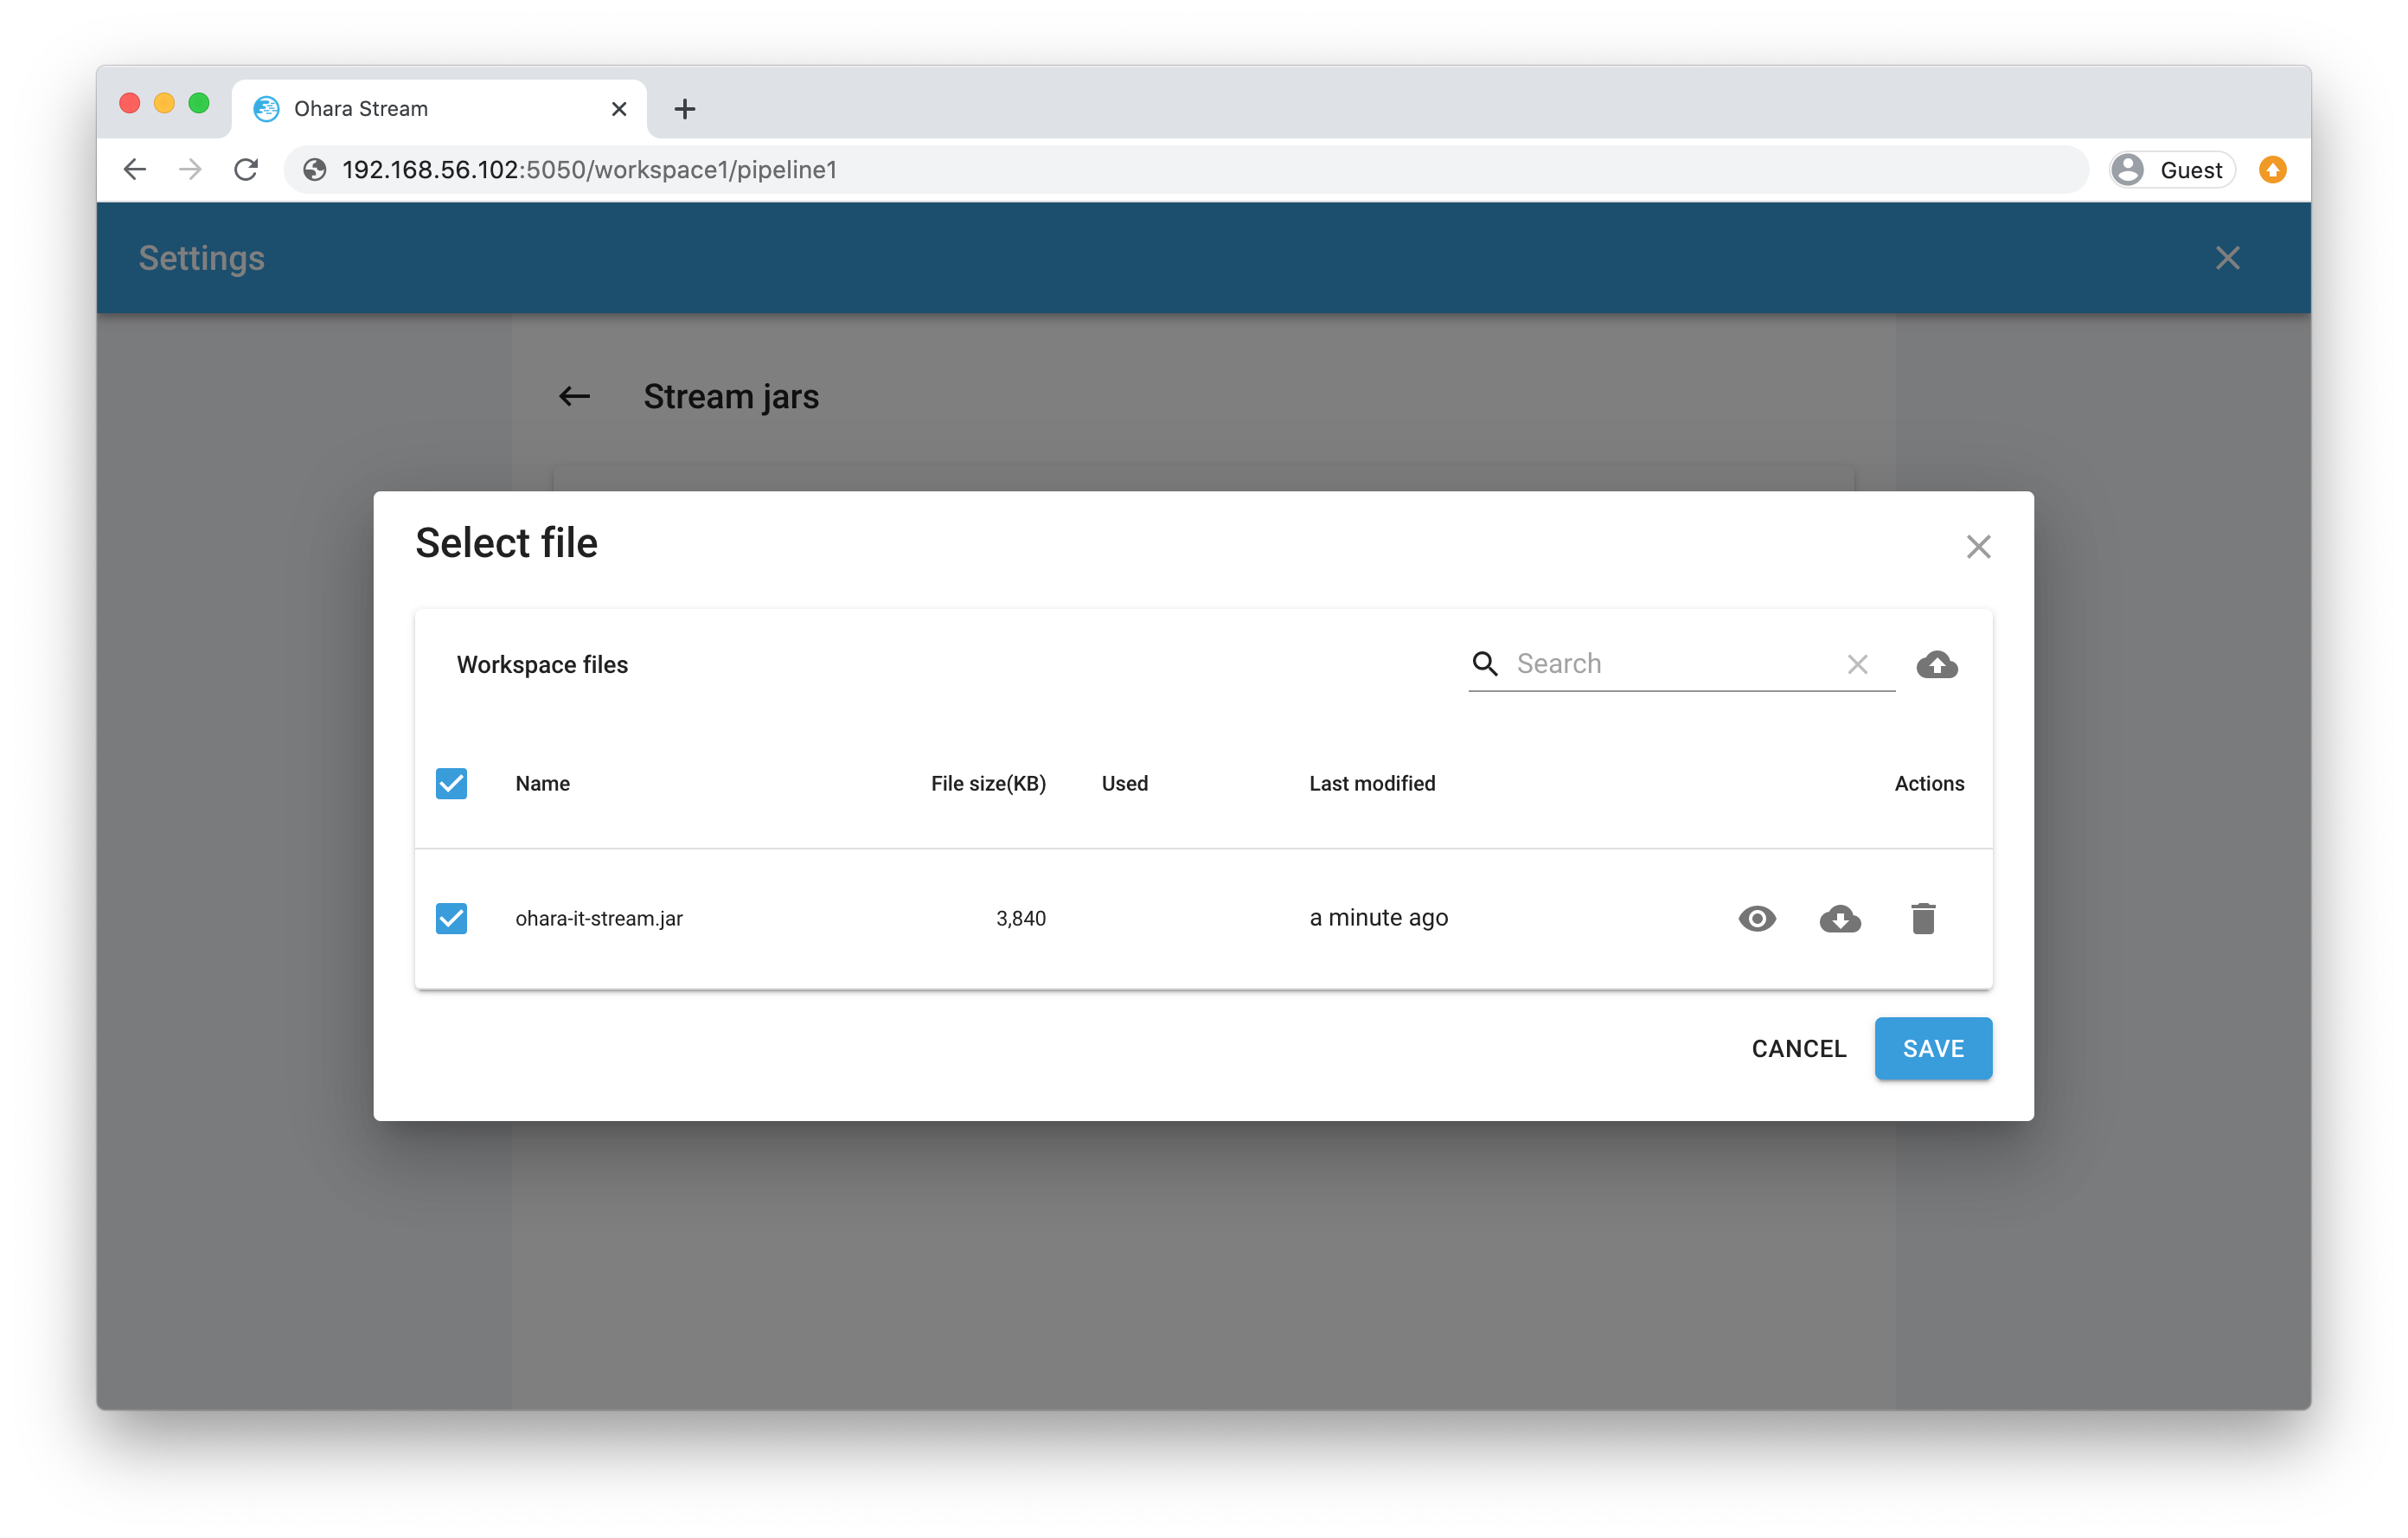
- Select the stream and click on the SAVE button to close select file dialog
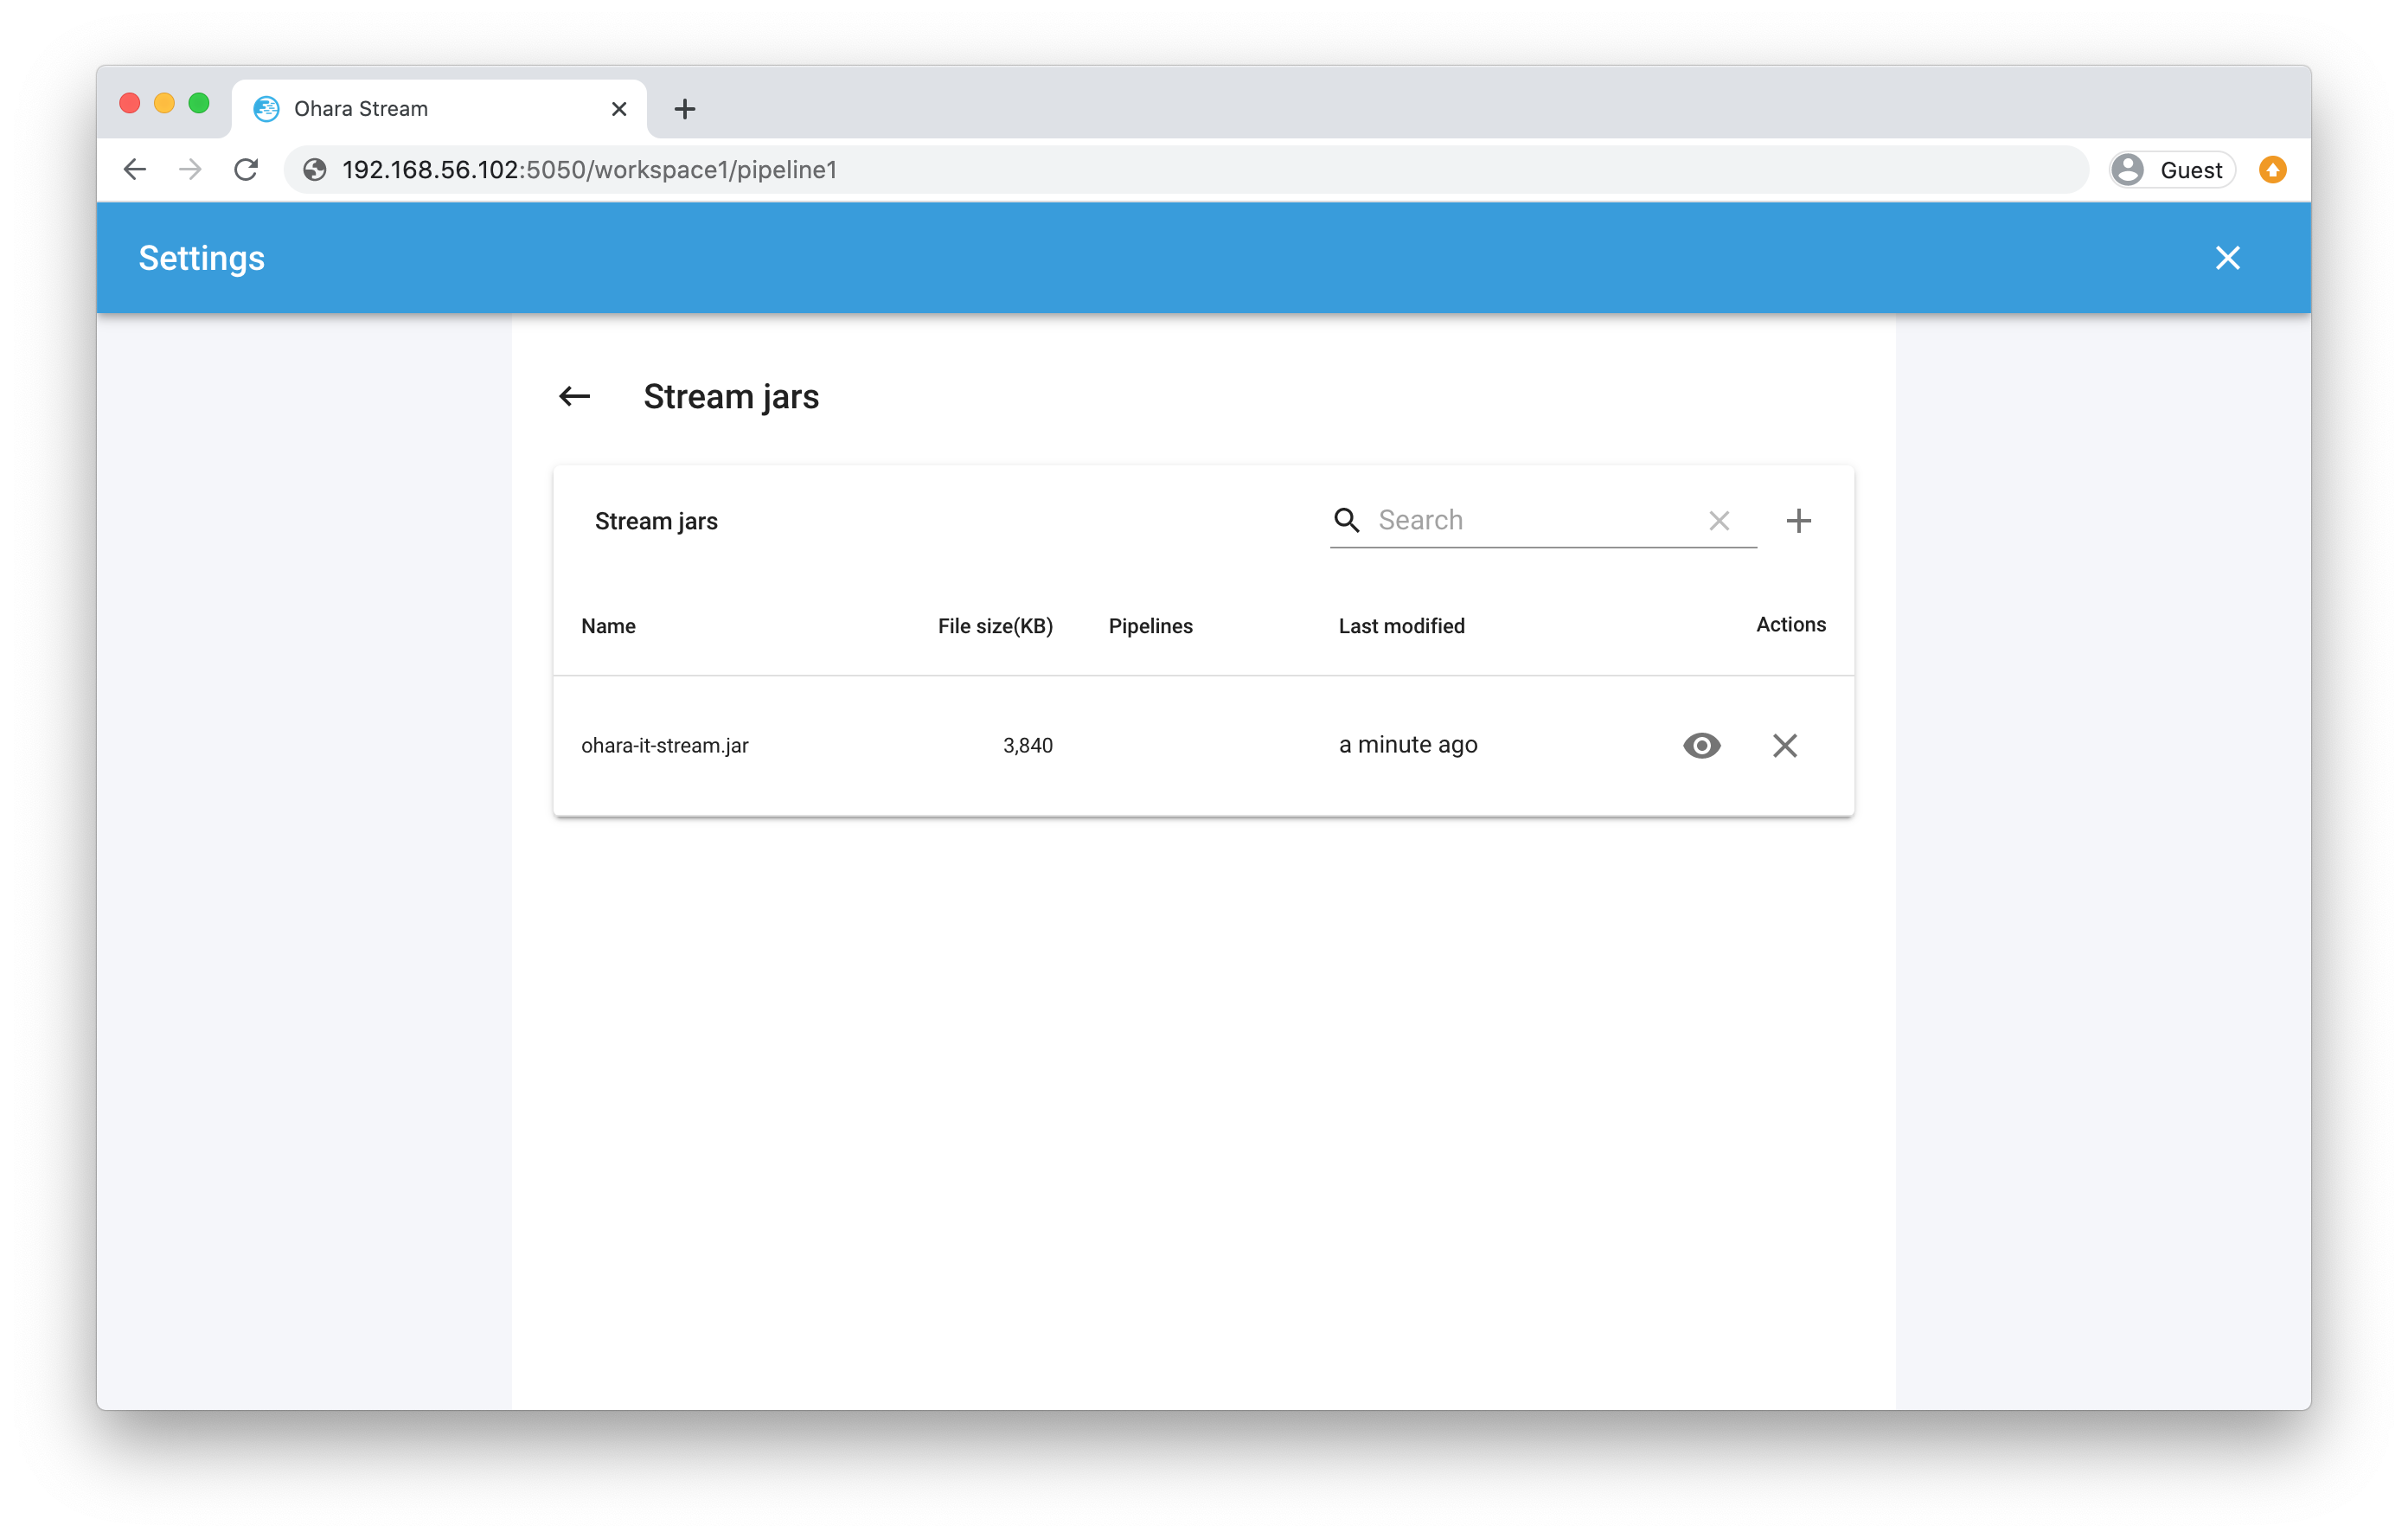
- The stream file should now listed in your Stream Jars page. Close this page by clicking on the close button on the upper-right corner
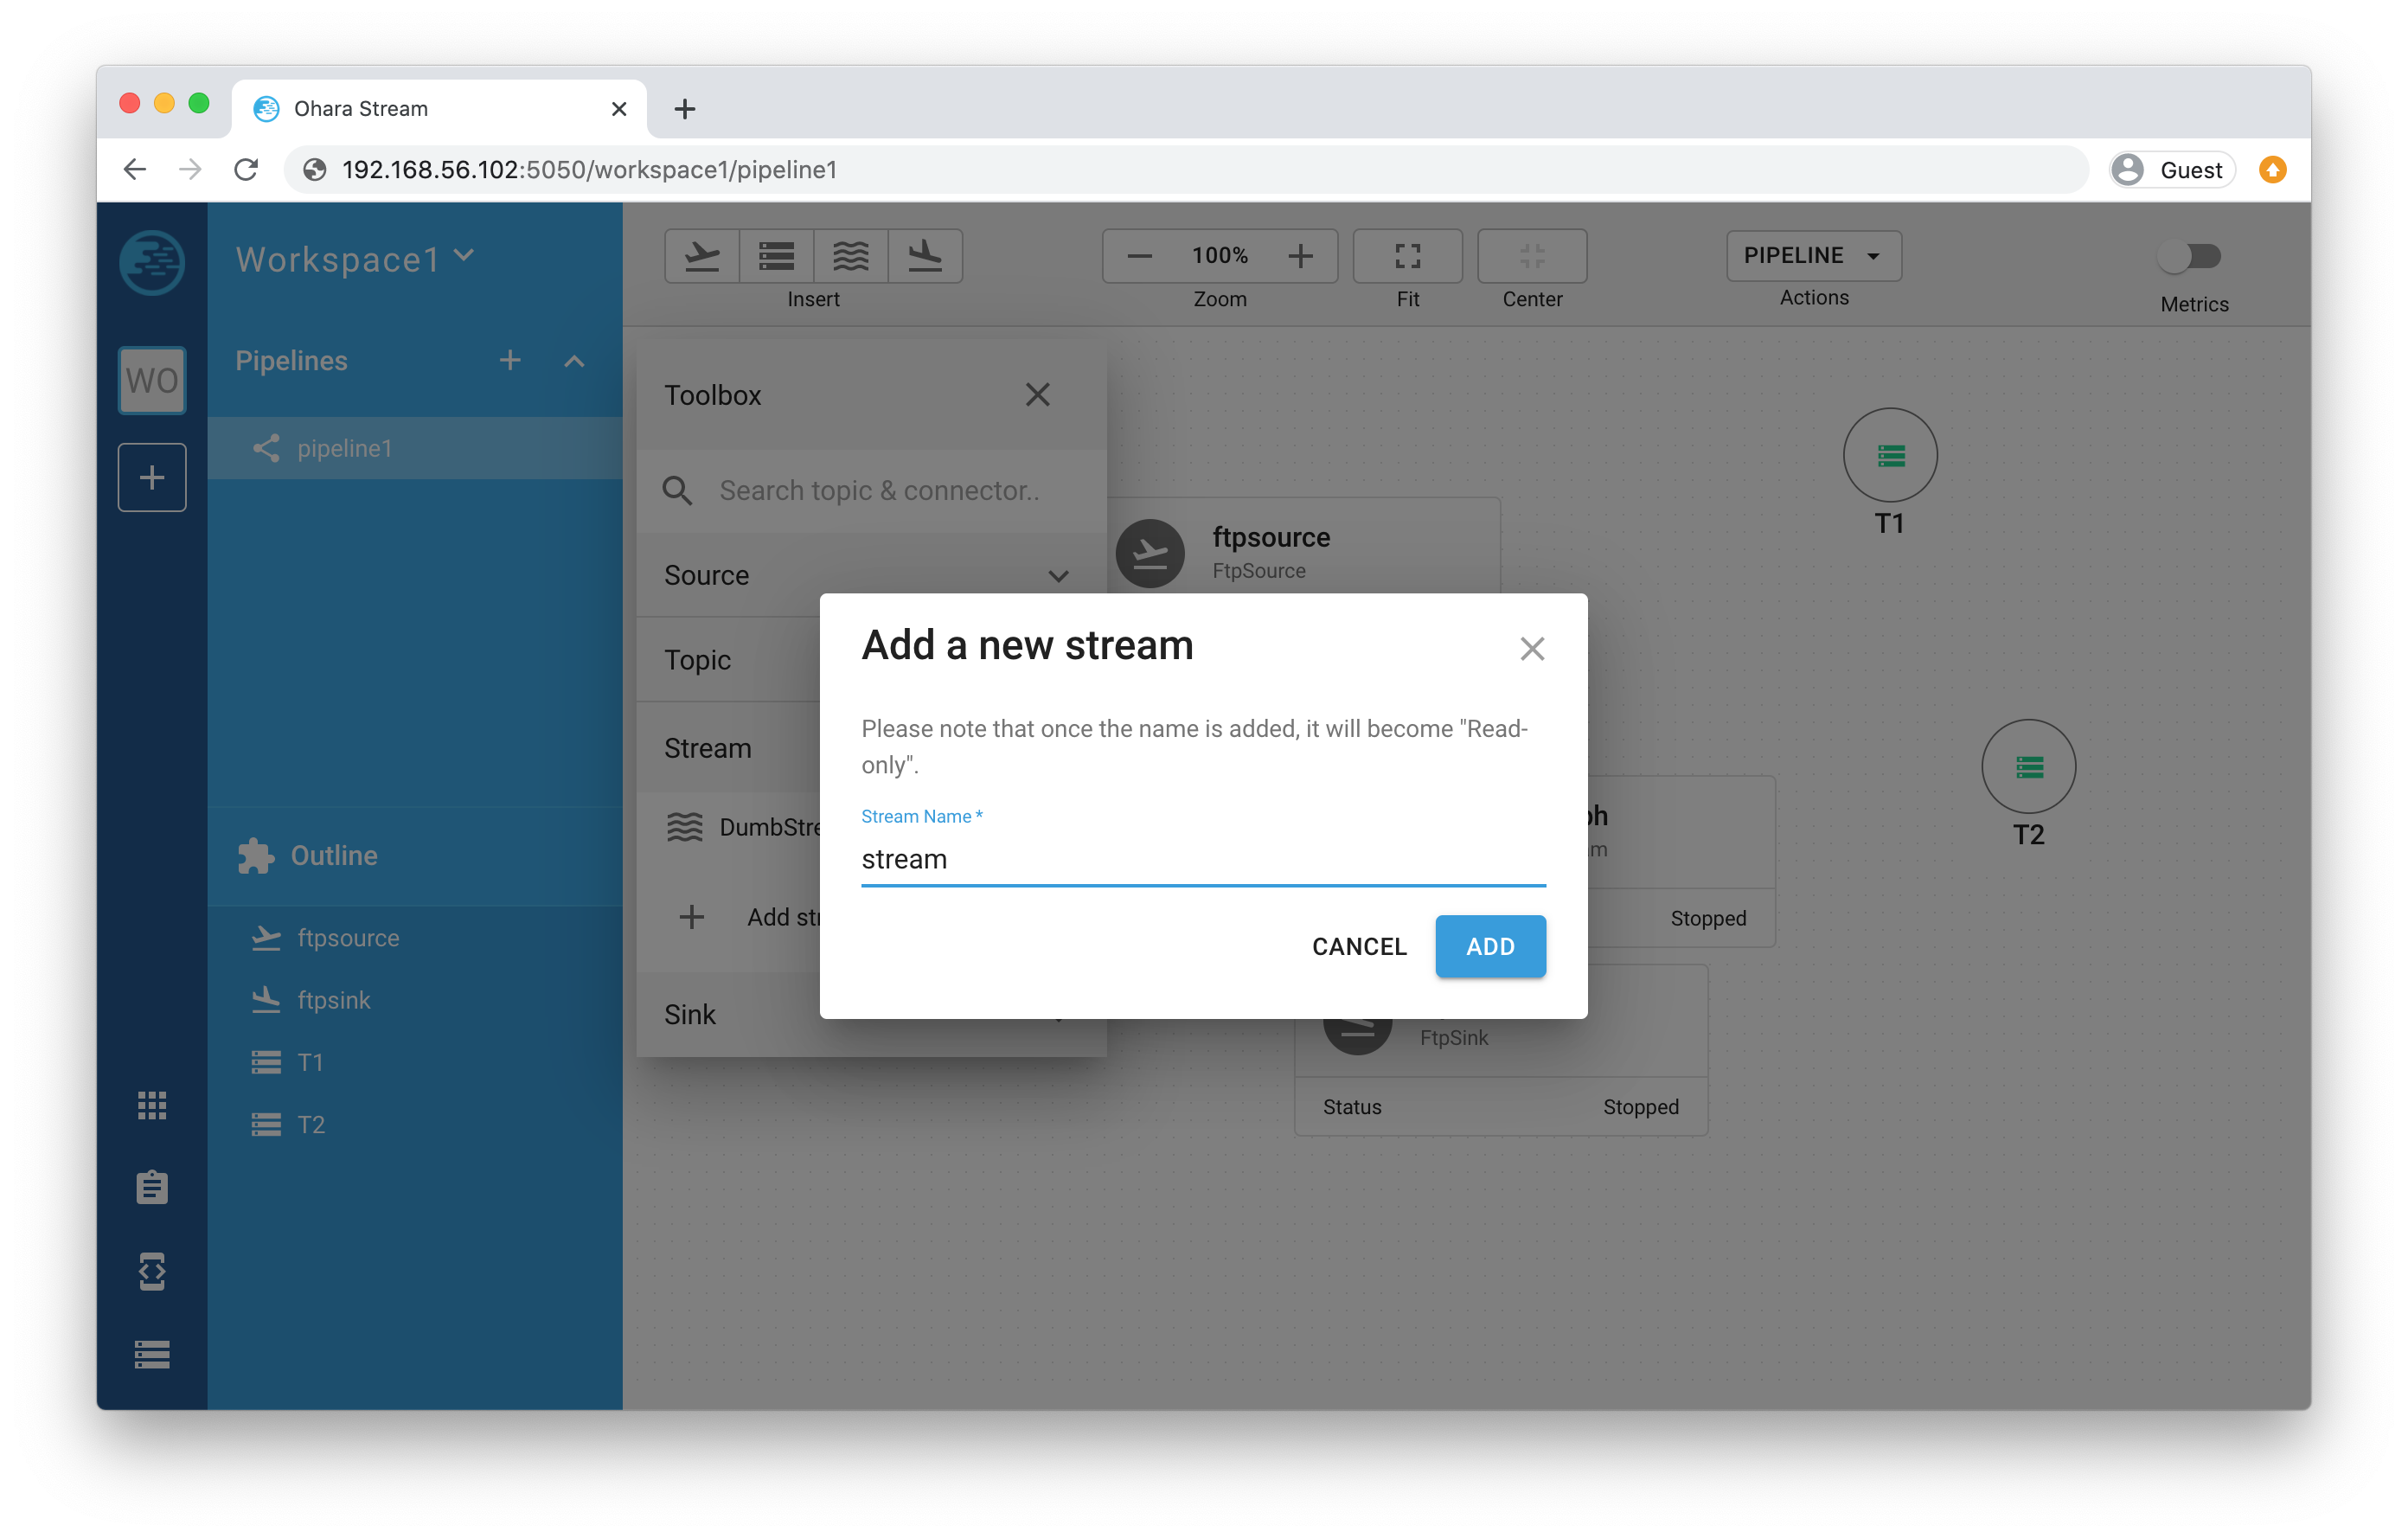
- Adding a stream is just like connector and topic, drag the “DumbStream” item from the Toolbox and drop it into the Paper and give a name “stream”
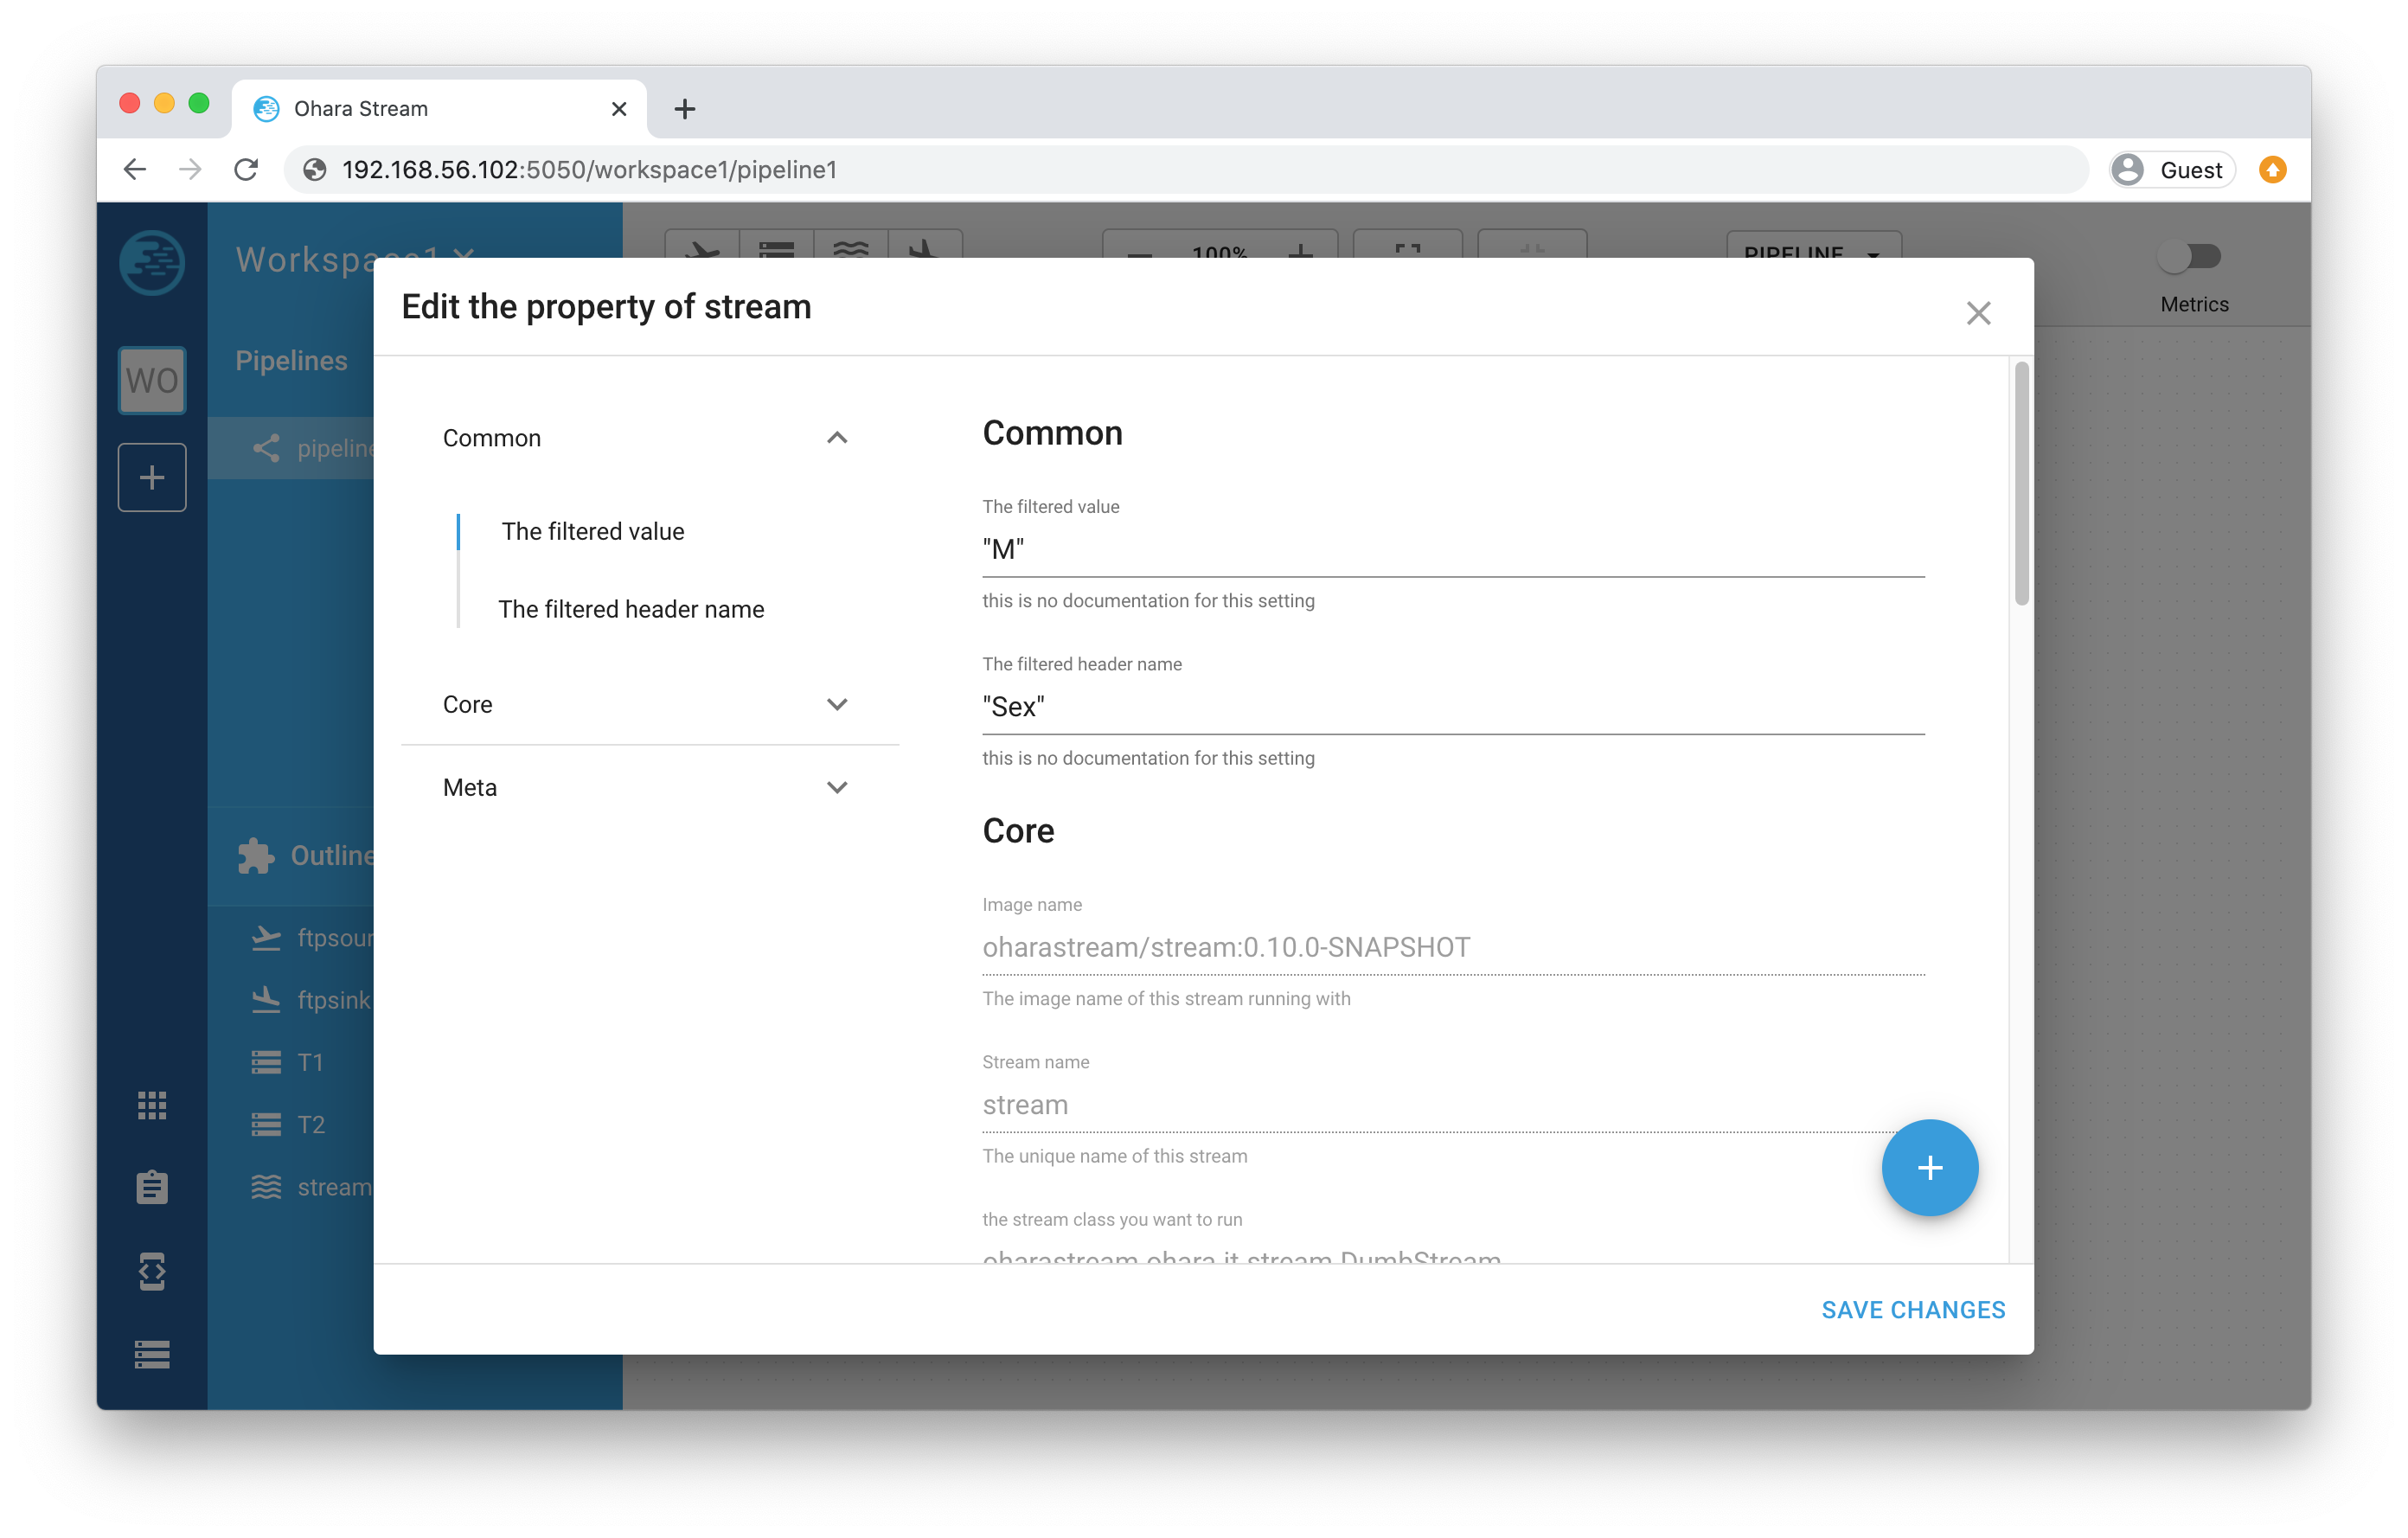
- Now let’s work through the configuration together. Hover over the stream component and click on the “Configure” button to open the configure dialog
- Fill out the form with the following settings and click the “SAVE CHANGES” button:
- The filtered value: “M”
- The filtered header name: “Sex”
- Node name list: 192.168.56.111 (you should use you own IP)
Note
This stream is capable of filtering out columns and values that we specified and then push the new result to a topic. Here we’re specifically setting the “Sex” as the filtered header and “M” as the filtered value (stands for Man) and so our output data will only “include” data that contains “M” value in the “Sex” column. We will verify the result later in the tutorial.
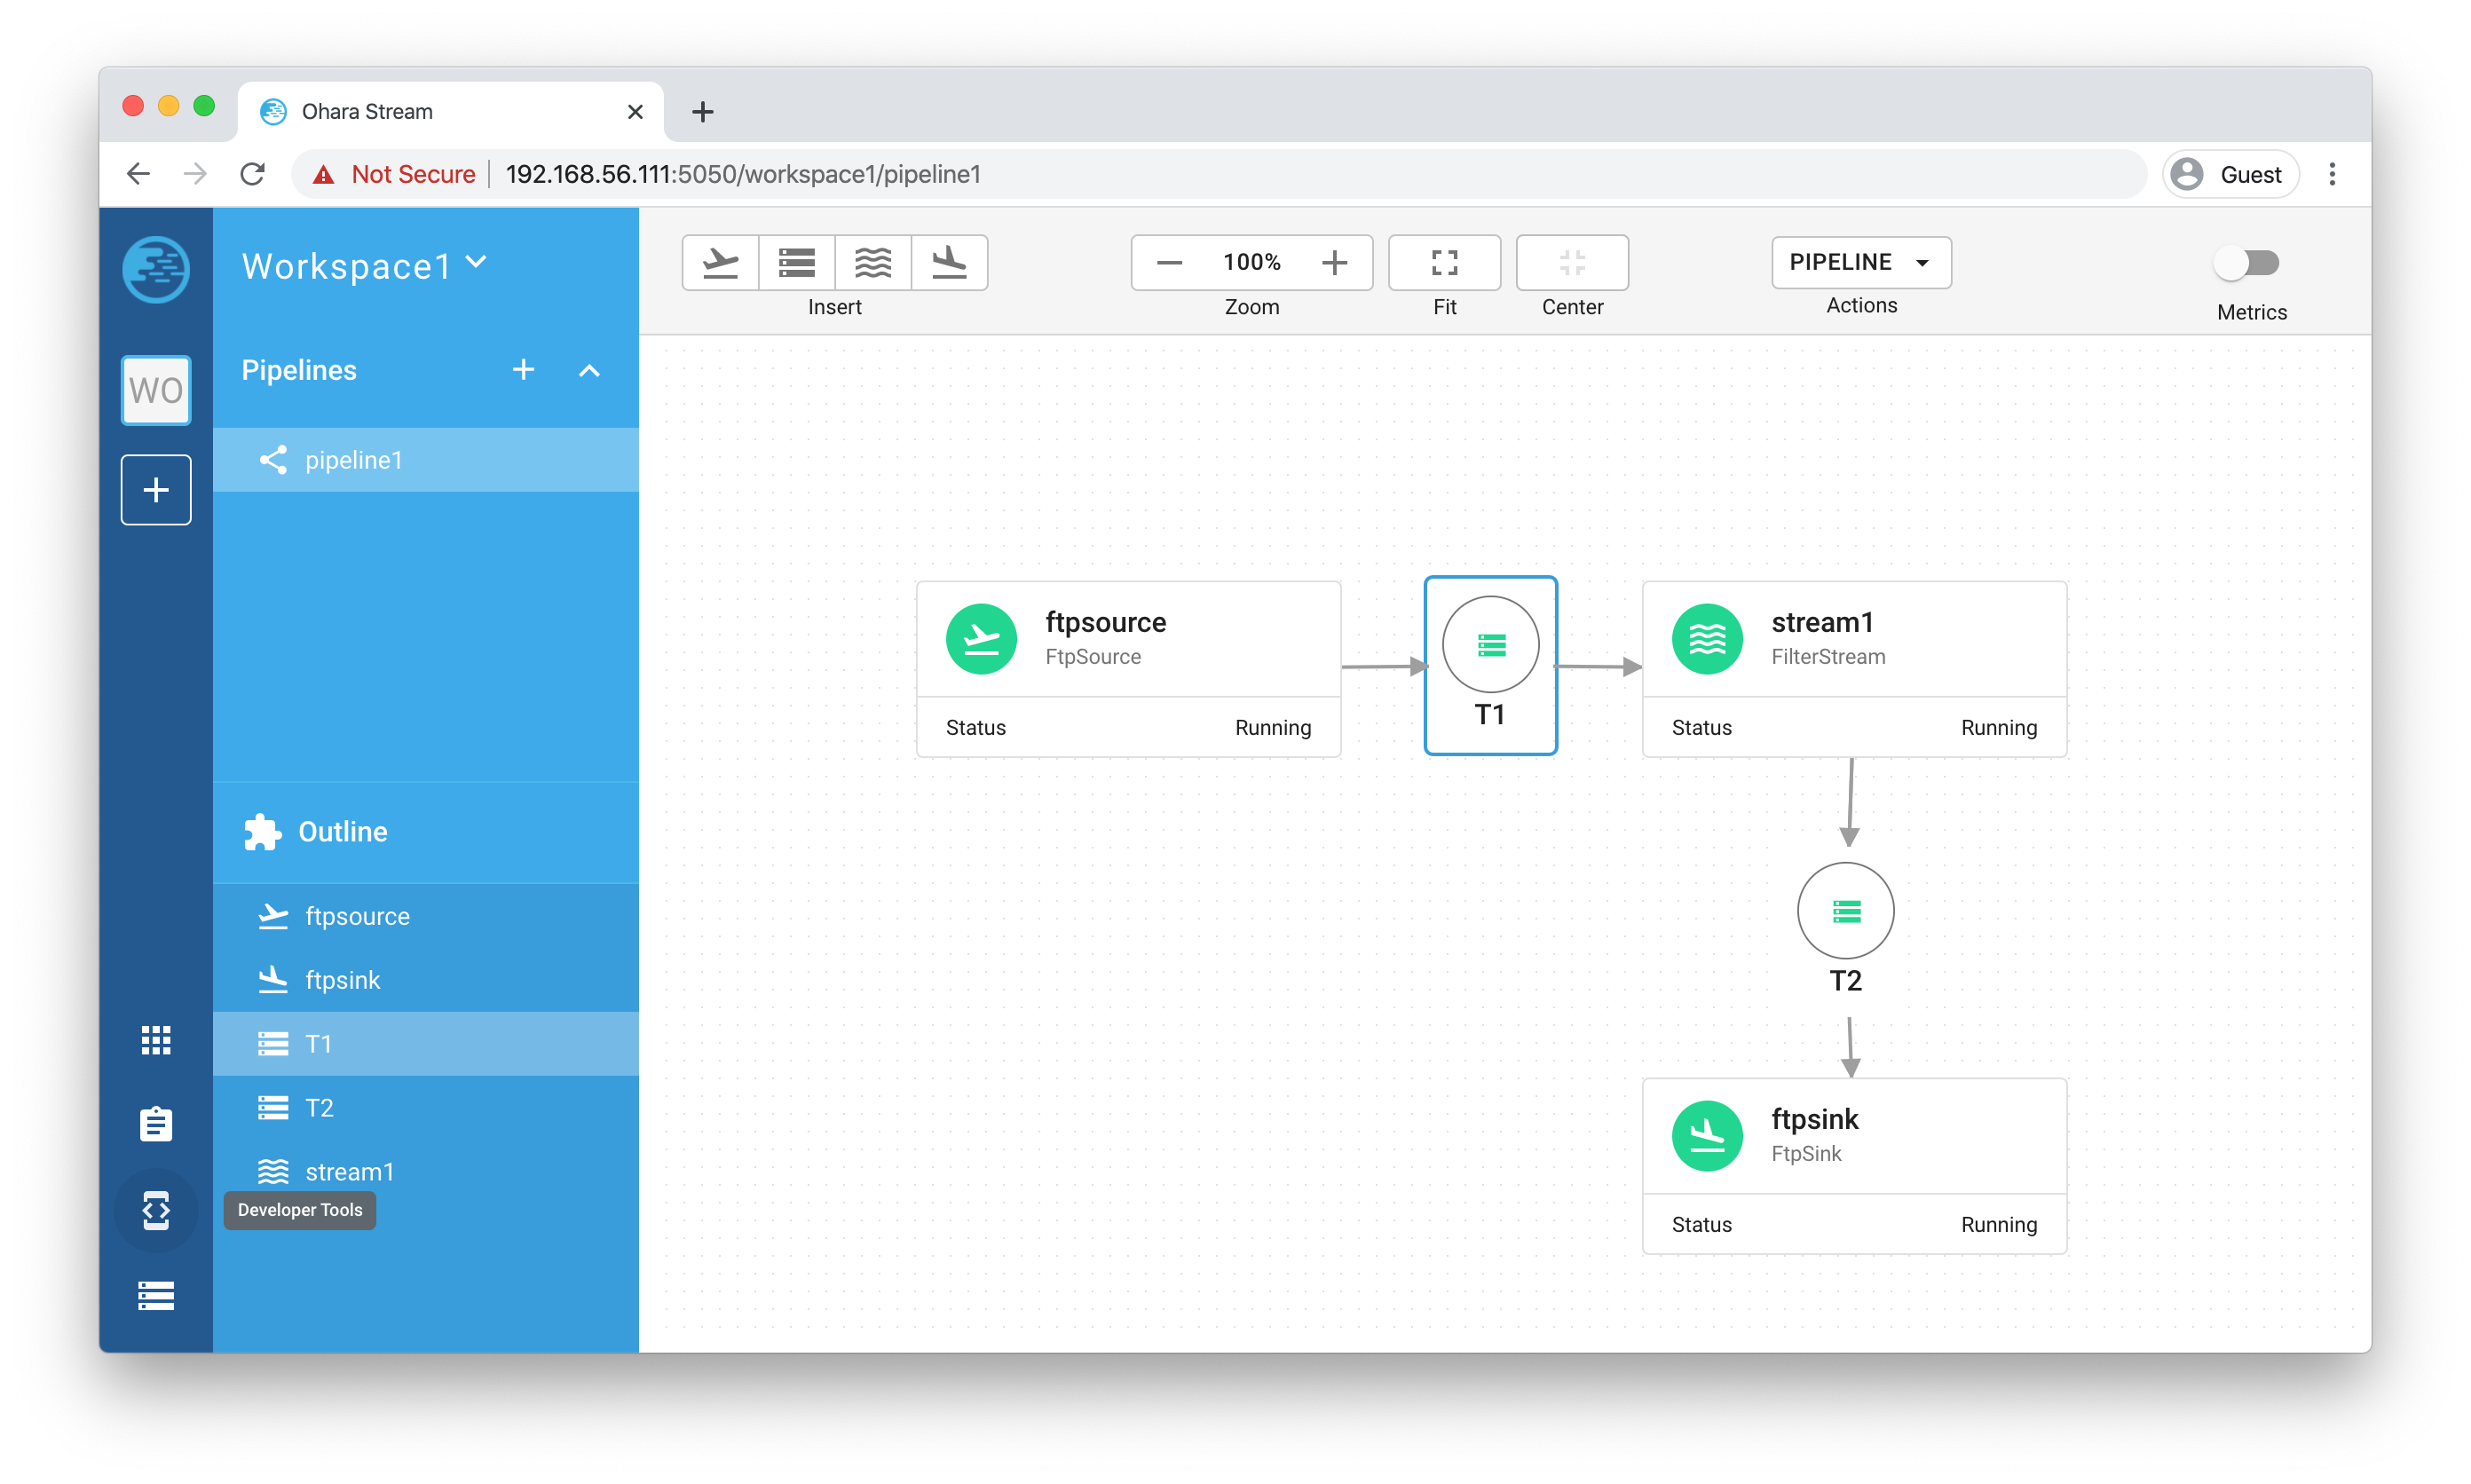
Everything is ready. We can now create the connection like we mentioned earlier: FTP source -> topic -> stream -> topic -> FTP sink. But before doing so, let’s move these components a bit and so we can have more room to work with (You can close the Toolbox by clicking on the close icon on the top right corner):

Okay, it’s time to create the connection:
- Hover over FTP source connector and click the “Link” button, and move your mouse to the first topic named “T1” and click on it. A connection should be created:
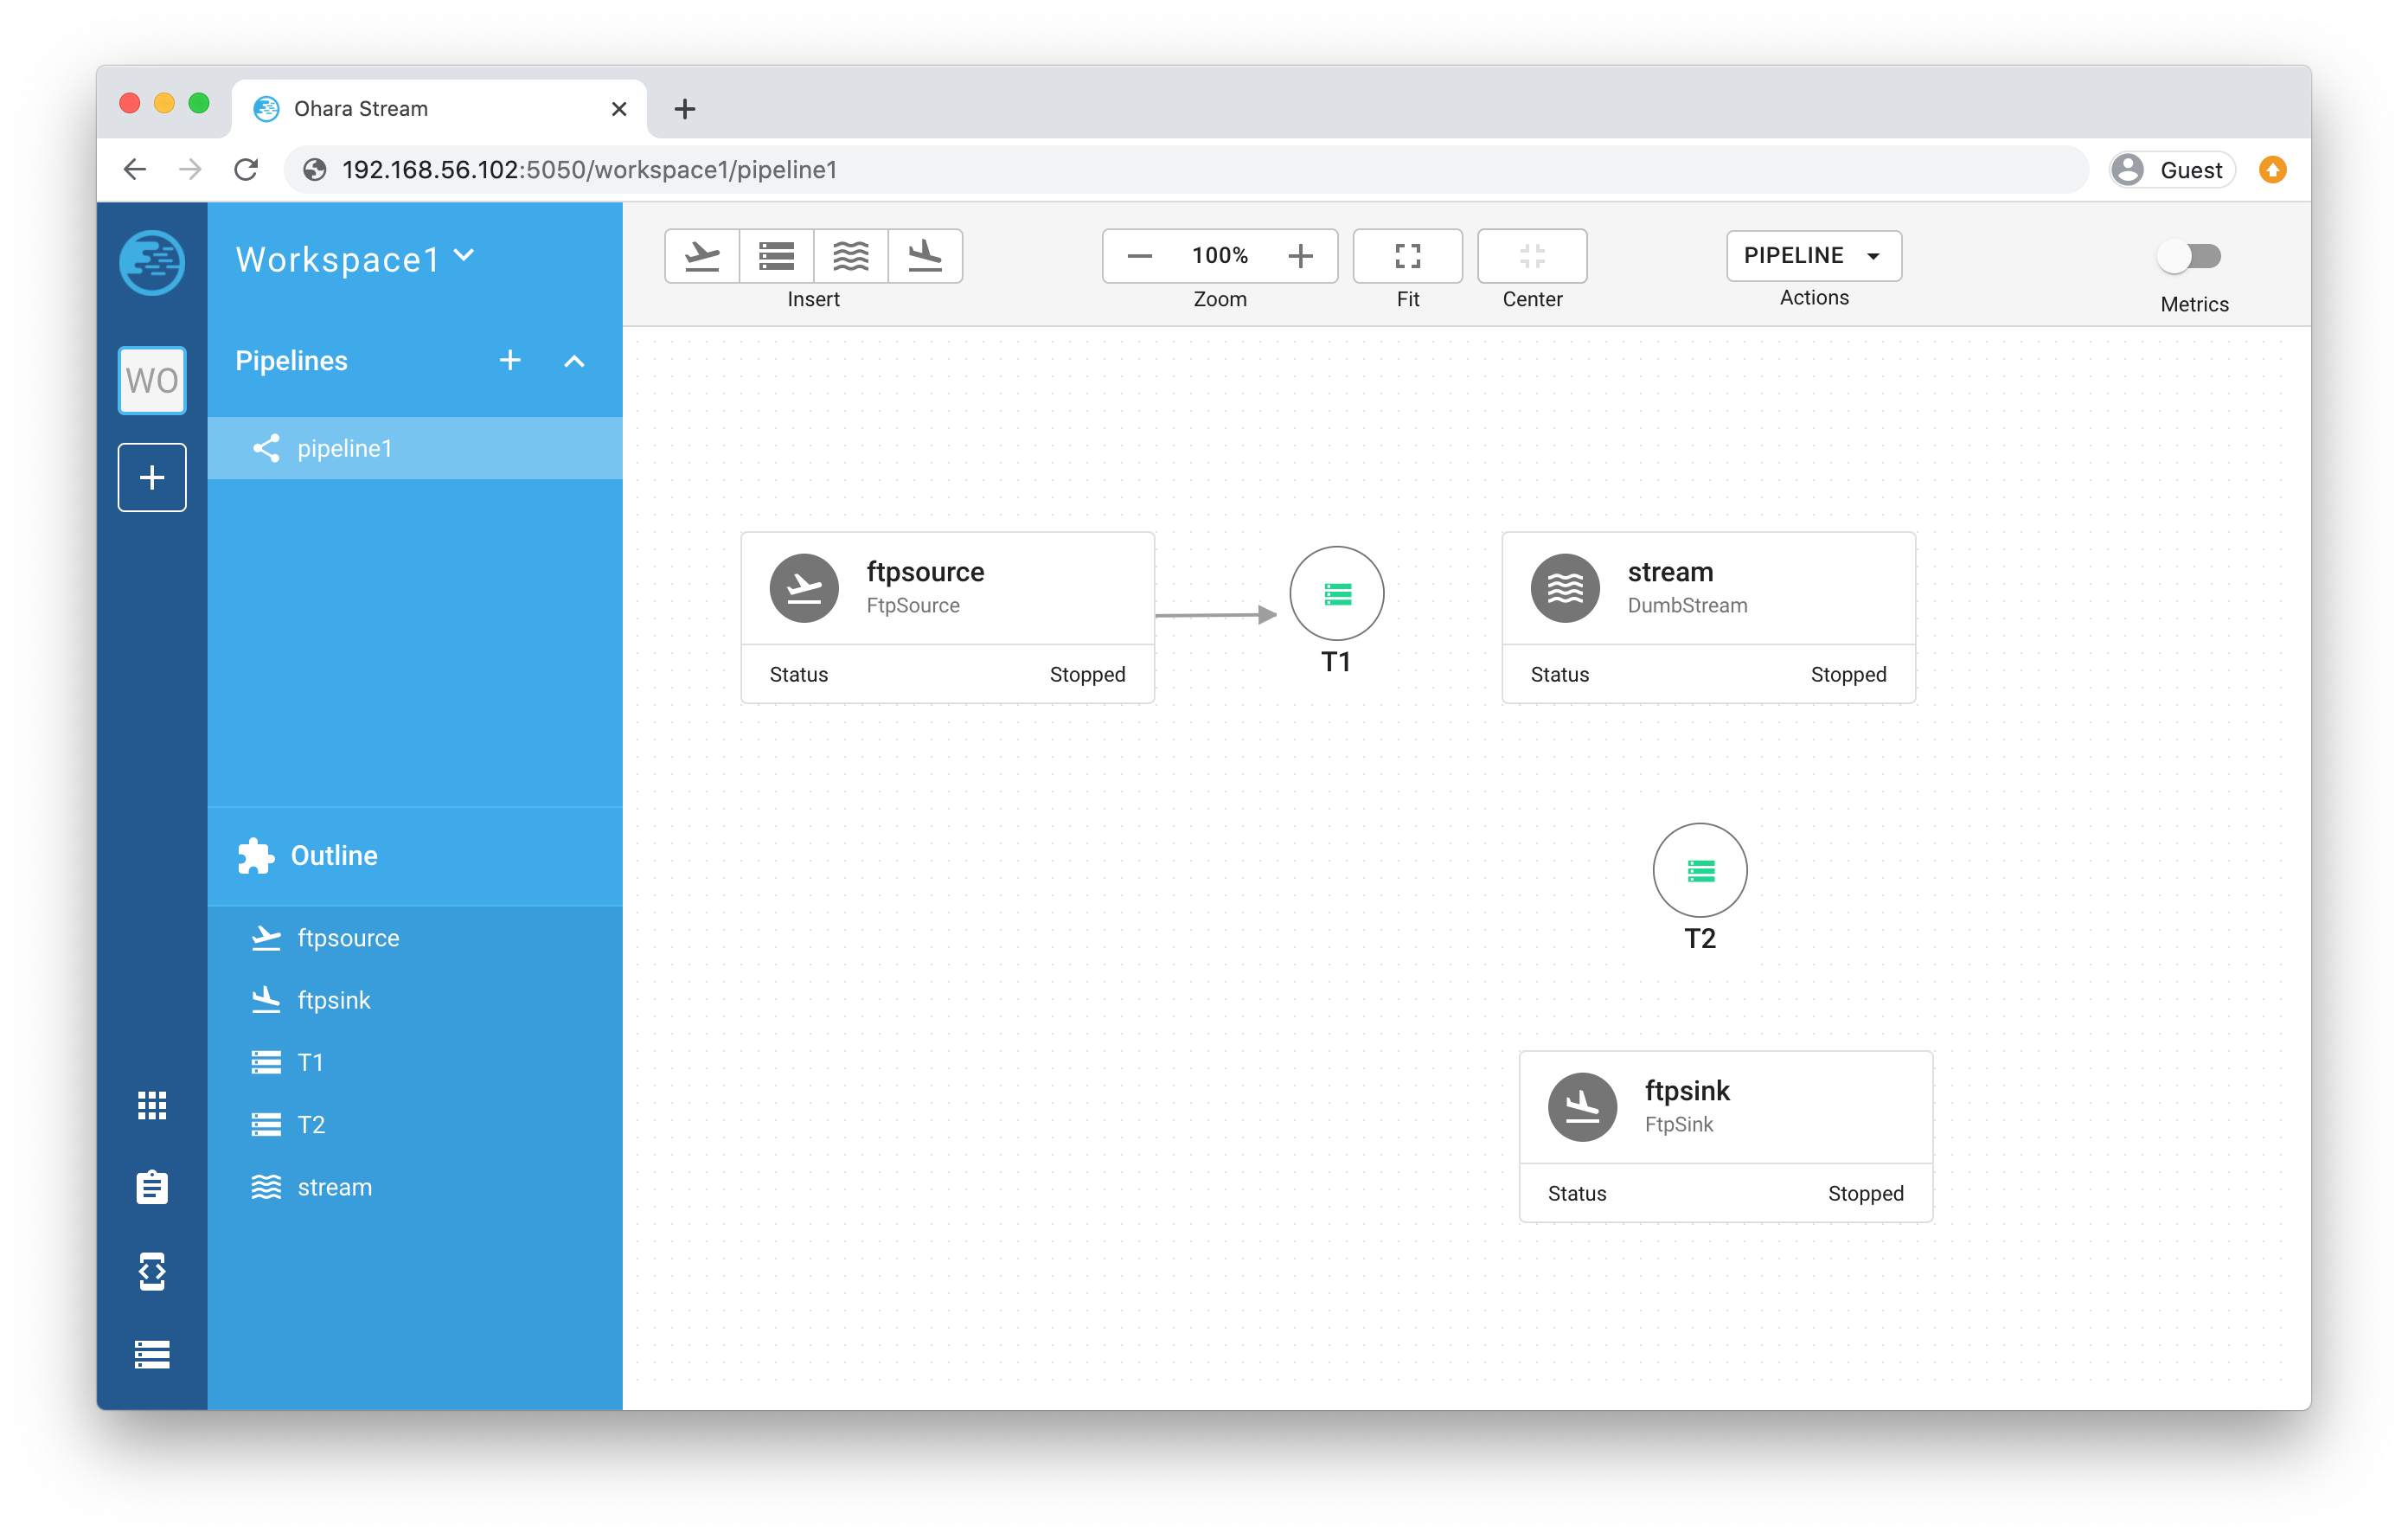
- Repeat the same step but this time with “T1” to create a connection from T1 to stream
- And stream -> T2 then T2 -> FTP sink connector. After you are done, you should have a graph like this (Components position have been tweaked so it’s better to see the relation between these components):

Note
You can also create the connection during configuring the connector or stream. For connector, just choose the topic from its topic list. For stream, you will need to choose both from and to topics from the topic list.
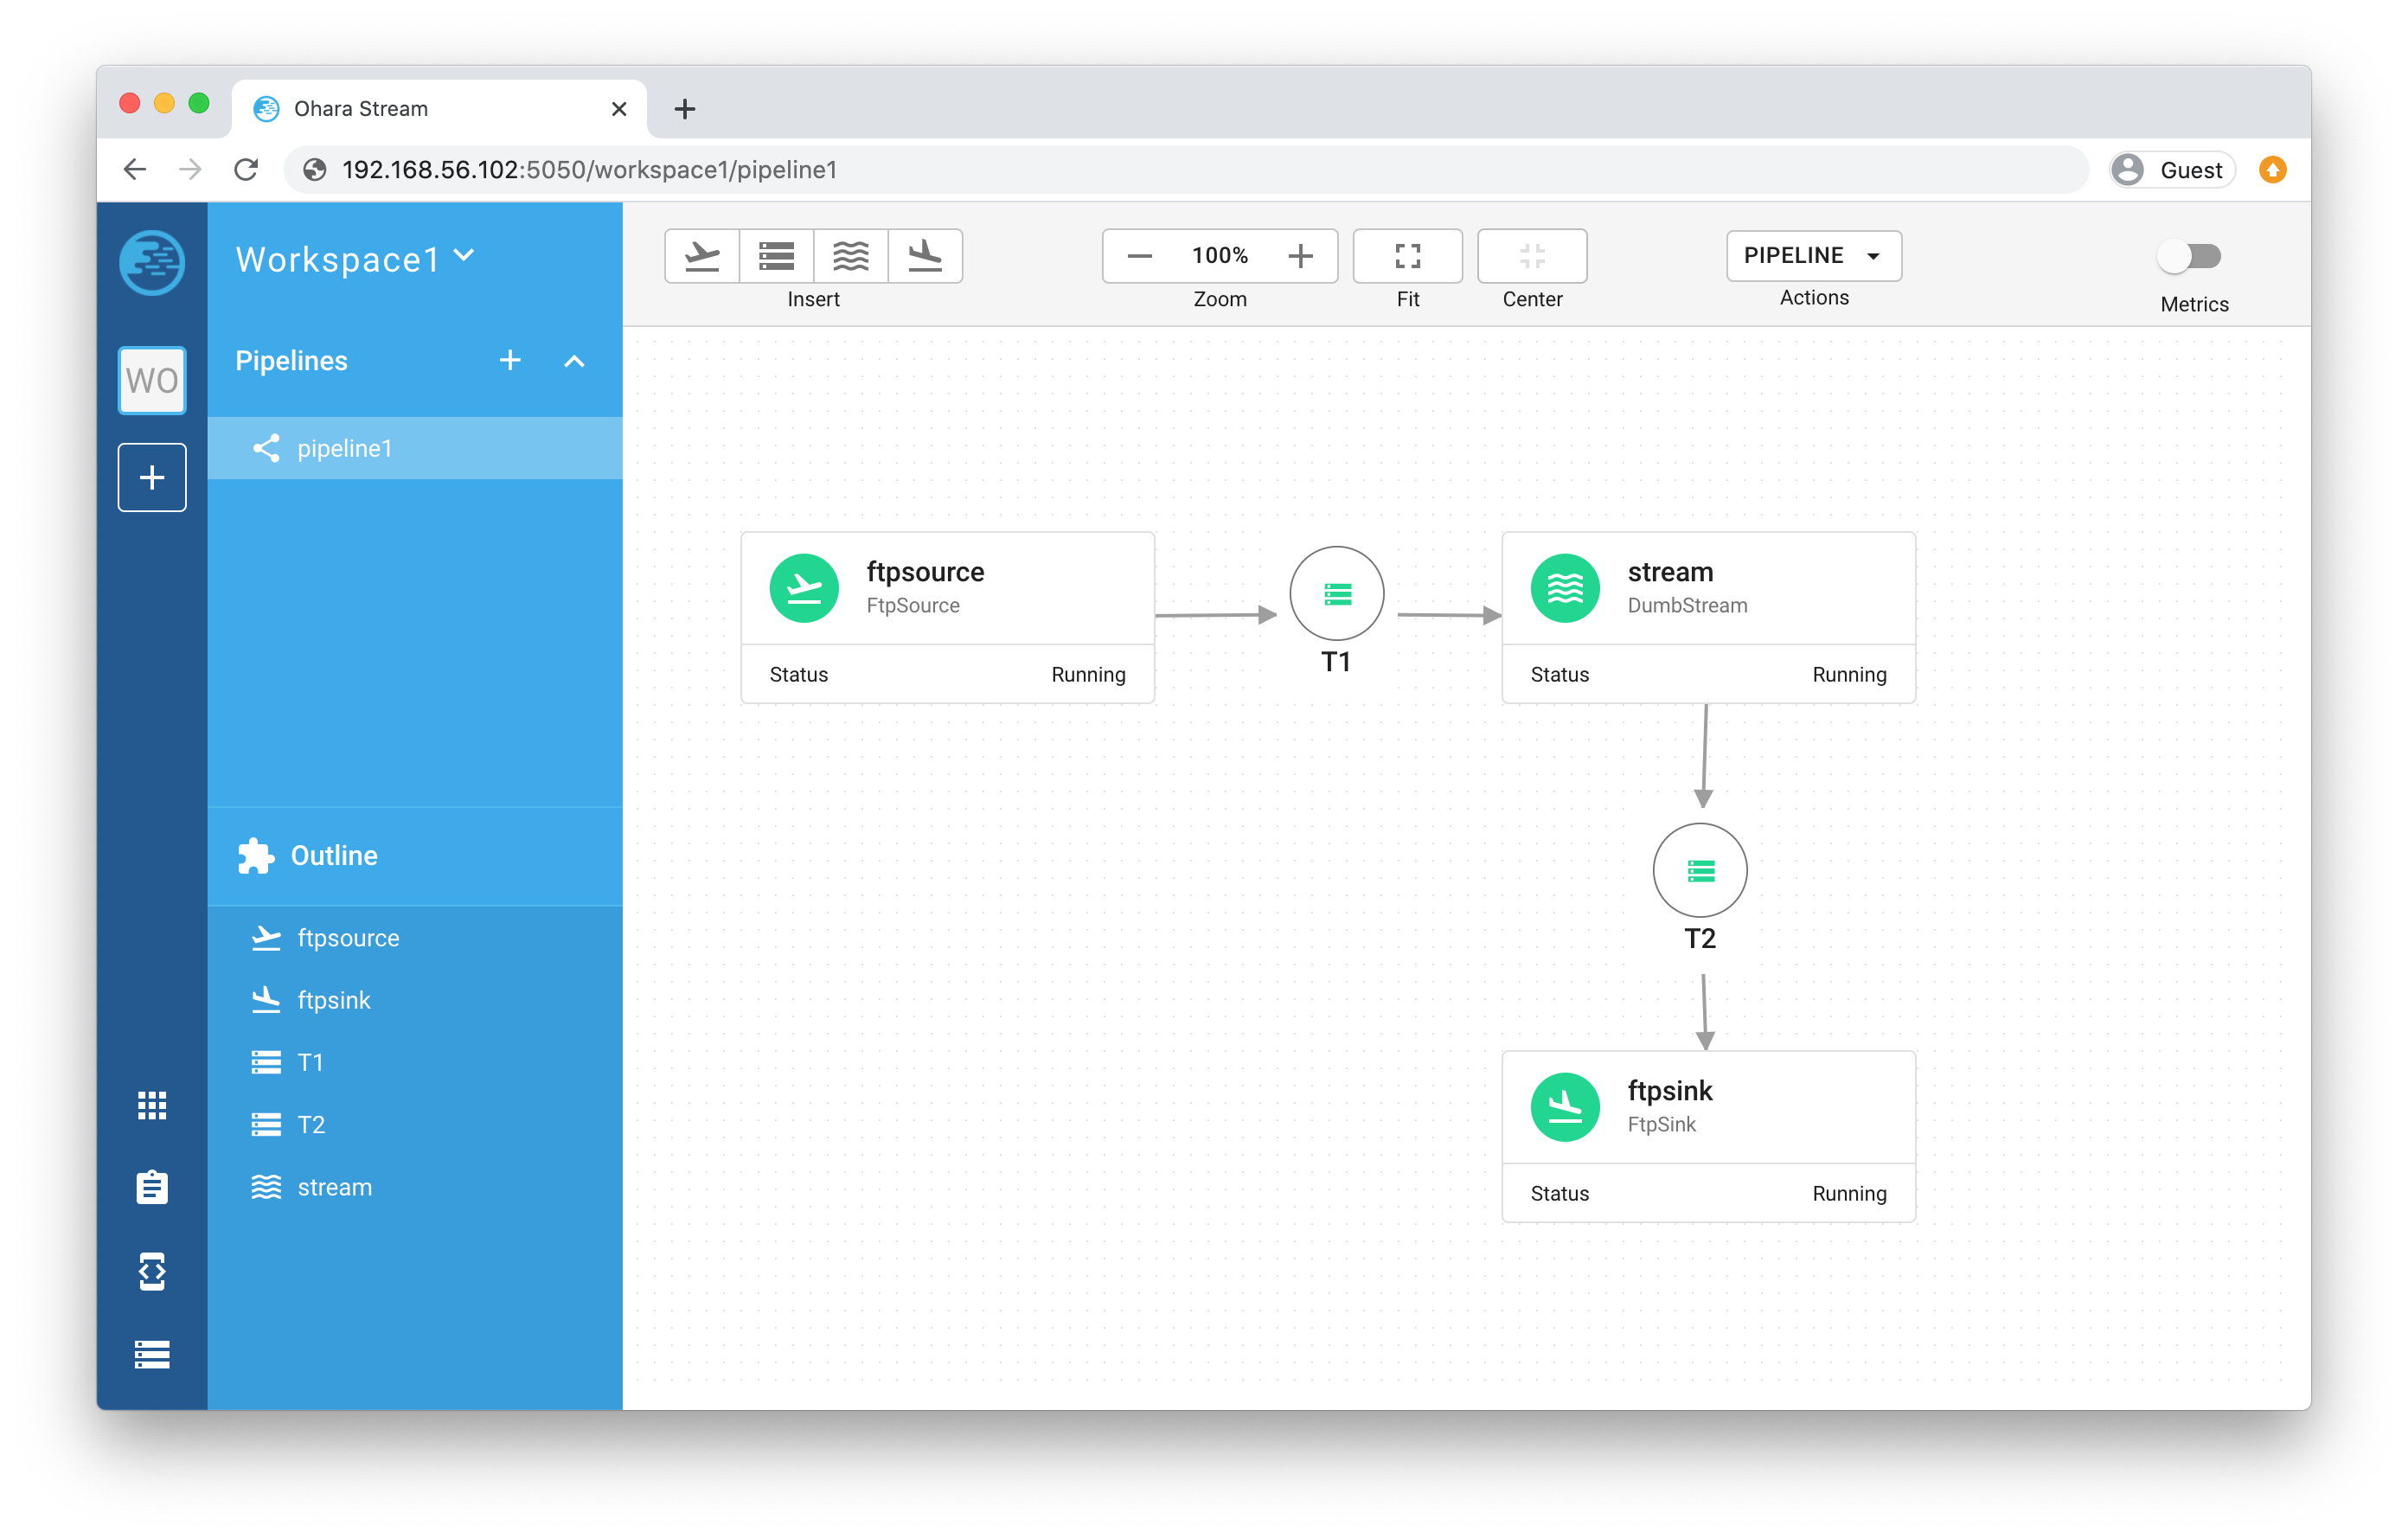
Start pipeline components
So far so good, let’s start all the components simply by clicking on the “Start all components” button located on the Toolbar menu. If everything goes well you should see that all components’ icon are now green just like the following image:
Test our new pipeline
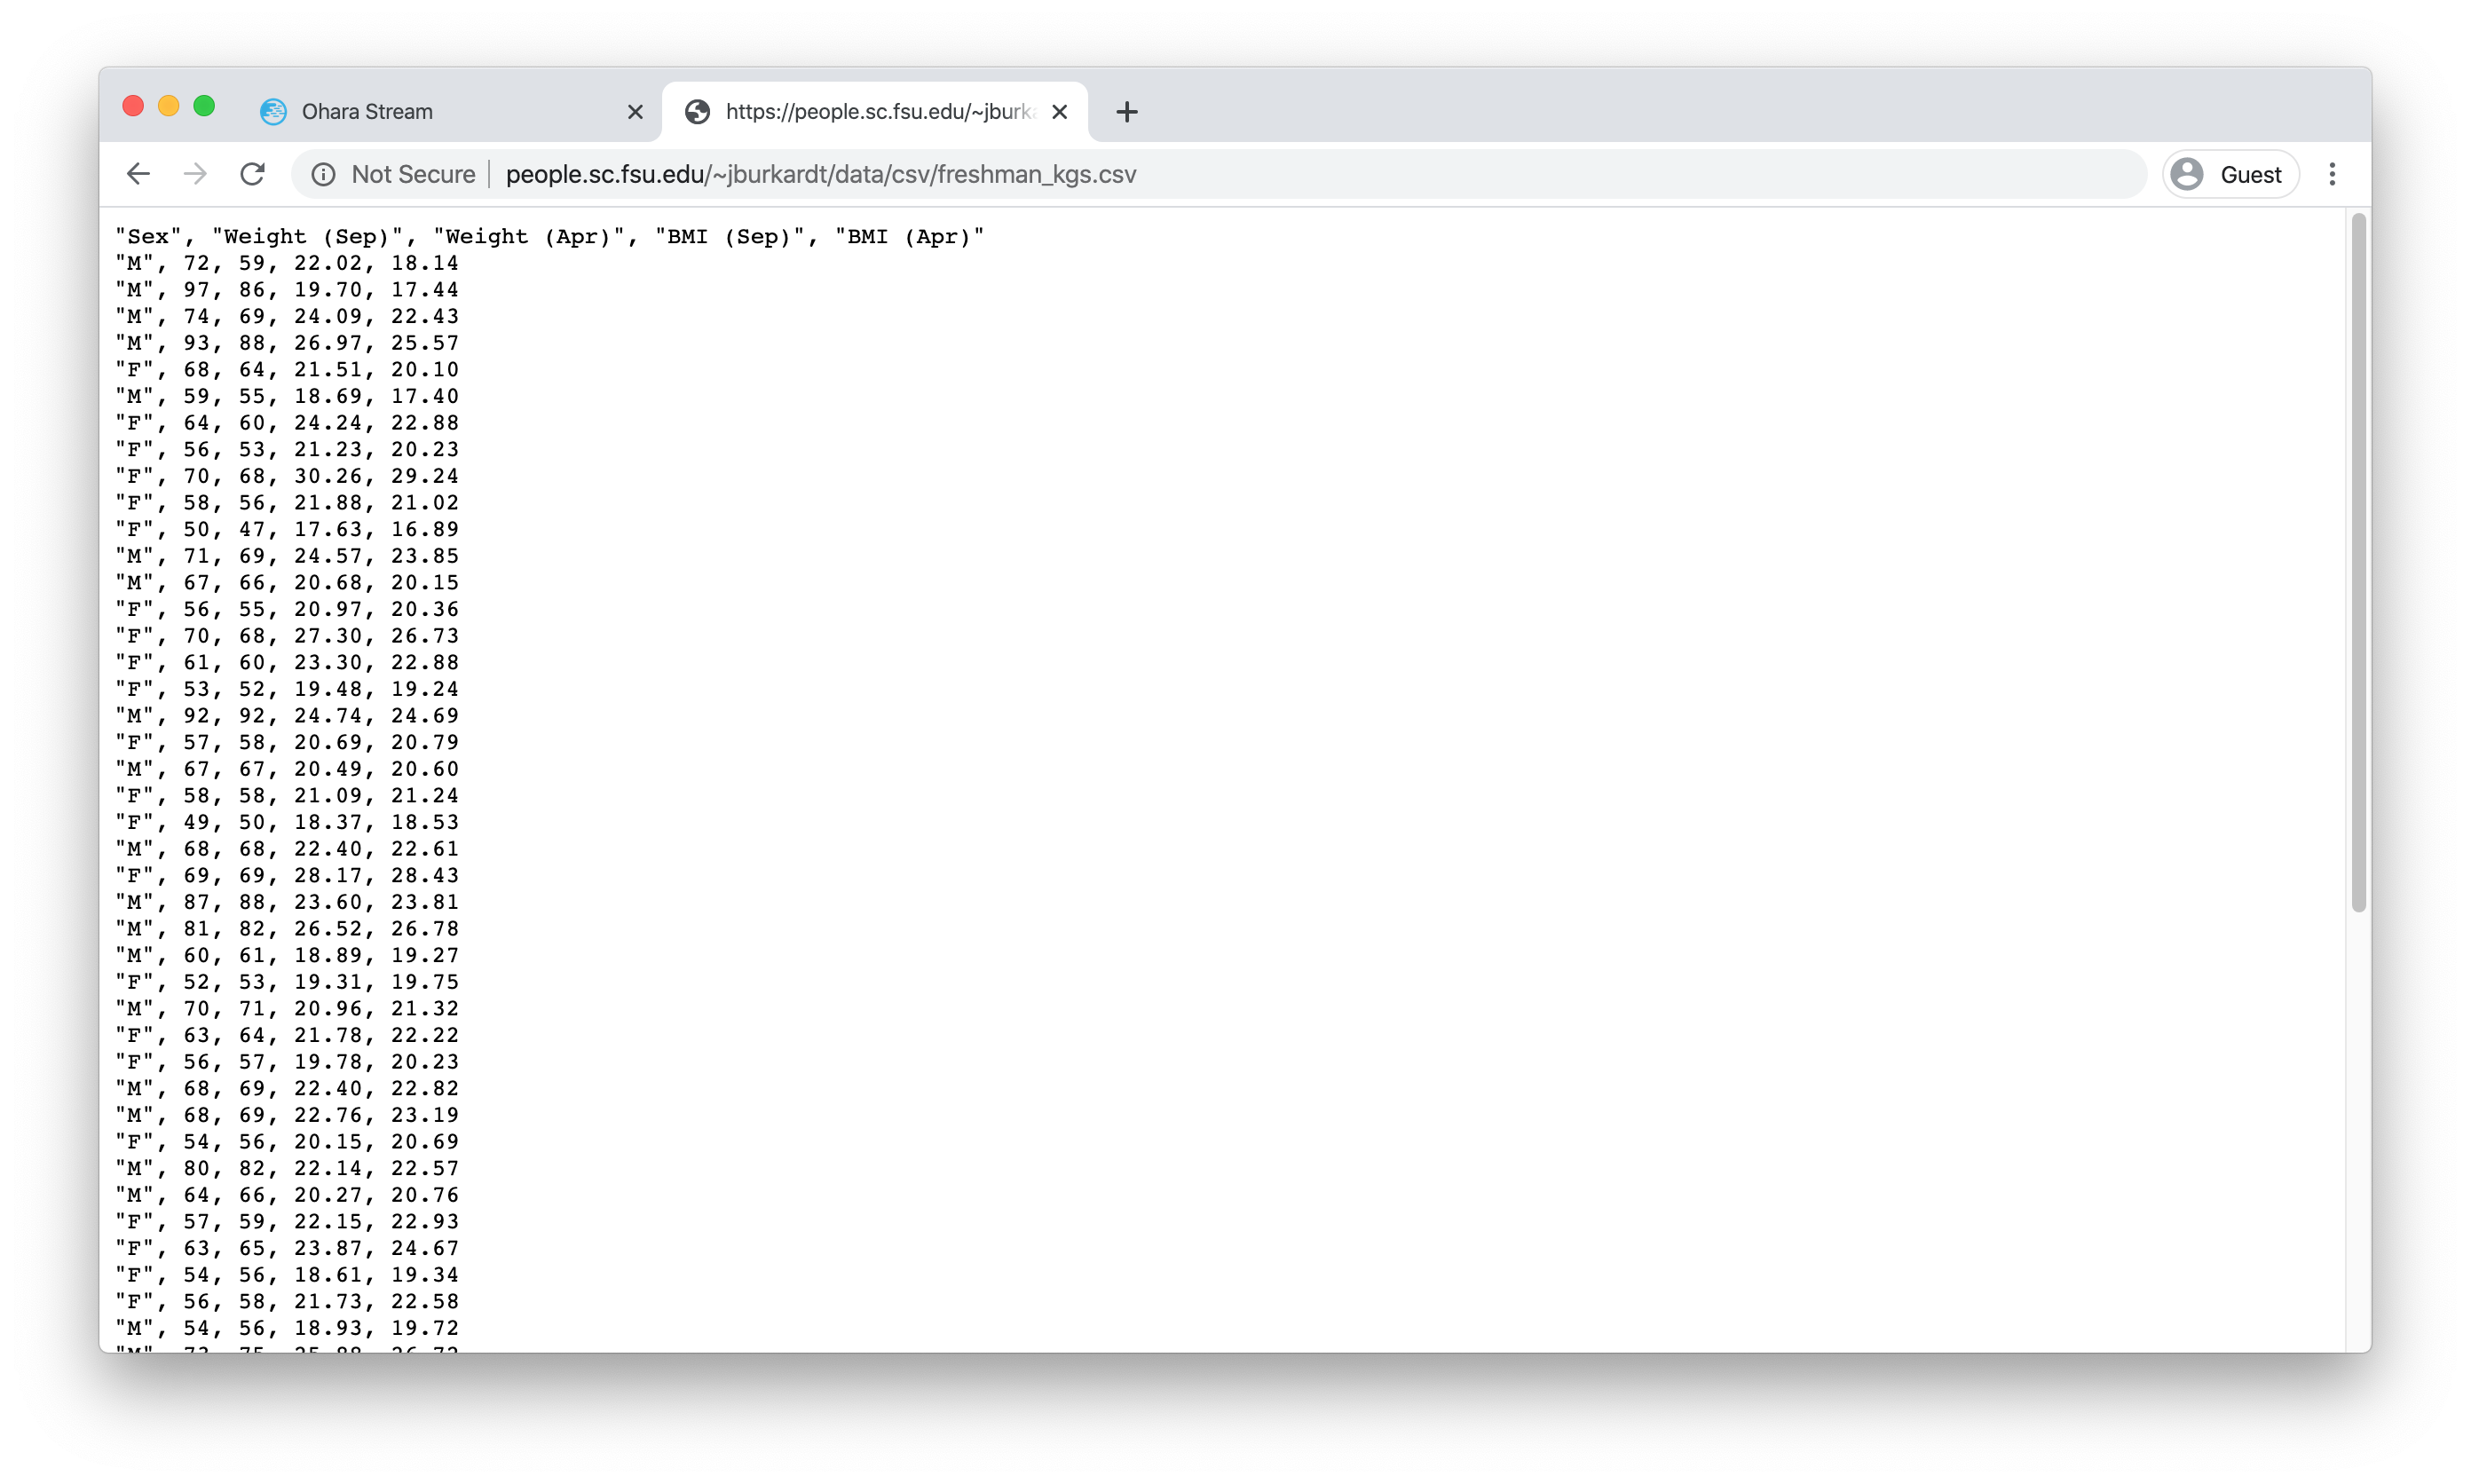
Let’s test this “pipeline” to see if it’s capable of transferring some data. We have prepared a CSV file which looks like this (you can download this file from this URL ):
Upload the file to the FTP service’s input folder. Wait a while, the file should be consumed and move to the output folder. You can verify if the data is properly transferred by using a FTP client to check the file (we’re using FileZilla ).

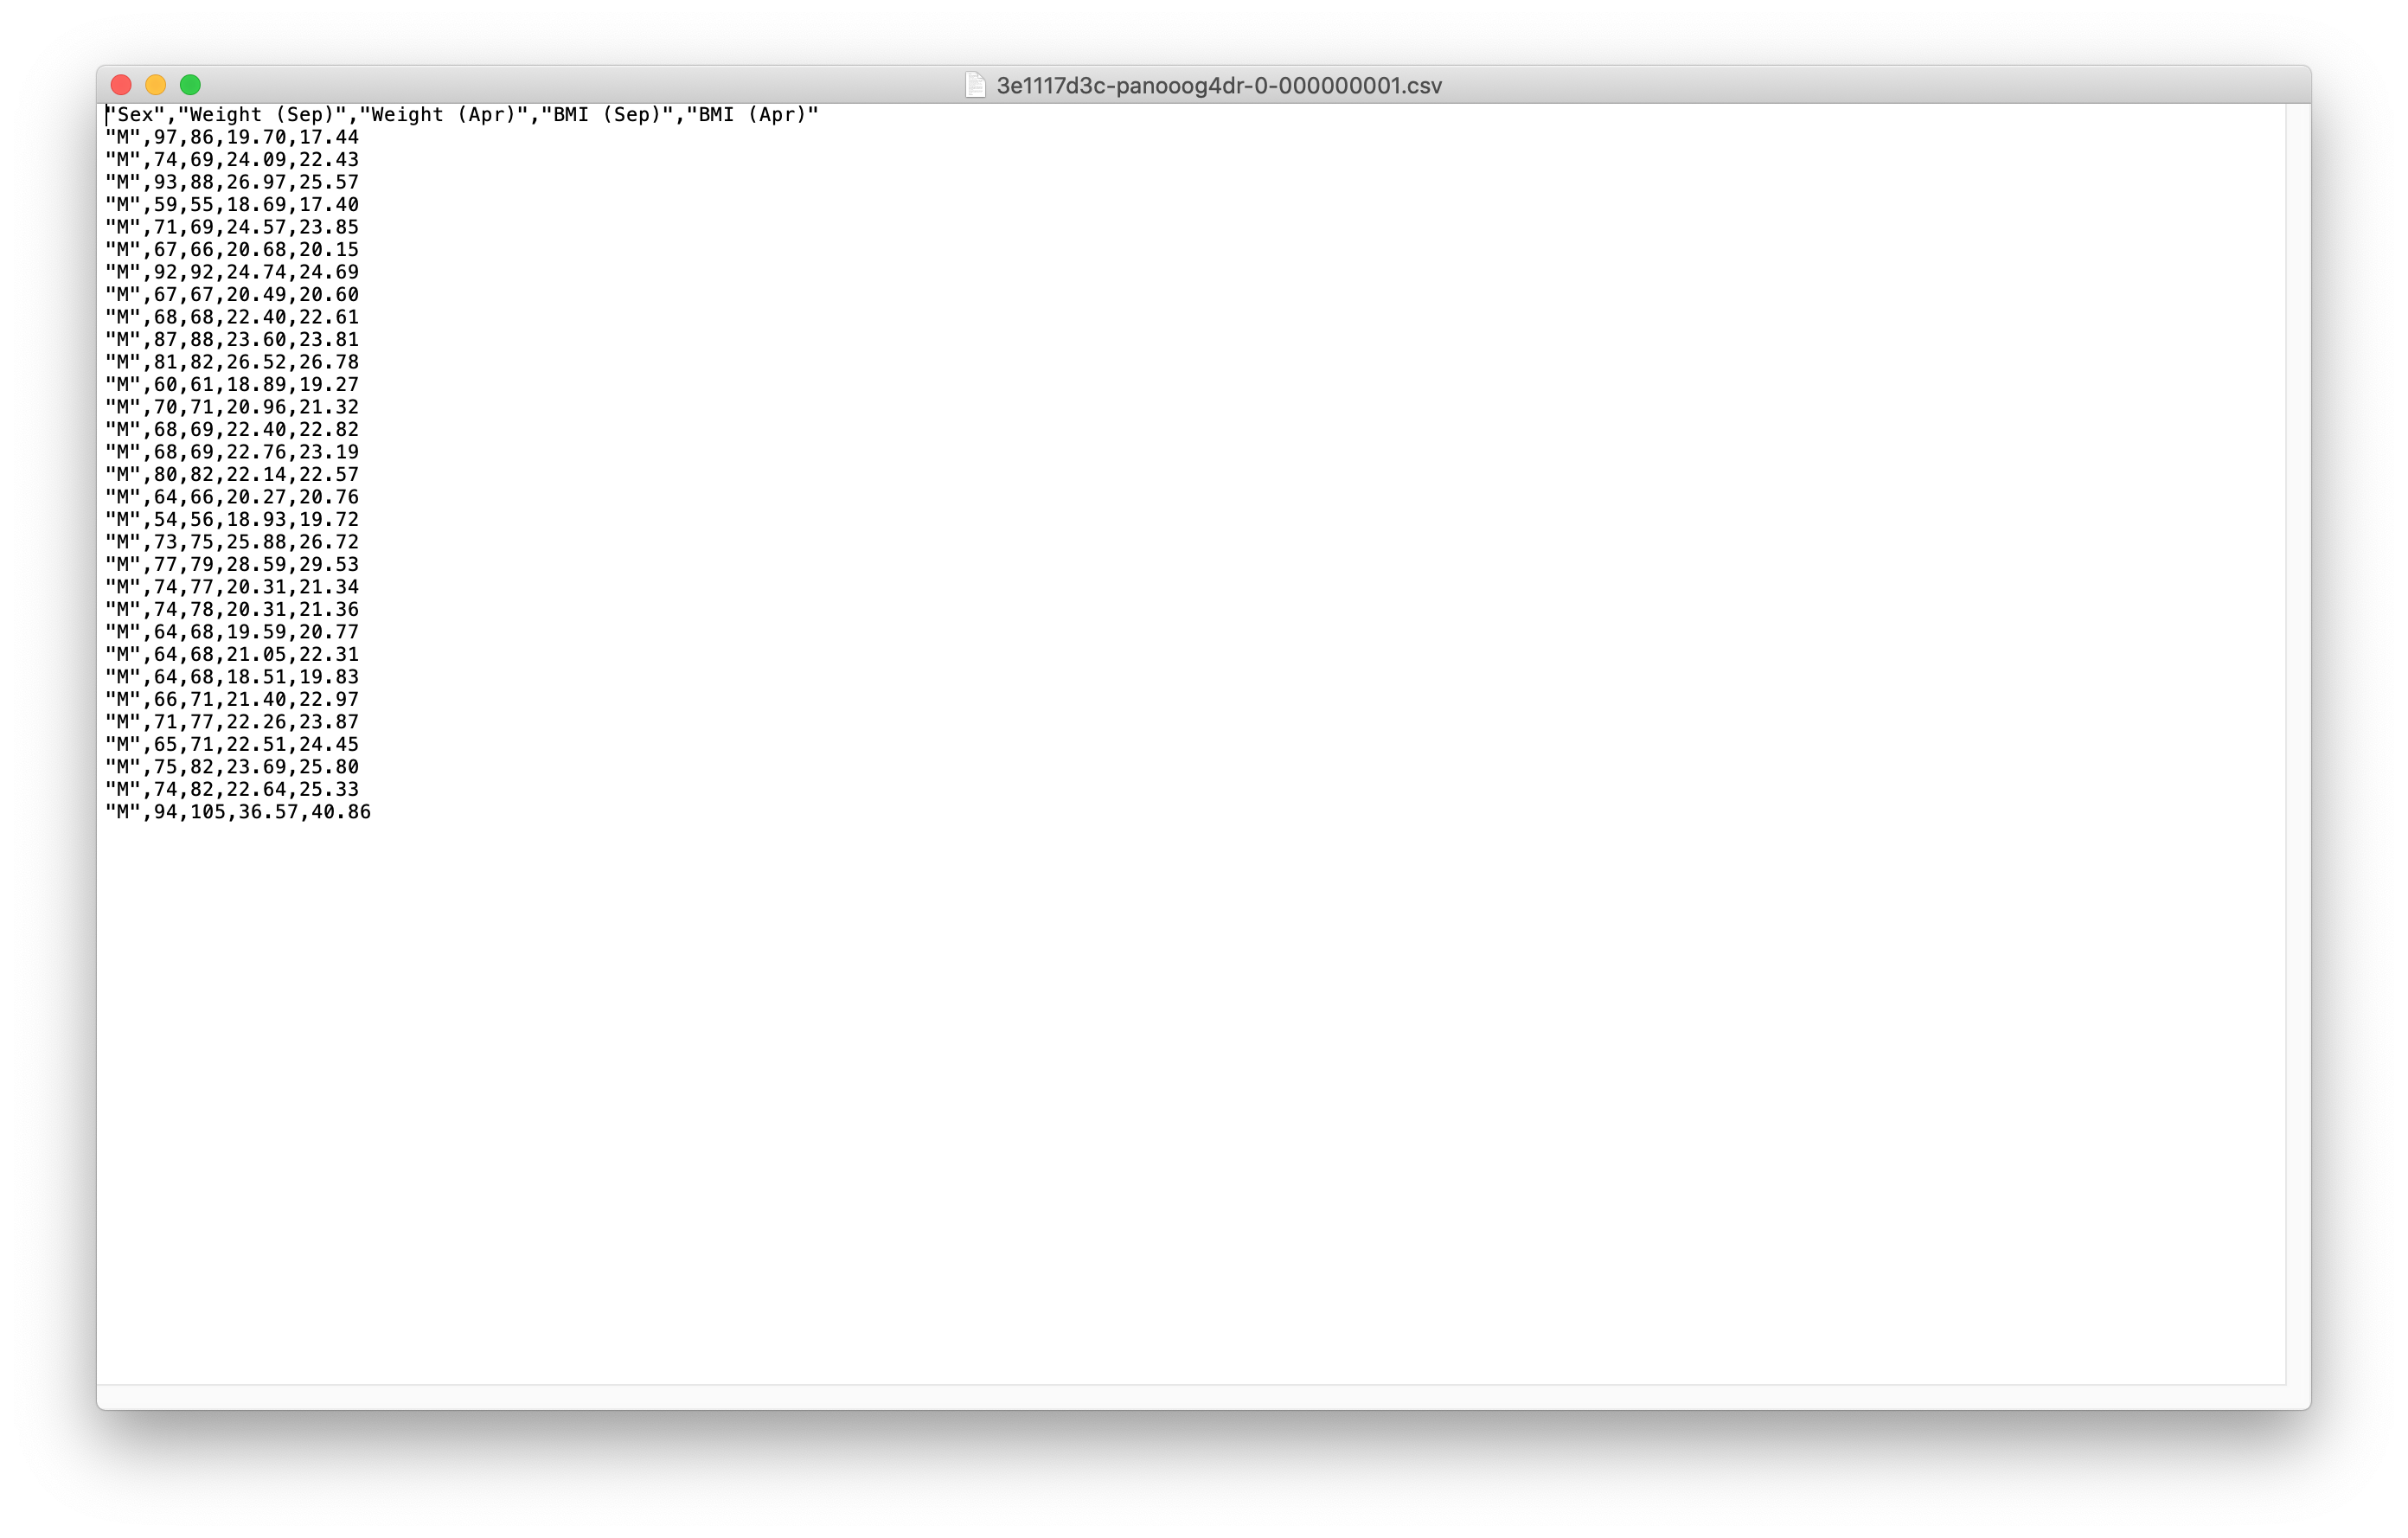
The output data should be filtered with the result only “M” (man) data are listed as shown below:
Troubleshooting
We now provide a few debugging tools that can help you pin down unexpected errors:
Event log panel:
All UI events are recorded, things like API request and response are also stored. You can view all you event log by simply opening up the Event log panel. As you can see in the screenshot, errors are highlighted and have more details that can be viewed when click on each of them.
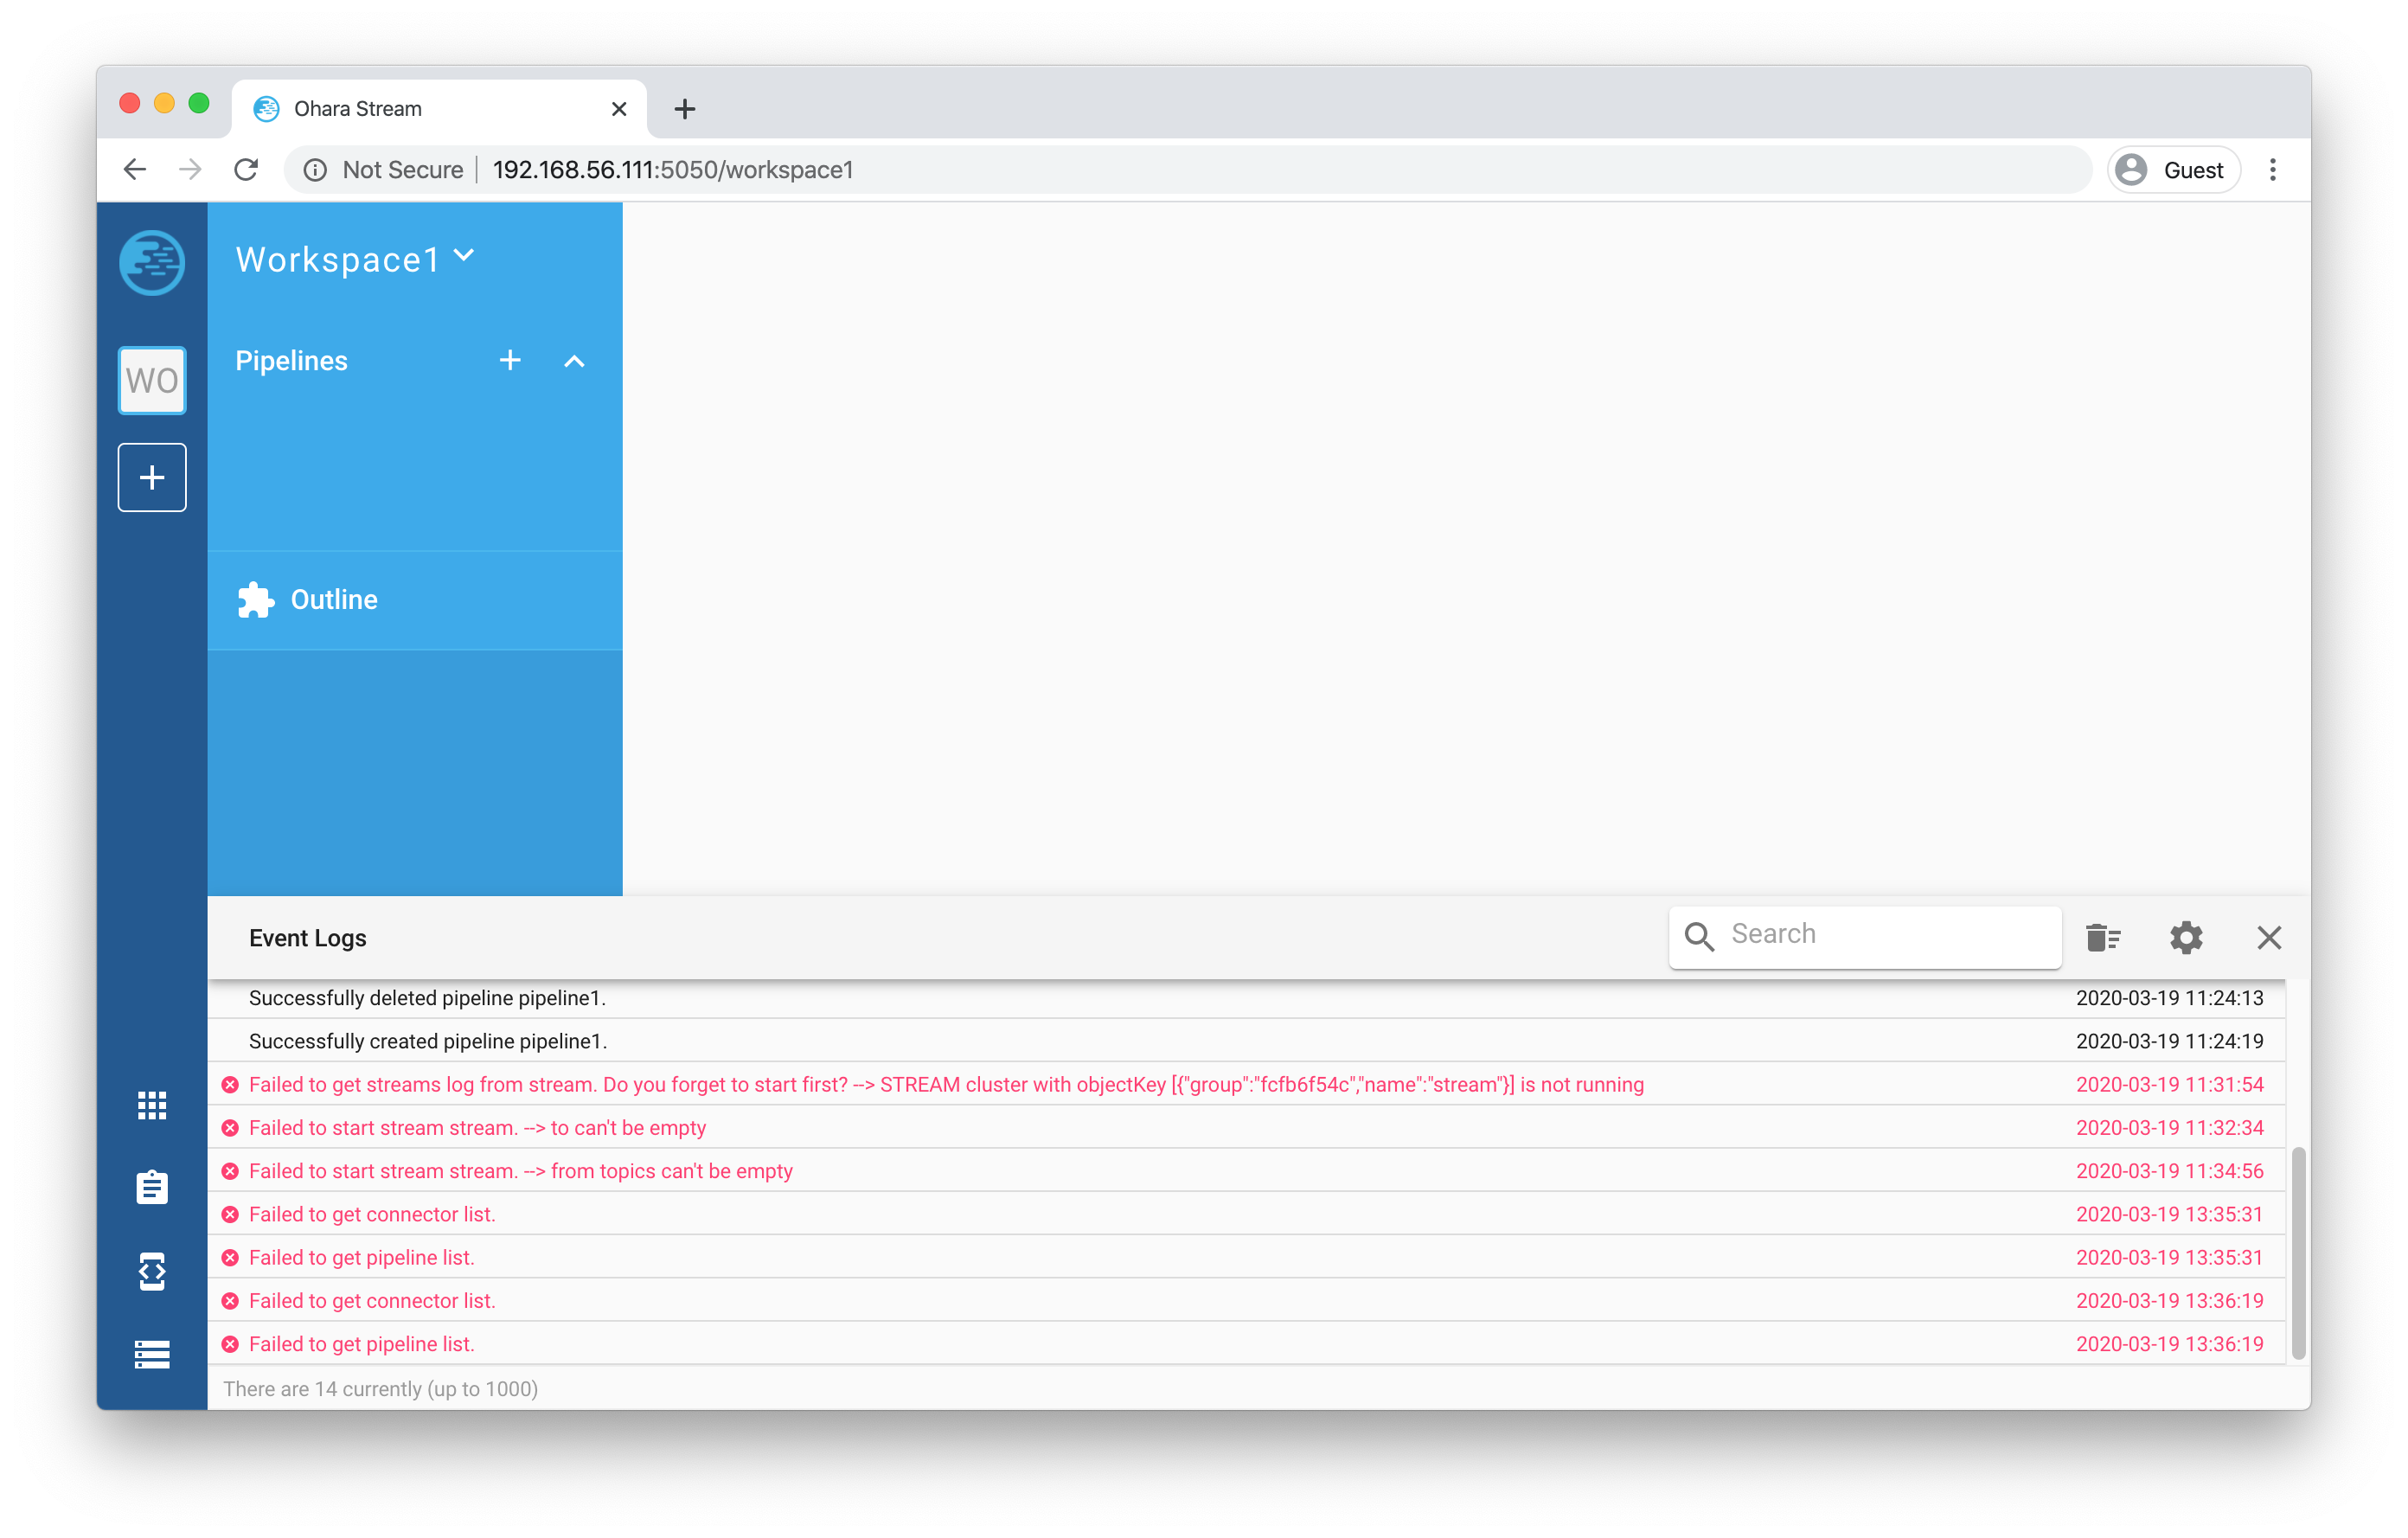
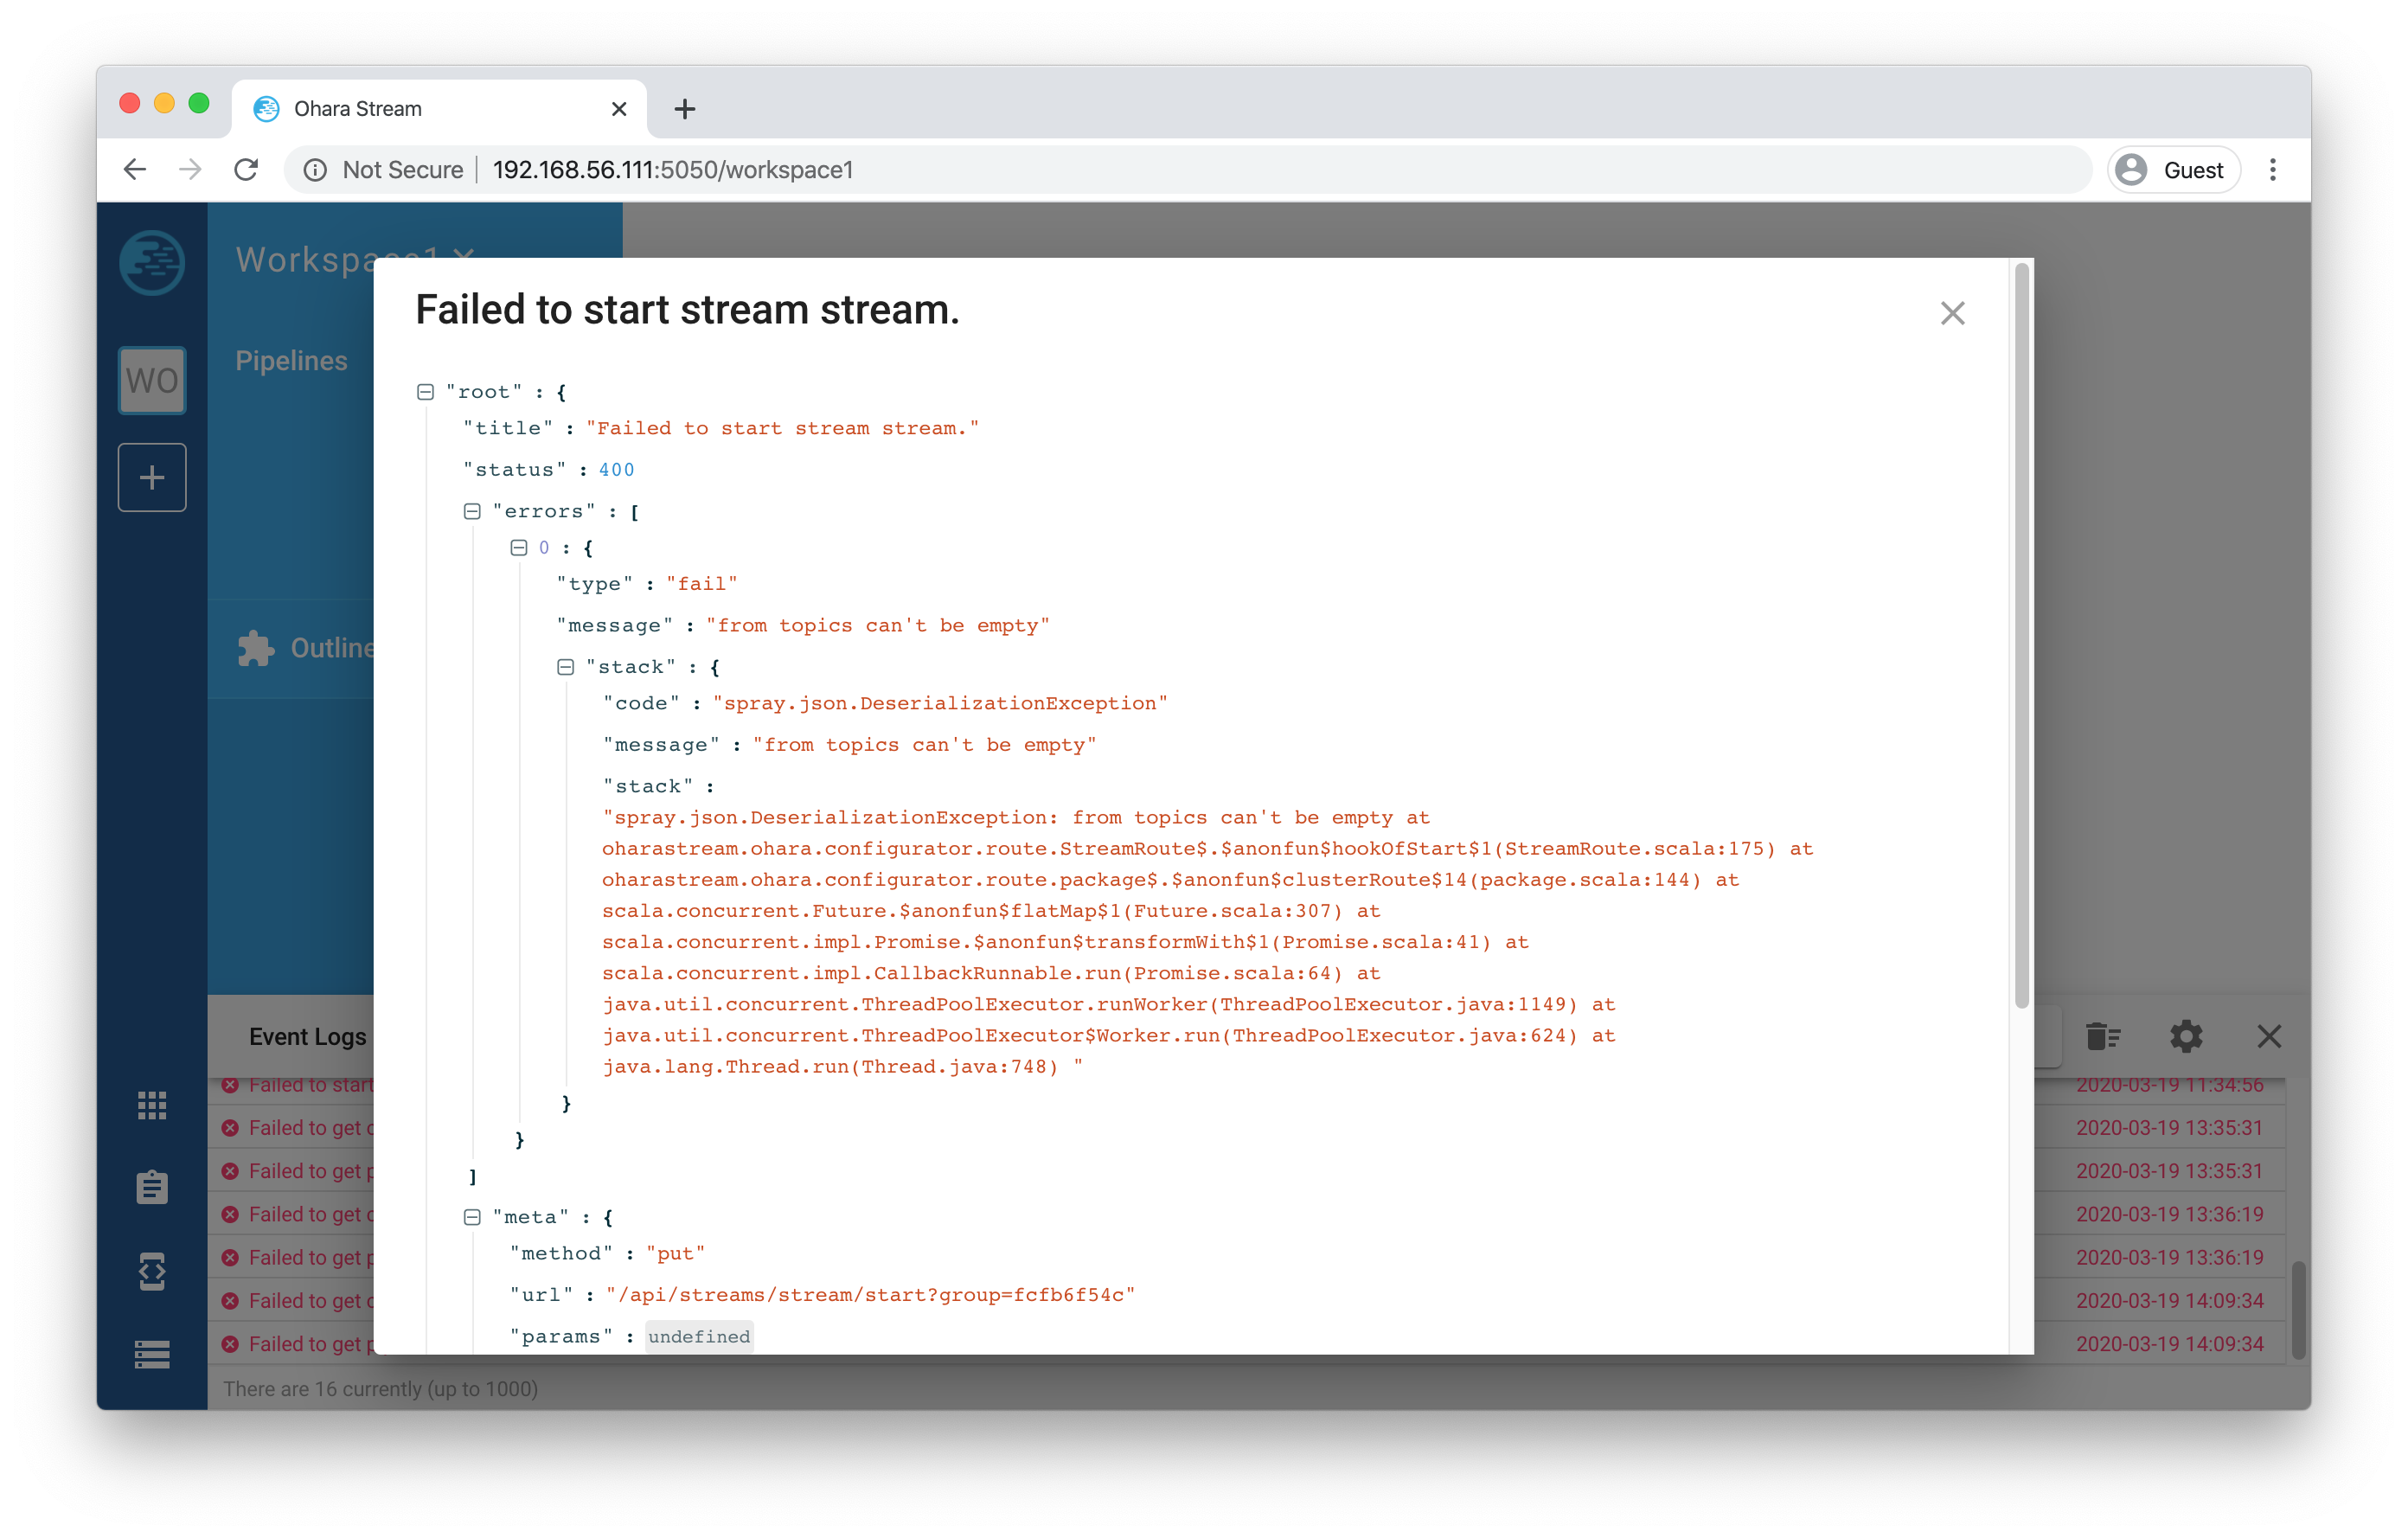
Another thing that is worth mentioning here is the Event log icon will display the error log’s count on the icon
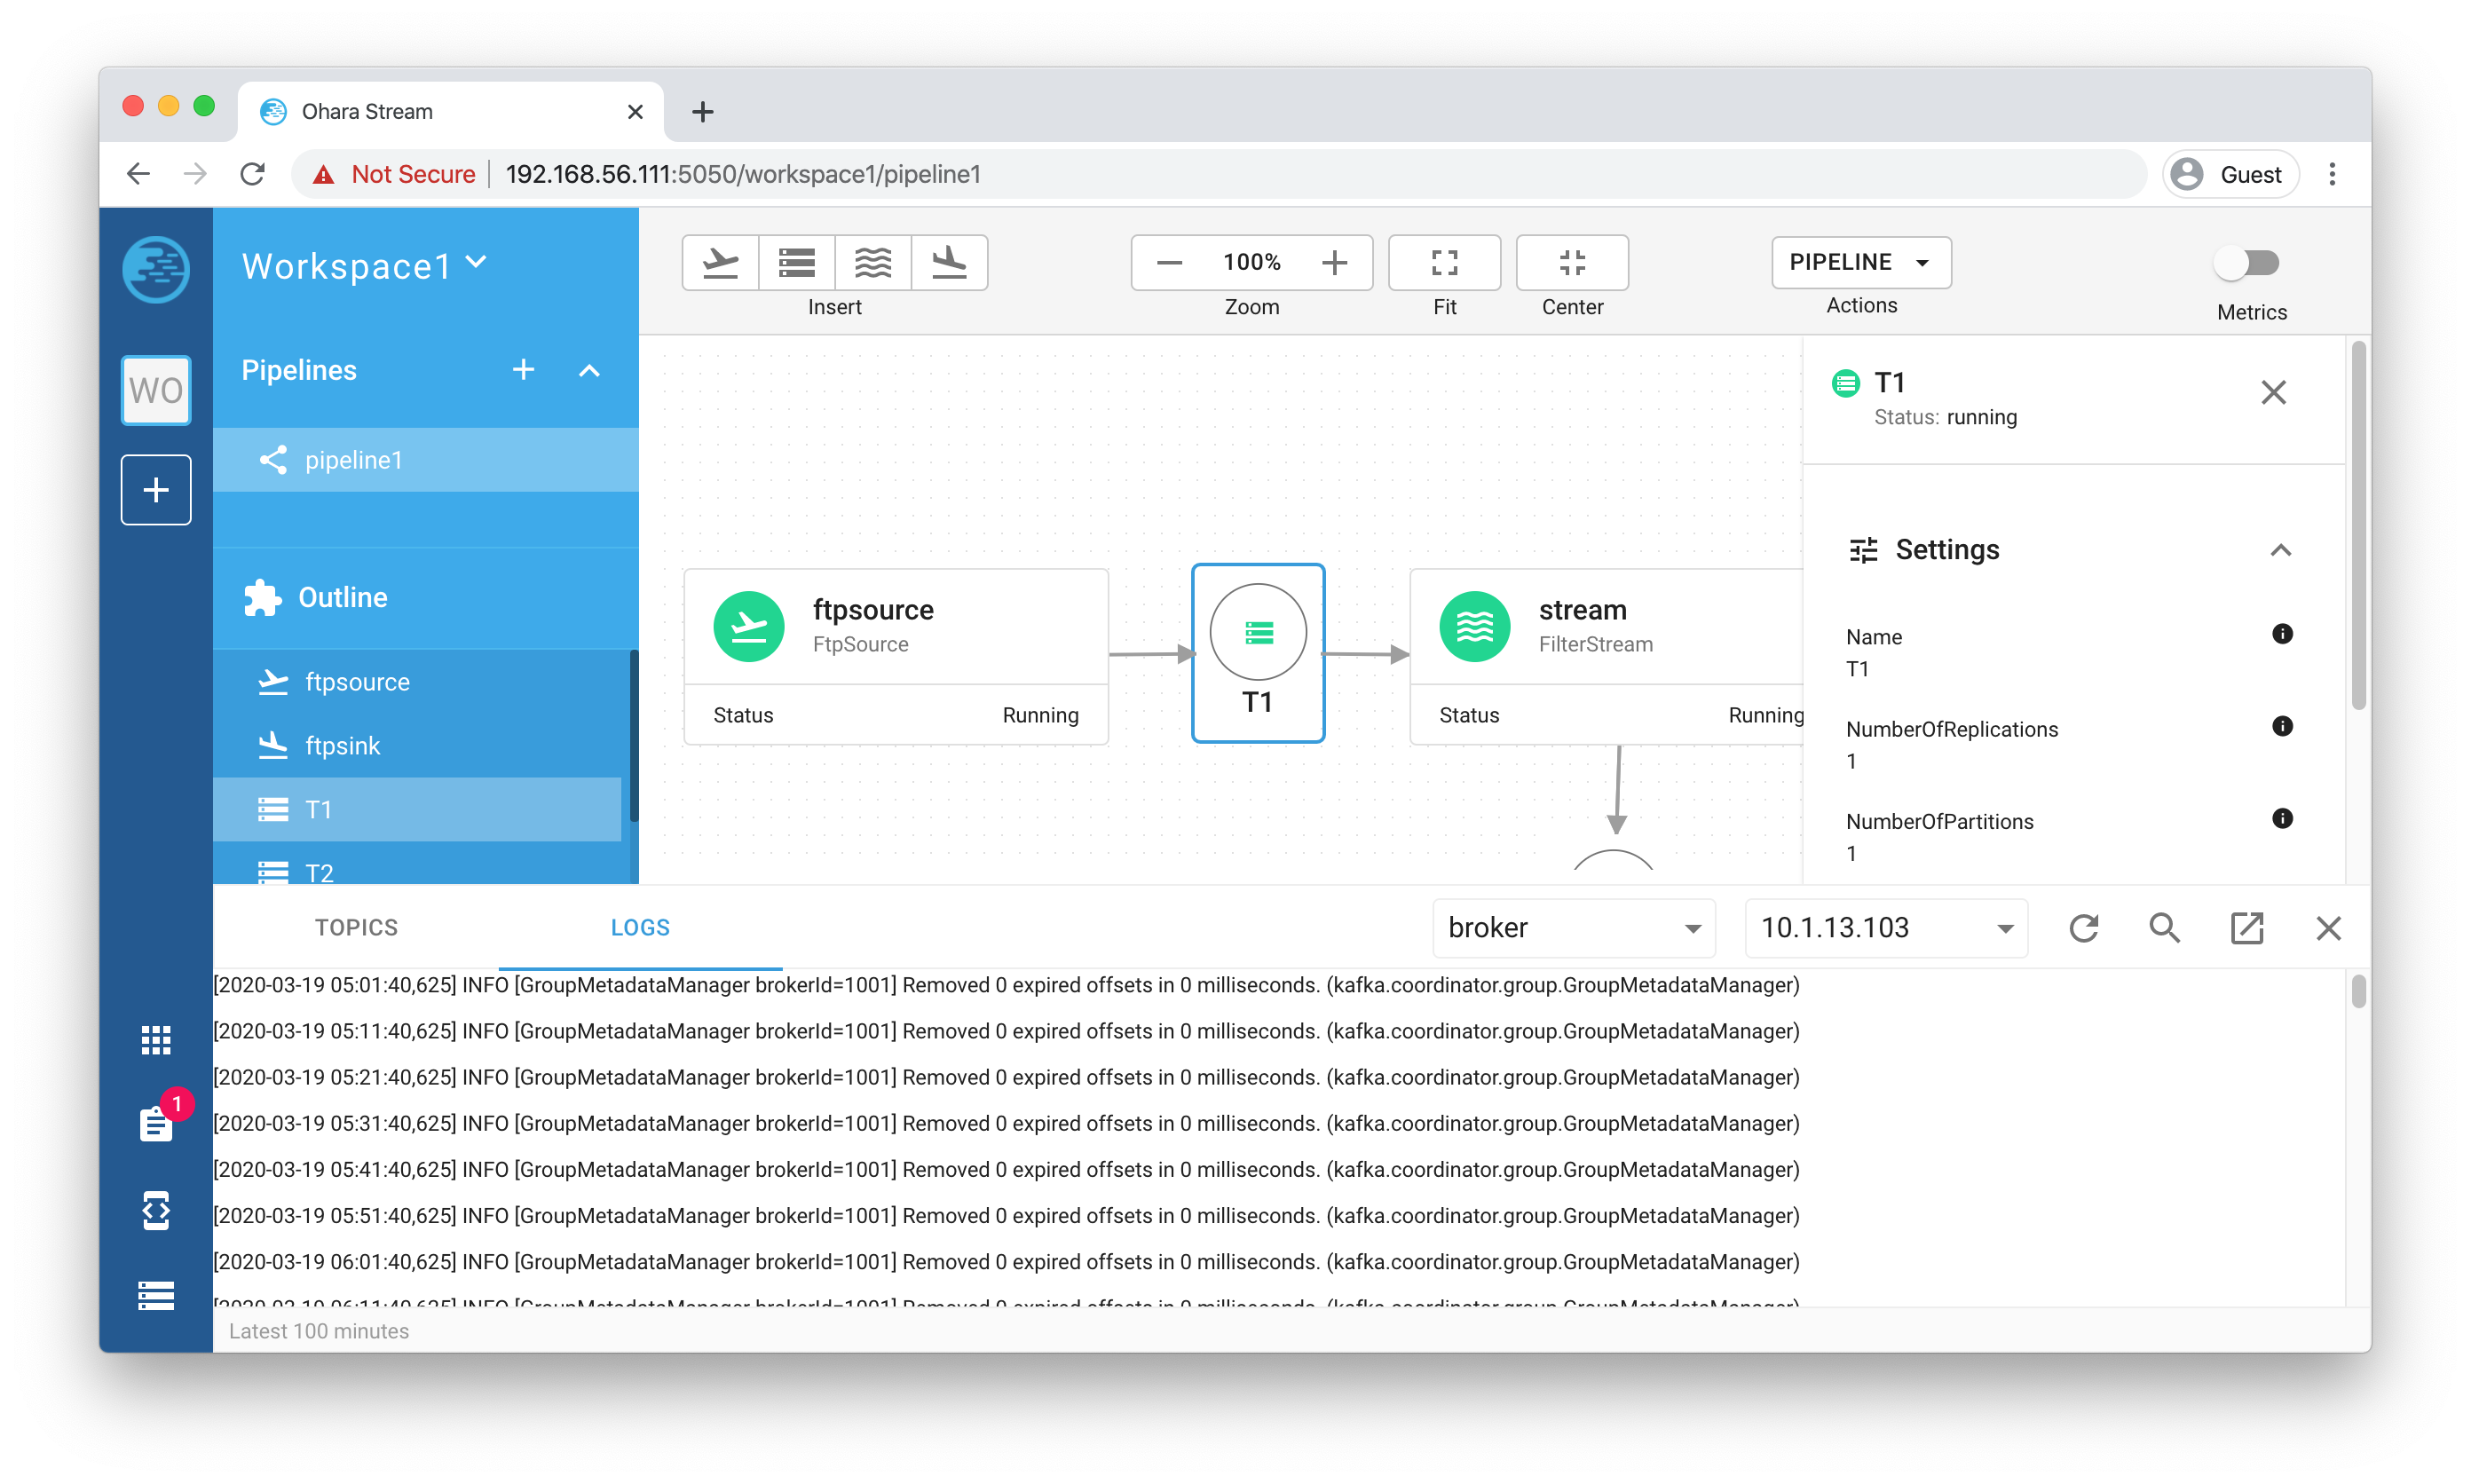
Developer Tools panel:
Open the dev tool from the App bar:
There are two main functionalities that could be utilized here:
- Topic panel: you can quickly preview the topic data here
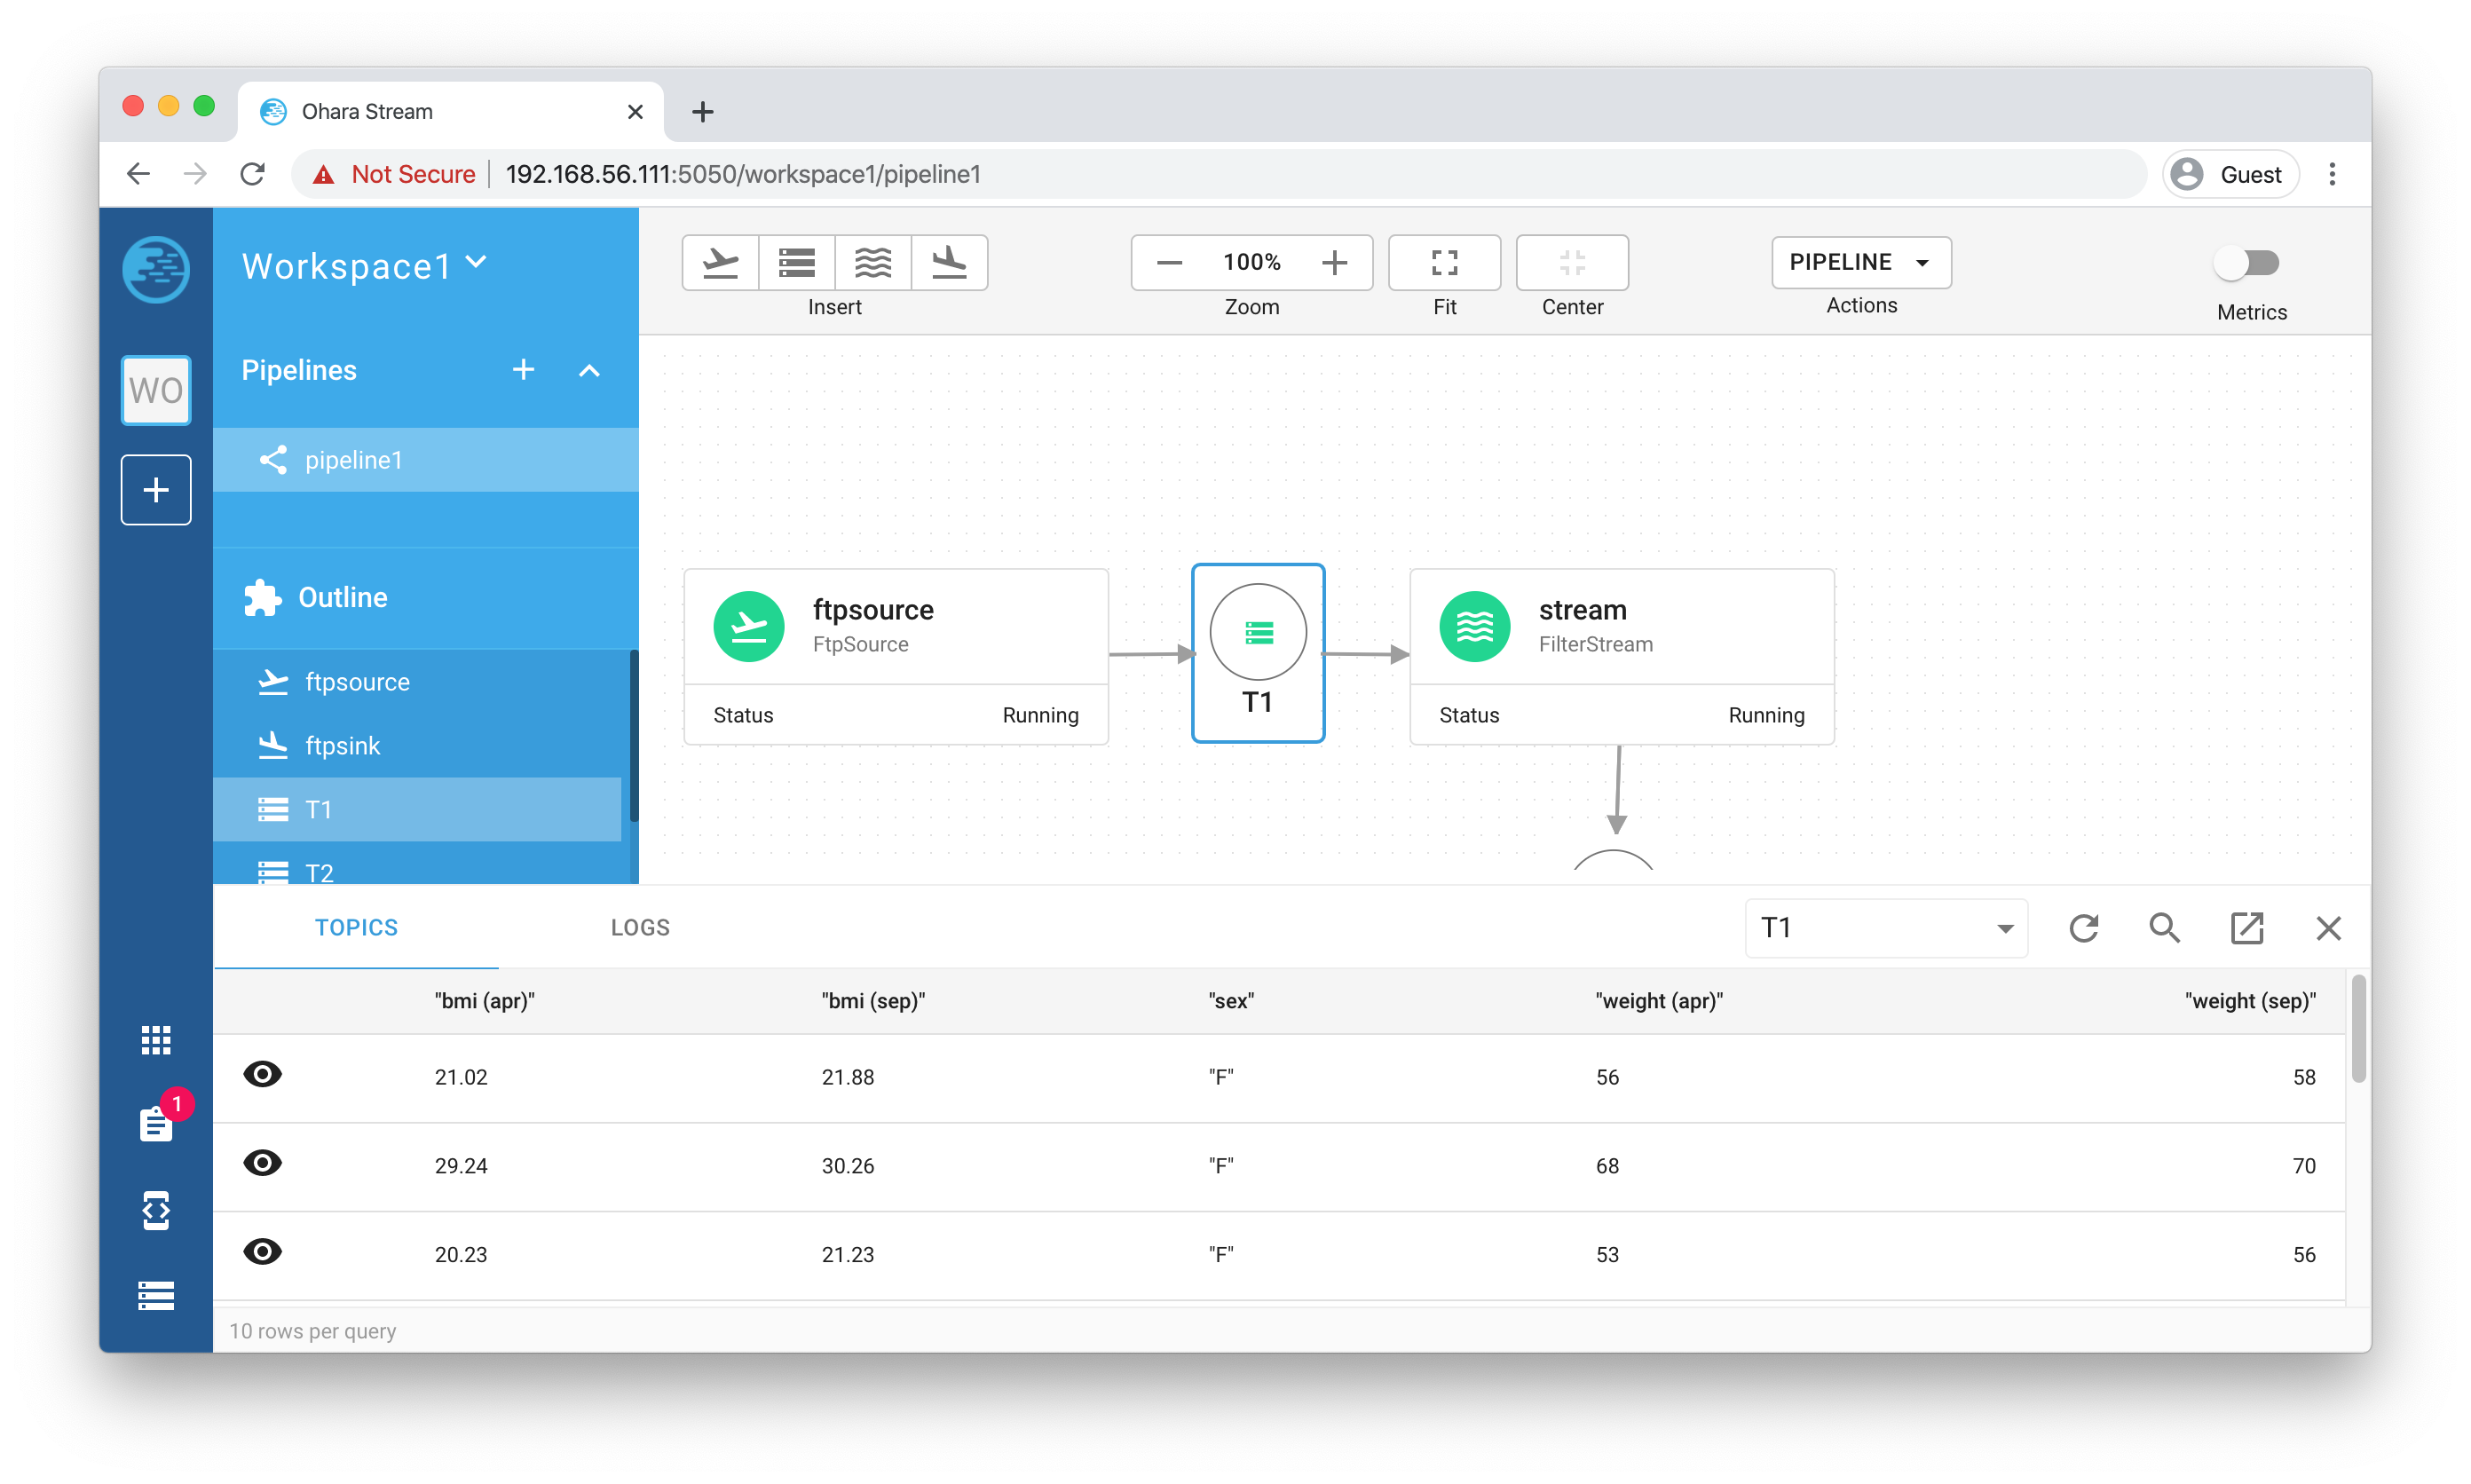
- Log panel: view all running service’s full log
Delete workspace:
Deleting a workspace is a new feature implemented in 0.10.0, with this feature, you can now delete a workspace with our UI
Warning
All pipelines under the workspace that you’re about to delete should be stopped (in other word, everything except topics in the pipeline should have the status “stopped”, you can do so by going to each pipeline’s Toolbar and click on the “Stop all components” item from the Pipeline actions
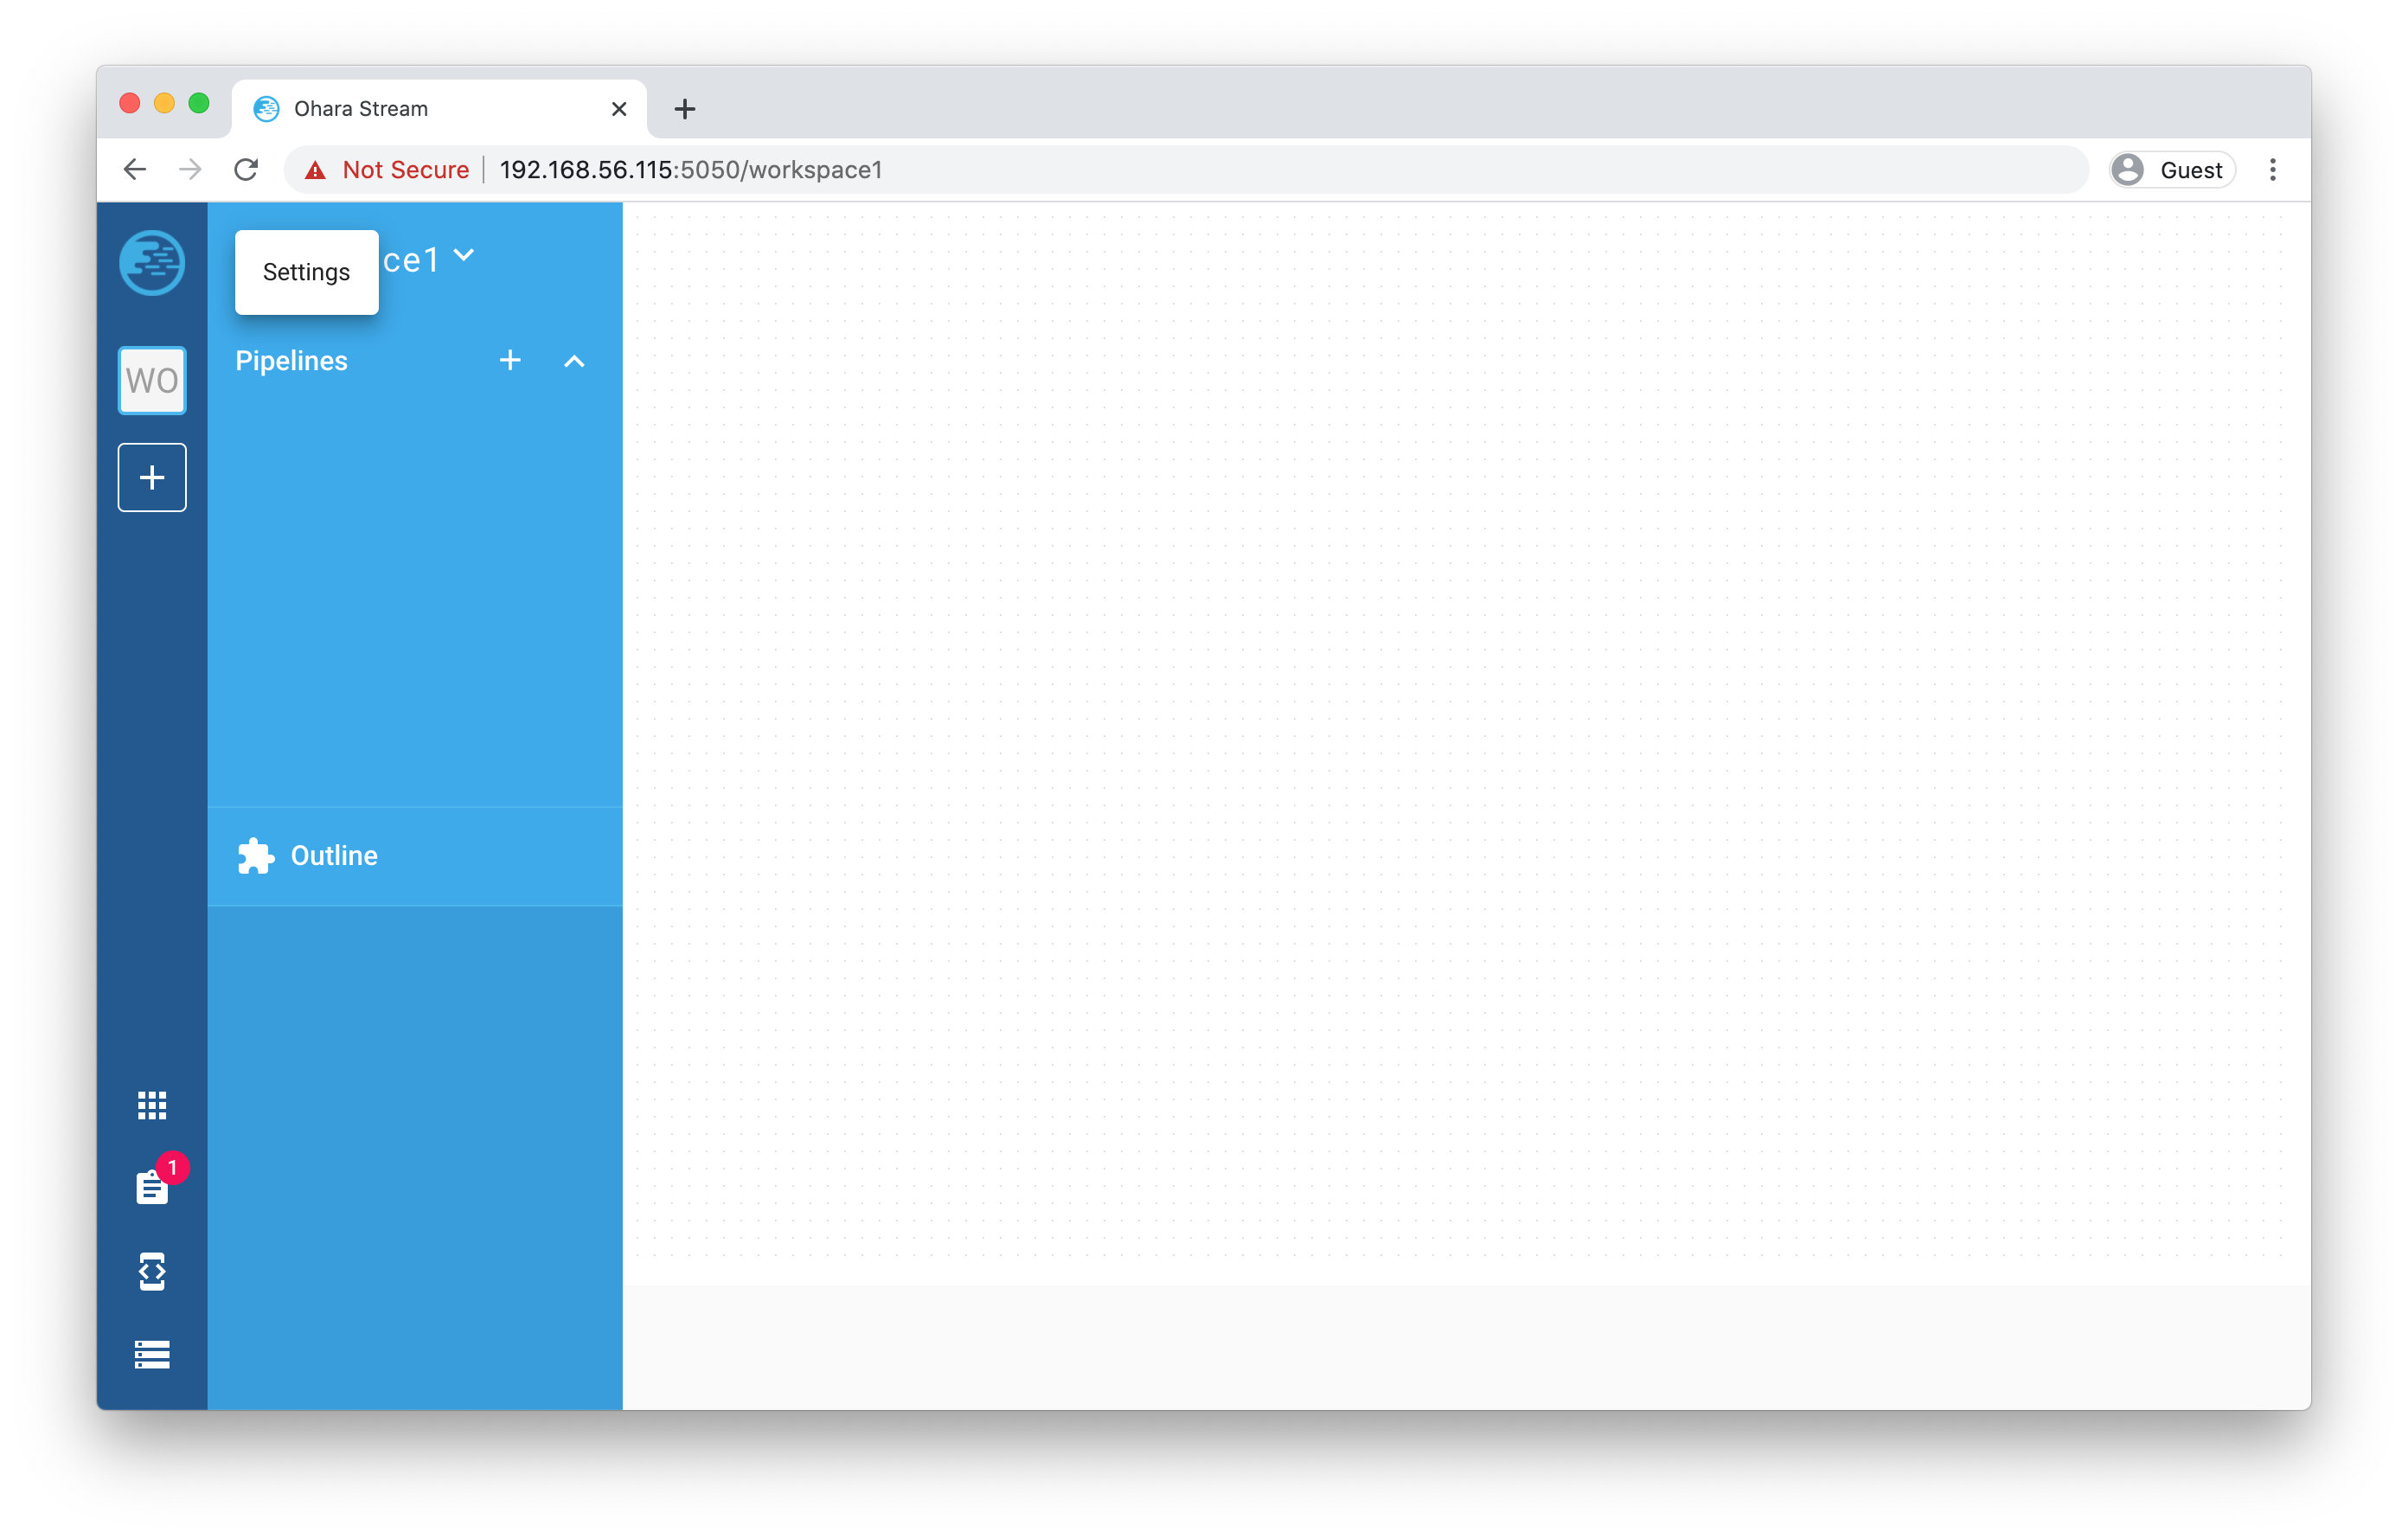
- From Navigator, click on the workspace name, and click on the “Settings” item from that dropdown:
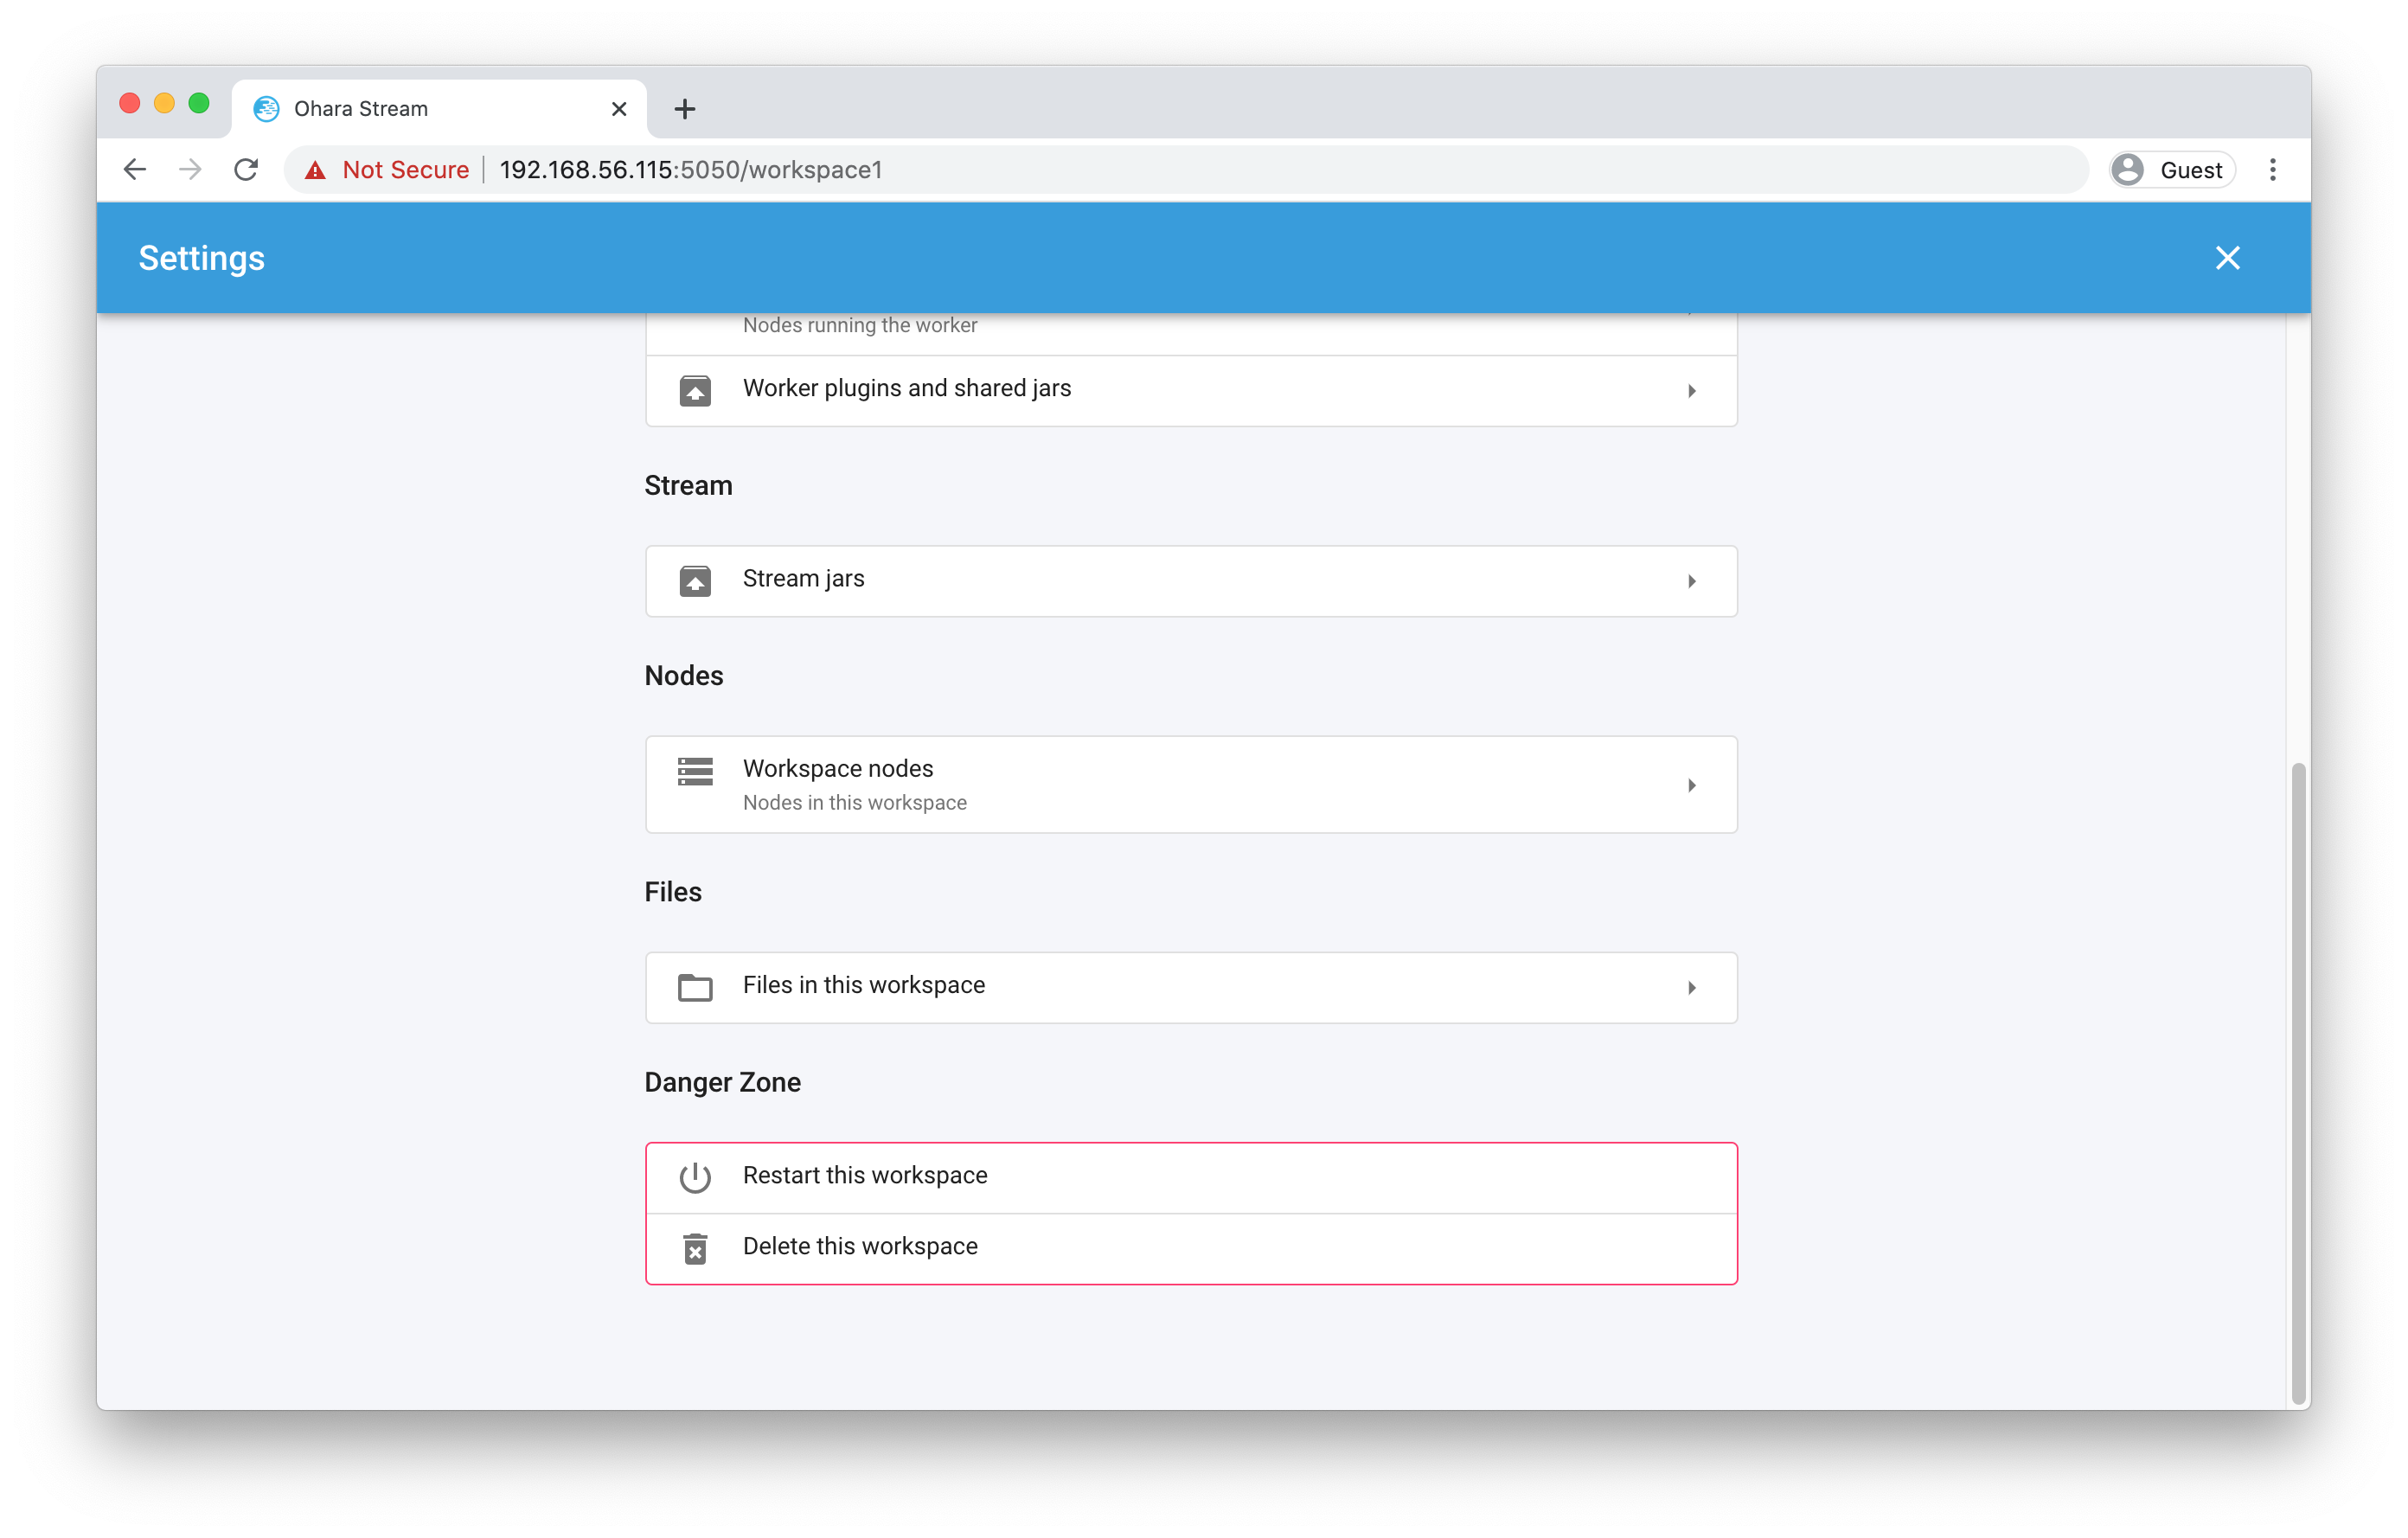
- In the Settings dialog, scroll to the very bottom of the page, and click “Delete this workspace”
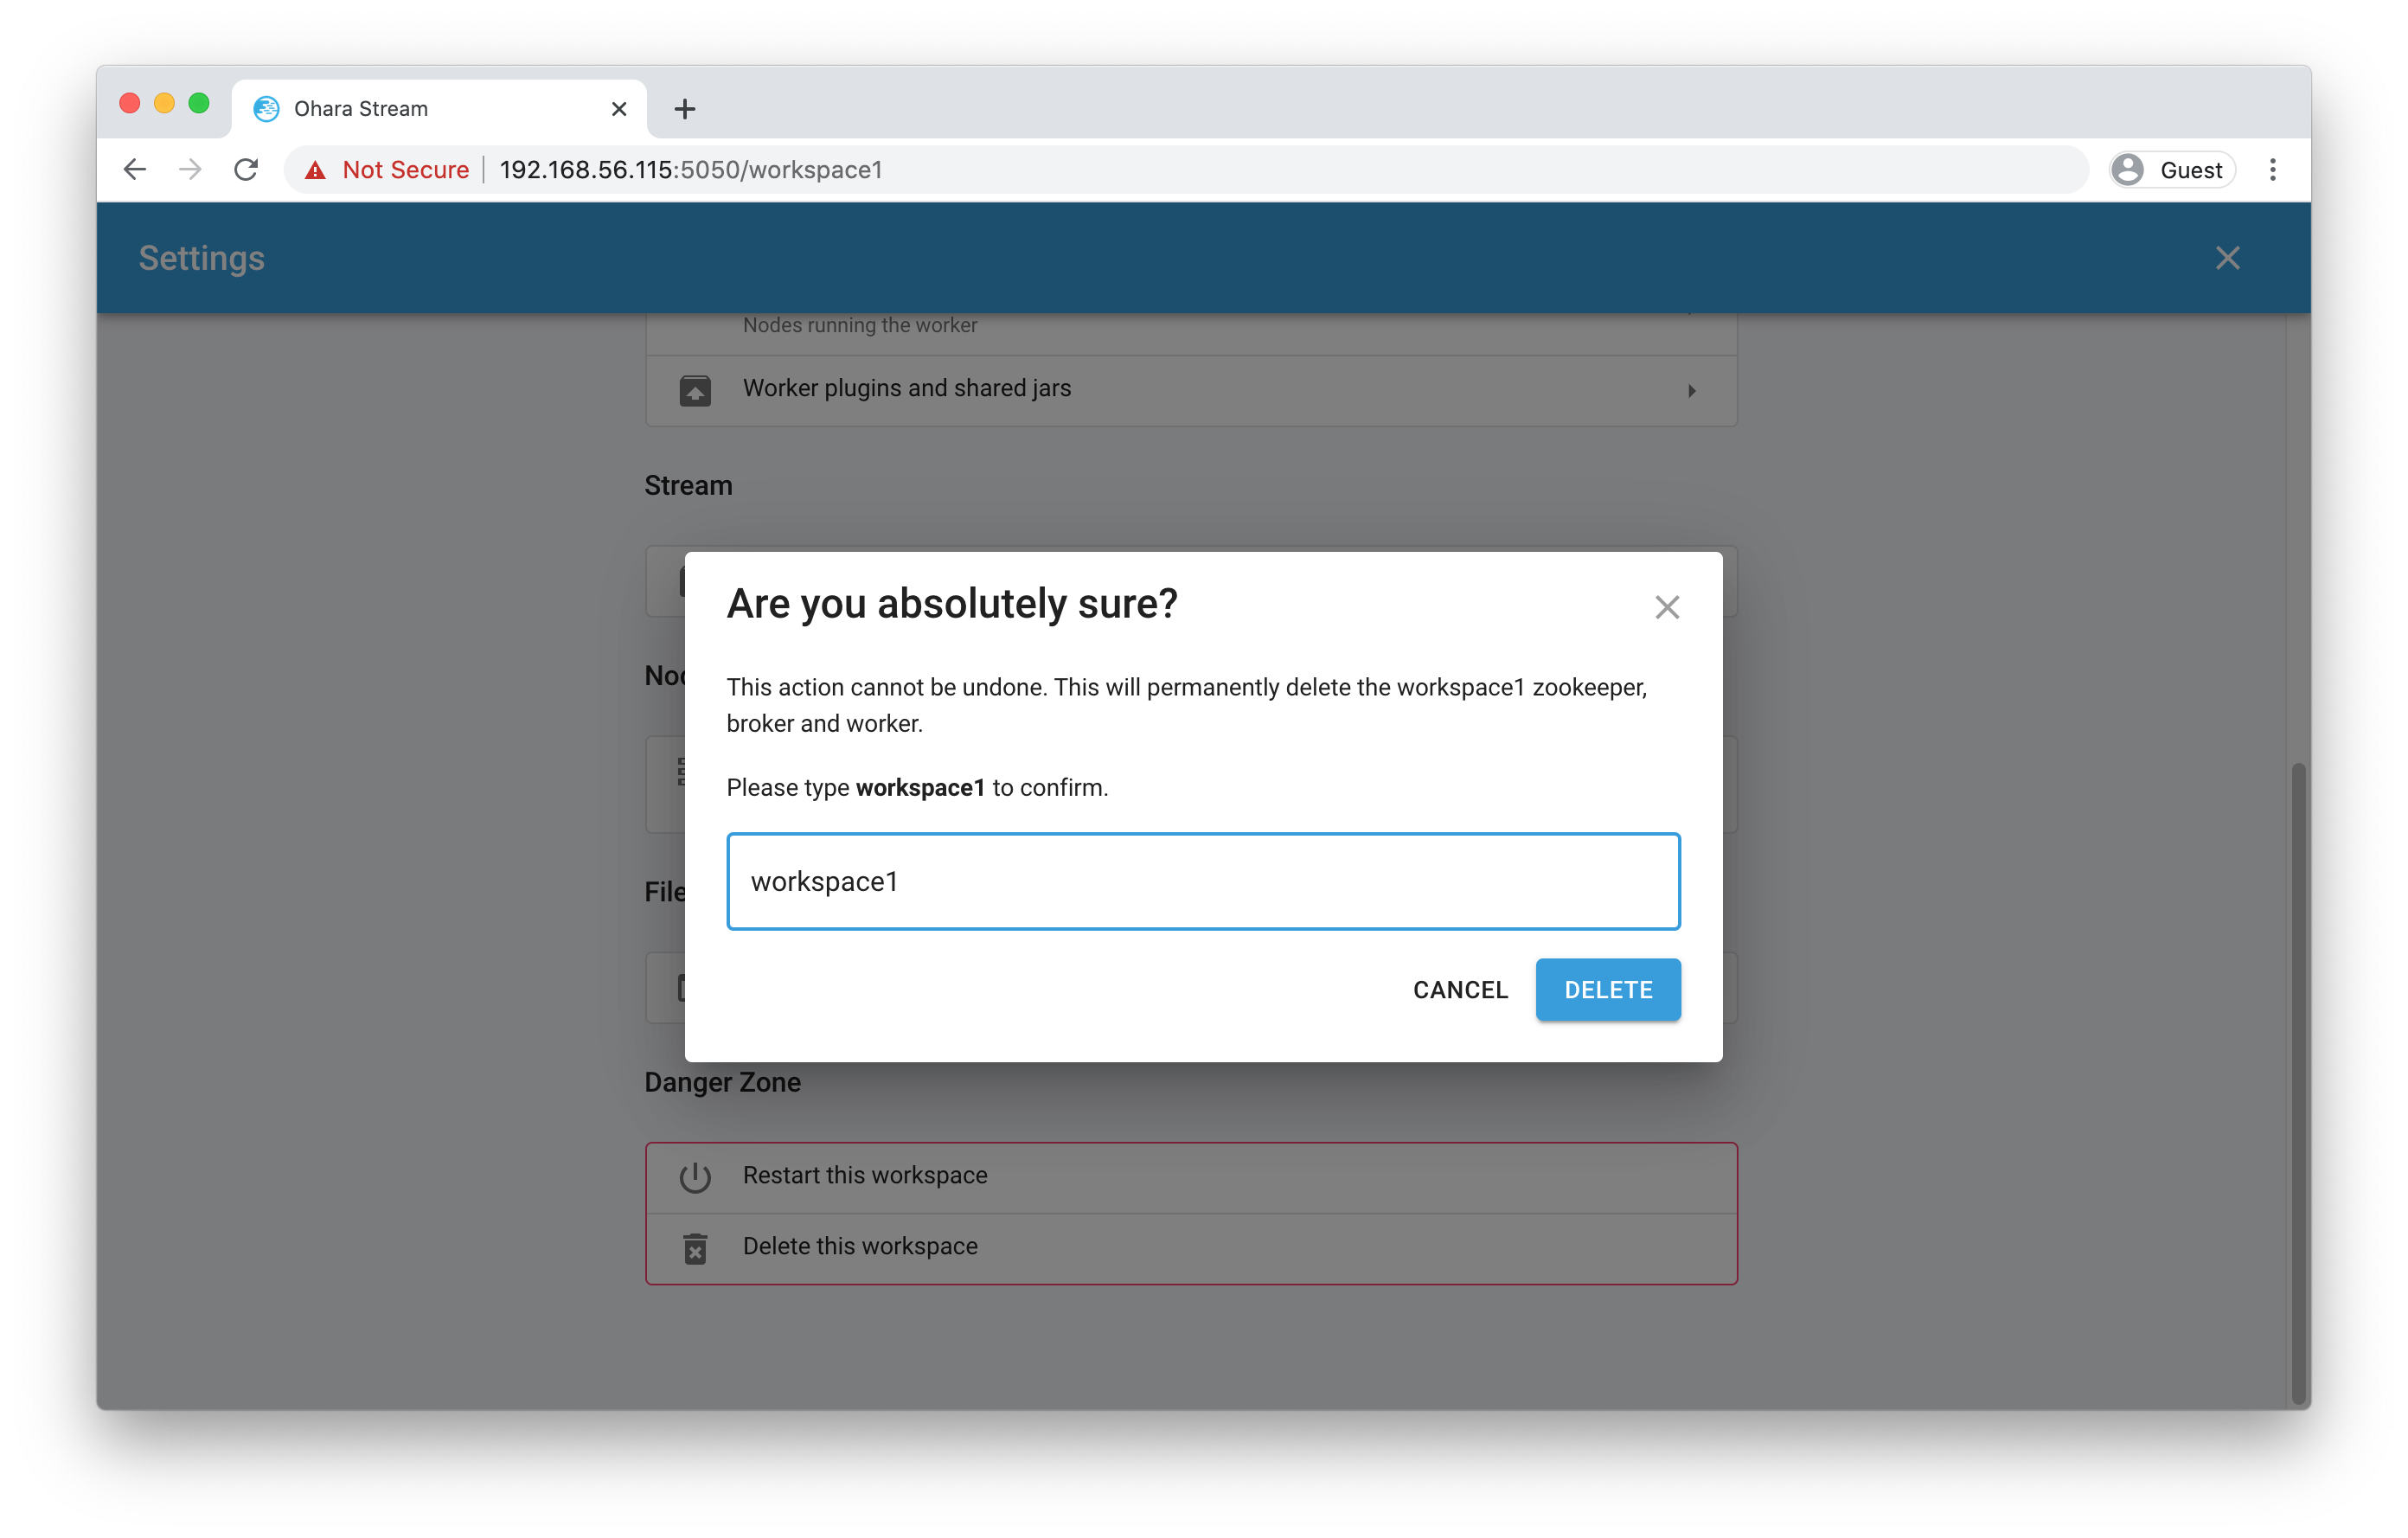
- A confirm dialog will pop up. Enter the workspace name and click on the DELETE button to start deleting. (Note that if you still have some services running in the workspace, you won’t able to proceed. You should following the instruction mention in the above to stop all pipelines first)
- The deletion is in progress, after the deletion is completed, you will be redirected to home or a default workspace if you have one.

Restart workspace:
When new changes were made in workspace, the restart is required. Also, if you ever run into issues that cannot be recovered from, you can try to restart the workspace to fix the issue.
Since delete workspace and restart workspace are almost identical, the following instruction won’t include any screenshots as they are already included in the Delete workspace section
Warning
Same with delete a workspace, you will need to make sure all pipelines are stopped before starting:
- From Navigator, click on the workspace name, and click on the “Settings” item from that dropdown.
- In the Settings dialog, scroll to the very bottom of the page, and click “Restart this workspace”.
- A confirm dialog will pop up. Click on the RESTART button to start restarting this workspace.
- The restarting is in progress, after the restart is completed, you can close the progress dialog and changes you made should applied to the workspace by now.
And if you think you ever encountered a bug, let us know: GitHub Repo.